Installation guide – ACTi Outdoor Dome (B8xI8x) on Tilted Wall with Gang Box Converter User Manual
Page 24
Installation Guide
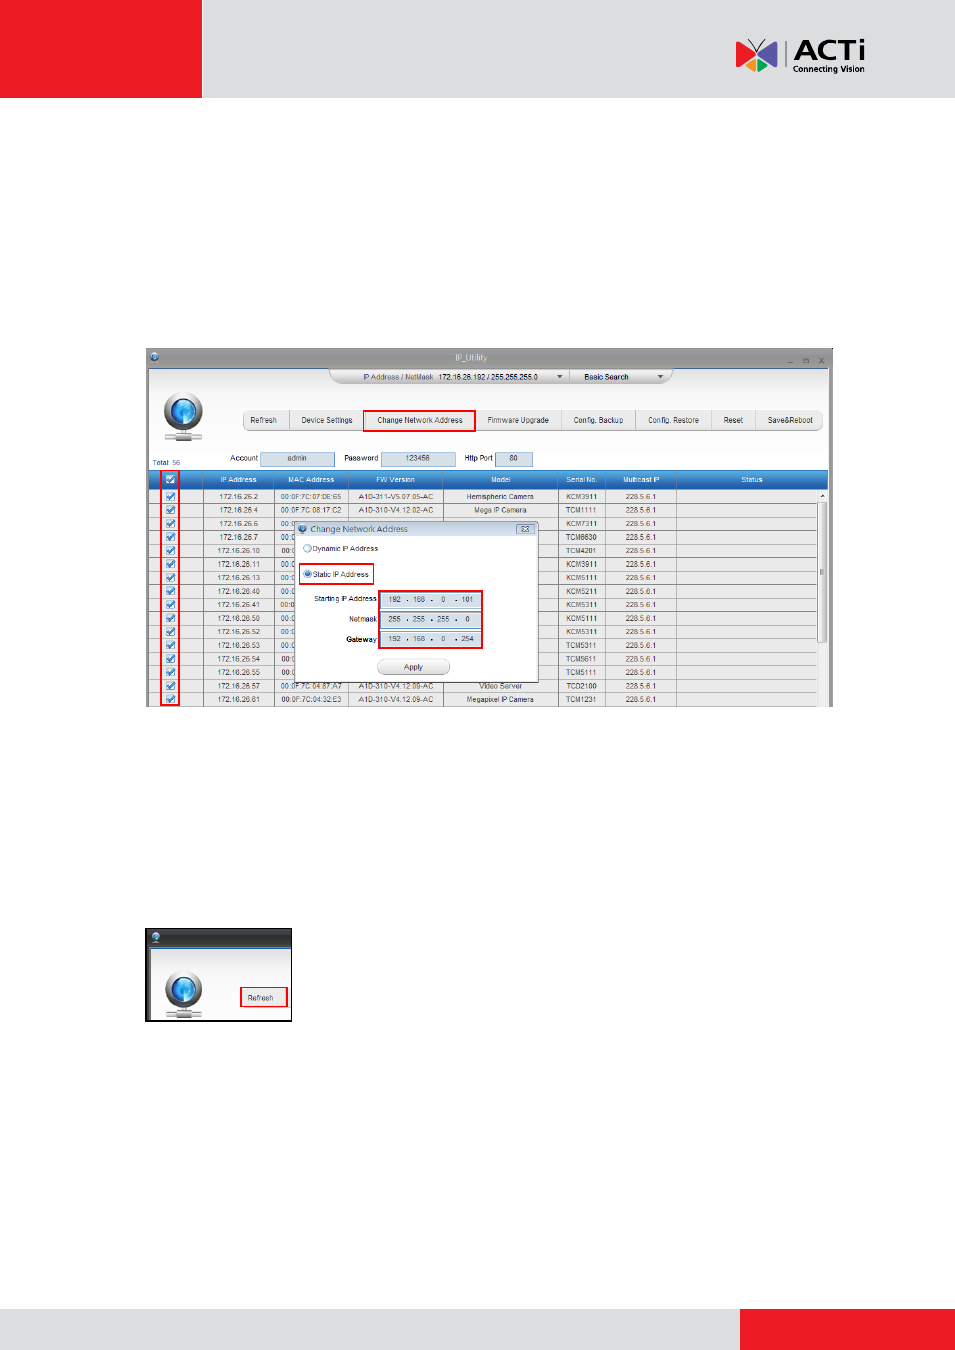
Manually adjust the IP addresses of multiple cameras:
If there are more than 1 camera to be used in the same local area network and there is no DHCP
server to assign unique IP addresses to each of them, all of the cameras would then have the
initial IP address of
192.168.0.100
, which is not a proper situation for network devices
– all the IP
addresses have to be different from each other. The easiest way to assign cameras the IP
addresses is by using
IP Utility
:
With the procedure shown above, all the cameras will have unique IP addresses, starting from
192.168.0.101. In case there are 20 cameras selected, the last one of the cameras would have
the IP 192.168.0.120.
Later, by pressing the
“Refresh” button of the IP Utility, you will be able to see the list of cameras
with their new IP addresses.
Please note that it is also possible to change the IP addresses manually by using the Web
browser. In such case, please plug in only one camera at a time, and change its IP address by
using the Web browser before plugging in the next one. This way, the Web browser will not be
confused about two devices having the same IP address at the same time.
- Outdoor Hemispheric / Fisheye Dome on Tilted Wall with Gang Box Converter Outdoor Hemispheric / Fisheye Dome on Dropped Ceiling with Gang Box Converter Outdoor Hemispheric / Fisheye Dome on Hard Ceiling with Gangbox Converter Outdoor Hemispheric / Fisheye Dome on Straight Wall with Gang Box Converter Outdoor Dome (B8xI8x) on Tilted Wall Outdoor Dome (B8xI8x) on Straight Wall Outdoor Dome (B8xI8x) on Straight Wall with Gang Box Converter Outdoor Dome (B8xI8x) on Hard Ceiling with Gang Box Converter Outdoor Dome (B8xI8x) on Dropped Ceiling with Gang Box Converter