Step 7: connect to network, Step 8: access the camera live view, Installation guide – ACTi Outdoor Dome (B8xI8x) on Tilted Wall with Gang Box Converter User Manual
Page 17
Installation Guide
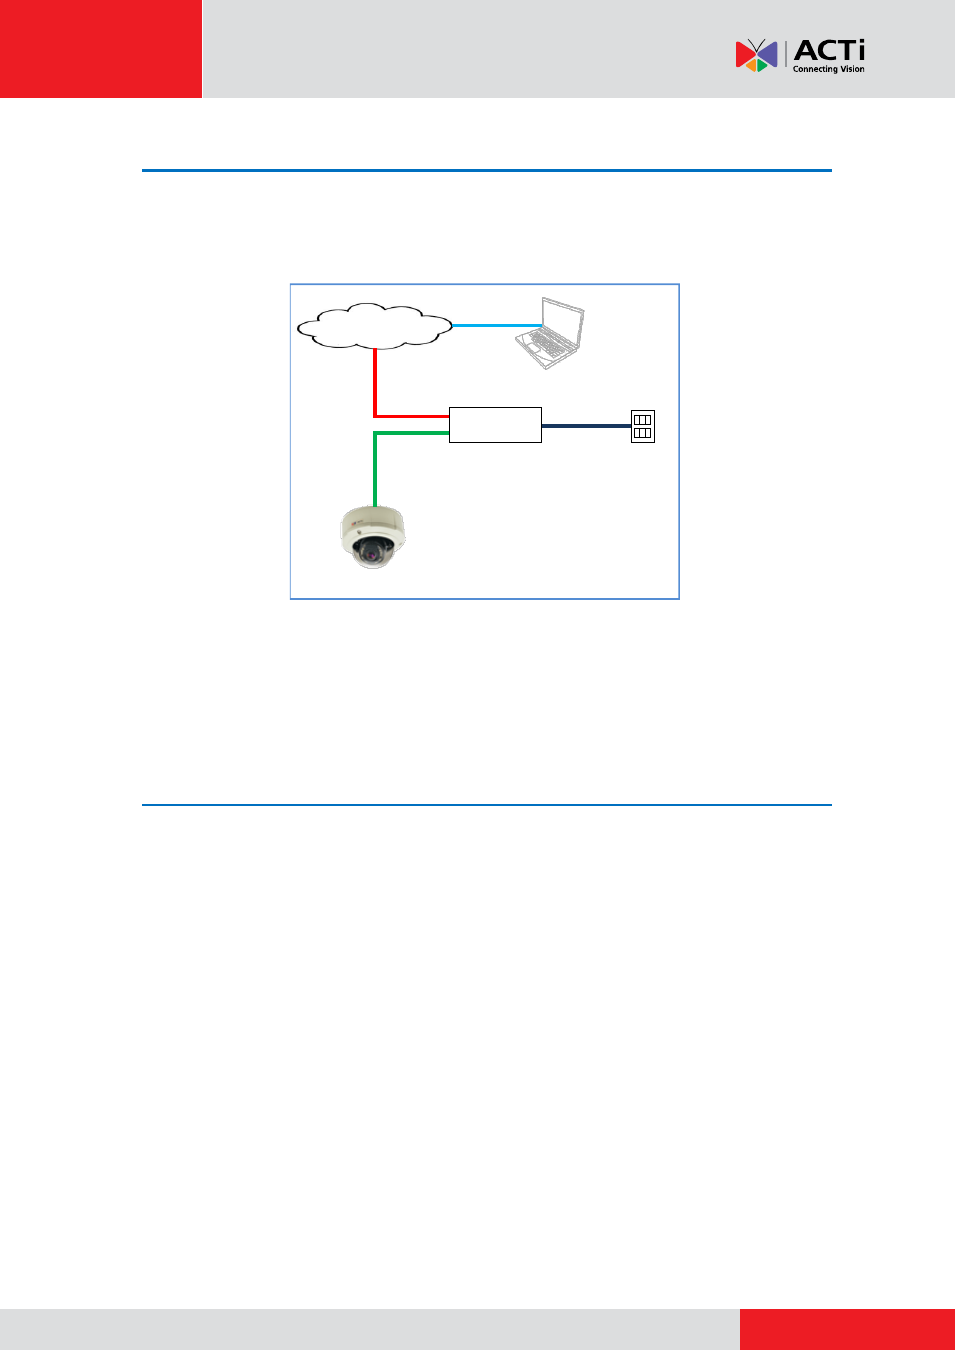
Step 7: Connect to Network
Connect the other end of the network cable to a switch or injector. Then, connect the switch or
injector to a network or PC and a power source. See Power-over-Ethernet (PoE) example
connection diagram below.
Network
AC Power
Source
PoE Injector /
PoE Switch
Power Cable
Ethernet Cable
Ethernet Cable
(Data + Power)
Ethernet Cable
(Data)
Camera
In case of using a non-PoE switch, power up the camera using a power adapter (not supplied). As
needed, power up the other connected devices.
Step 8: Access the Camera Live View
How to Access the Camera Live View
on page 20 for more information.
This manual is related to the following products:
- Outdoor Hemispheric / Fisheye Dome on Tilted Wall with Gang Box Converter Outdoor Hemispheric / Fisheye Dome on Dropped Ceiling with Gang Box Converter Outdoor Hemispheric / Fisheye Dome on Hard Ceiling with Gangbox Converter Outdoor Hemispheric / Fisheye Dome on Straight Wall with Gang Box Converter Outdoor Dome (B8xI8x) on Tilted Wall Outdoor Dome (B8xI8x) on Straight Wall Outdoor Dome (B8xI8x) on Straight Wall with Gang Box Converter Outdoor Dome (B8xI8x) on Hard Ceiling with Gang Box Converter Outdoor Dome (B8xI8x) on Dropped Ceiling with Gang Box Converter