Hardware manual – ACTi E89 User Manual
Page 21
Hardware Manual
2.
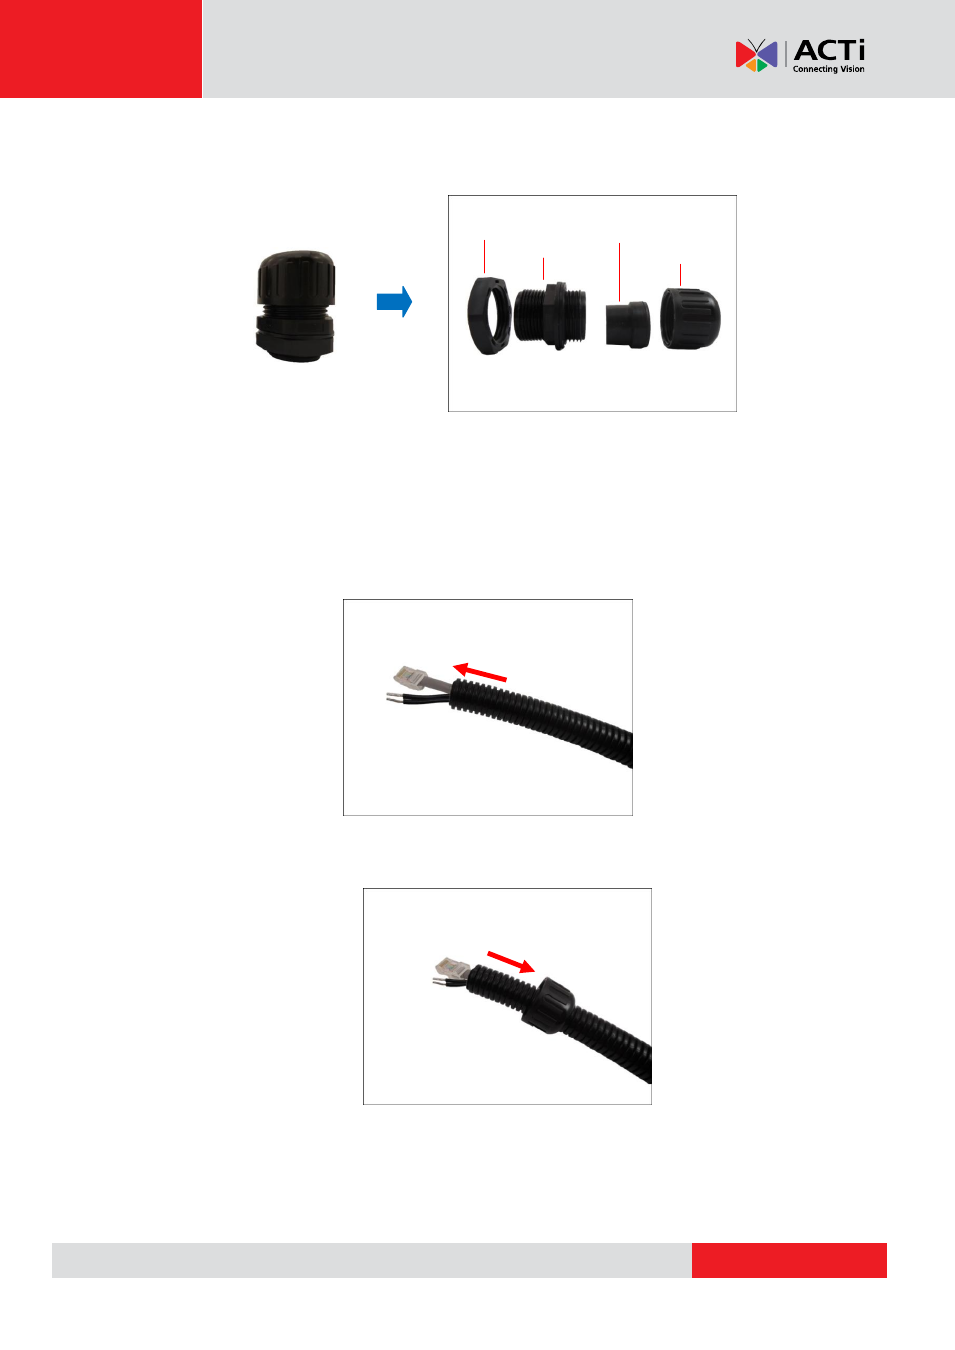
Disassemble the bundled conduit gland as shown below:
NOTE:
In this installation, the conduit gland body can be securely attached to the mount kit;
therefore the use of lock nut is not necessary. Please set the lock nut aside.
3.
Pull the network cable through the flex conduit. If connecting other input/output devices, pull
the cables through the flex conduit without connectors. The terminal blocks will be attached
once the cables pass through the camera hole later.
4.
Insert the clamping nut through the flex conduit.
Lock Nut
Body
Sealing Insert
Clamping Nut
This manual is related to the following products:
- E815 E816 E817 E822 E610 E616 E617 E618 E621 Outdoor Dome (B8xI8x) on Tilted Wall Outdoor Dome (B8xI8x) on Tilted Wall with Gang Box Converter Outdoor Hemispheric / Fisheye Dome on Tilted Wall with Gang Box Converter Outdoor Hemispheric / Fisheye Dome on Dropped Ceiling with Gang Box Converter Outdoor Hemispheric / Fisheye Dome on Hard Ceiling with Gangbox Converter Outdoor Hemispheric / Fisheye Dome on Straight Wall with Gang Box Converter Outdoor Dome (B8xI8x) on Straight Wall Outdoor Dome (B8xI8x) on Hard Ceiling Outdoor Dome (B8xI8x) on Dropped Ceiling B81 B82 B84 B85 B87 B85 2 Mp Basic WDR Day & Night Outdoor IR Dome PoE Camera with 3x Lens Outdoor Dome (B8xI8x) on Straight Wall with Gang Box Converter Outdoor Dome (B8xI8x) on Dropped Ceiling with Gang Box Converter Outdoor Dome (B8xI8x) on Hard Ceiling with Gang Box Converter