Hardware manual – ACTi E89 User Manual
Page 19
Hardware Manual
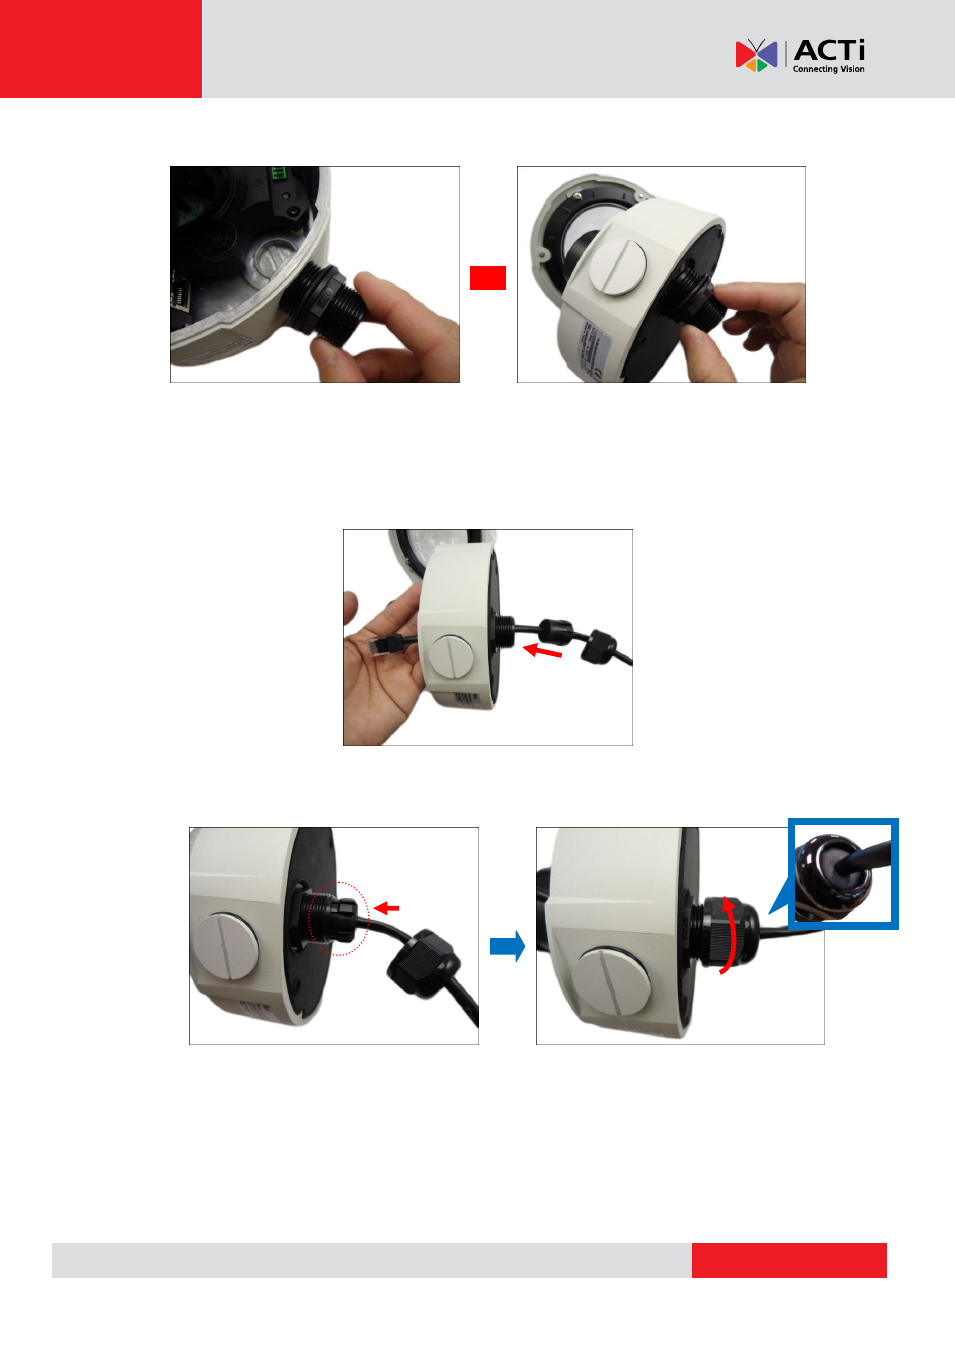
4.
Attach the cable gland body to the hole of the camera.
Attach to Camera Side Hole
Attach to Camera Bottom Hole
5.
If the cable will be routed along the surface
, skip this step.
If the cable will pass through the surface
, do the following:
a.
Pull the network cable through the bottom conduit hole.
b.
Insert the sealing insert with claw into the cable gland body and then attach the clamping
nut to complete the cable solution.
NOTE:
Make sure the clamping nut is tightly attached to the cable gland body and the sealing
insert is squeezed tightly.
6.
Step 4: Install the Camera to the Surface
on page 24.
or
This manual is related to the following products:
- E815 E816 E817 E822 E610 E616 E617 E618 E621 Outdoor Dome (B8xI8x) on Tilted Wall Outdoor Dome (B8xI8x) on Tilted Wall with Gang Box Converter Outdoor Hemispheric / Fisheye Dome on Tilted Wall with Gang Box Converter Outdoor Hemispheric / Fisheye Dome on Dropped Ceiling with Gang Box Converter Outdoor Hemispheric / Fisheye Dome on Hard Ceiling with Gangbox Converter Outdoor Hemispheric / Fisheye Dome on Straight Wall with Gang Box Converter Outdoor Dome (B8xI8x) on Straight Wall Outdoor Dome (B8xI8x) on Hard Ceiling Outdoor Dome (B8xI8x) on Dropped Ceiling B81 B82 B84 B85 B87 B85 2 Mp Basic WDR Day & Night Outdoor IR Dome PoE Camera with 3x Lens Outdoor Dome (B8xI8x) on Straight Wall with Gang Box Converter Outdoor Dome (B8xI8x) on Dropped Ceiling with Gang Box Converter Outdoor Dome (B8xI8x) on Hard Ceiling with Gang Box Converter