Installing the camera on a surface, Step 1: drill the holes, Installing the camera on a – ACTi E89 User Manual
Page 14: Surface
Hardware Manual
Installing the Camera on a Surface
This section describes the procedures in installing the camera on a flat surface such as a hard or
dropped ceiling and straight or tilted walls. Before installation, make sure the wall or the ceiling
can bear more than the weight of the camera.
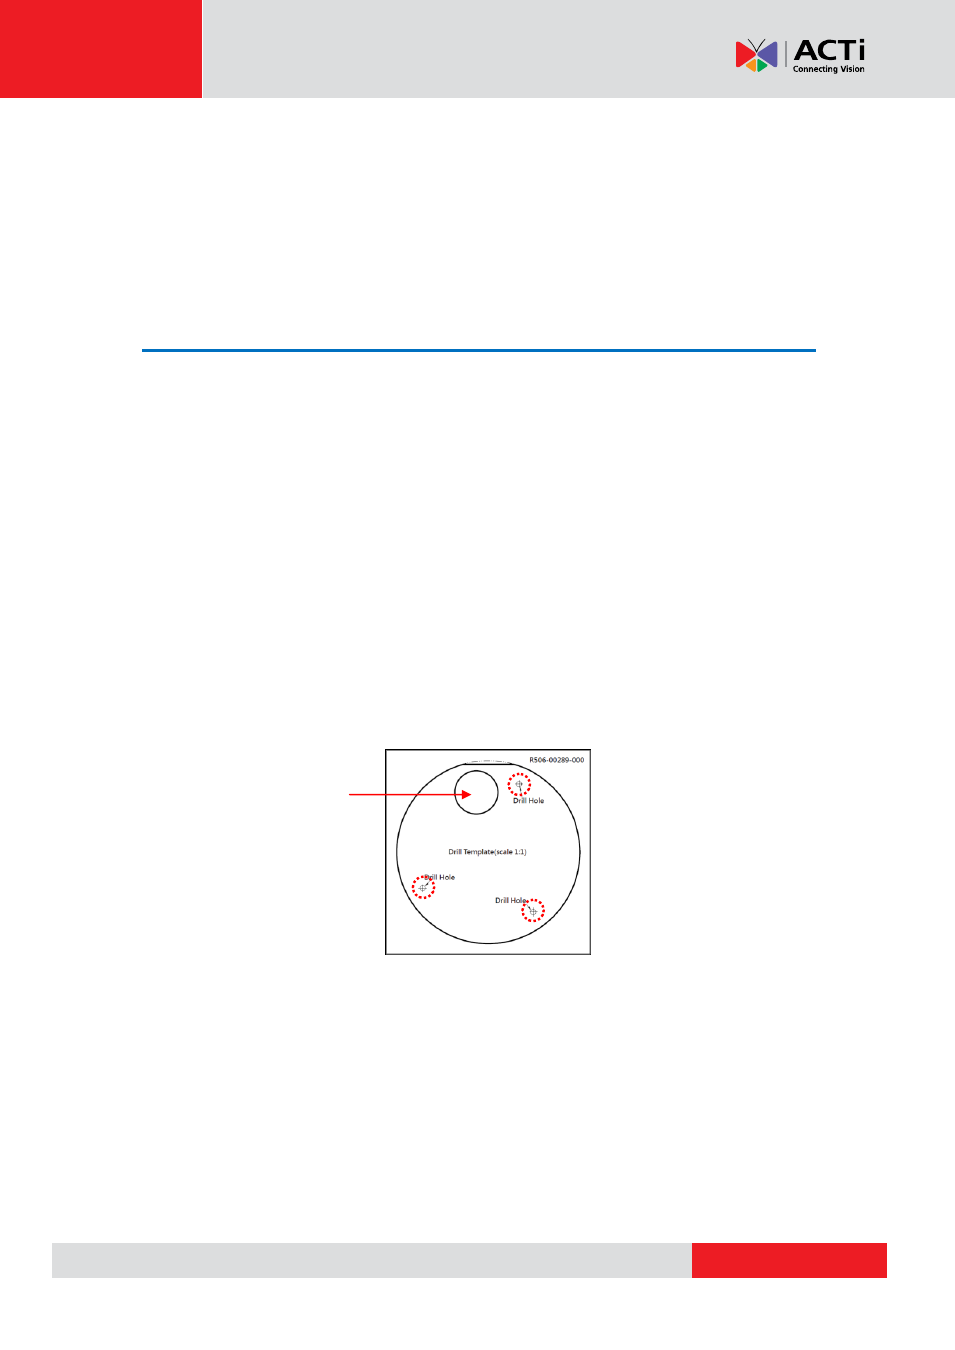
Step 1: Drill the Holes
Before drilling the holes on the ceiling or wall, note the direction of the connectors side of the
camera, which is also the opposite side of the camera logo. This influences the camera
placement and where you should drill the hole where the cables will pass through or how the
cables will go along the ceiling or wall. For outdoor wall installations, if the cables will go along the
wall, it is recommended to install the camera with the cables going down the wall to eliminate the
possibility of water leak.
1.
Attach the supplied drill template on the surface according to the preferred camera
orientation.
2.
Determine how the cables will be routed:
pass through the surface
or
along the surface
.
If the cables will pass through the surface
, drill the cable hole and the three (3)
screw holes on the surface.
If the cables will be routed along the surface
, just drill the three (3) screw holes on
the surface.
3.
Detach the drill template from the surface and insert the plastic plugs into the screw holes.
Cable hole
- E815 E816 E817 E822 E610 E616 E617 E618 E621 Outdoor Dome (B8xI8x) on Tilted Wall Outdoor Dome (B8xI8x) on Tilted Wall with Gang Box Converter Outdoor Hemispheric / Fisheye Dome on Tilted Wall with Gang Box Converter Outdoor Hemispheric / Fisheye Dome on Dropped Ceiling with Gang Box Converter Outdoor Hemispheric / Fisheye Dome on Hard Ceiling with Gangbox Converter Outdoor Hemispheric / Fisheye Dome on Straight Wall with Gang Box Converter Outdoor Dome (B8xI8x) on Straight Wall Outdoor Dome (B8xI8x) on Hard Ceiling Outdoor Dome (B8xI8x) on Dropped Ceiling B81 B82 B84 B85 B87 B85 2 Mp Basic WDR Day & Night Outdoor IR Dome PoE Camera with 3x Lens Outdoor Dome (B8xI8x) on Straight Wall with Gang Box Converter Outdoor Dome (B8xI8x) on Dropped Ceiling with Gang Box Converter Outdoor Dome (B8xI8x) on Hard Ceiling with Gang Box Converter