Fig. a, c, d, e – Swim'n Play International Oval Pool User Manual
Page 40
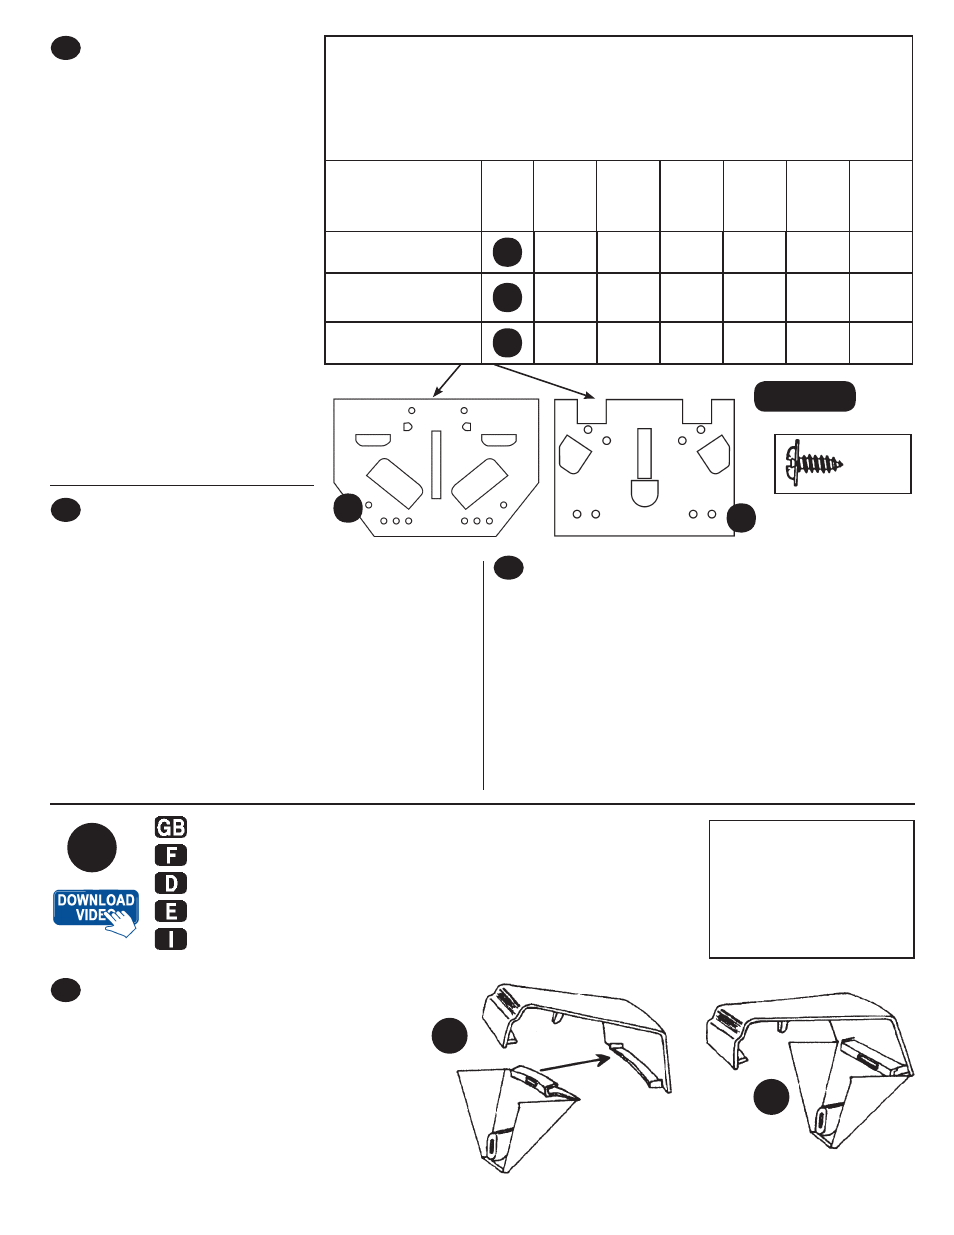
Fig. 18
1,3 cm
C D E
E D C
B
B
A
A
1
B
C
C
D
E
D
E
B
2
SCREW HOLE LOCATION GUIDE
GUIDE DES EMPLACEMENTS DES TROUS POUR LES VIS
SCHRAUBENLOCH LAGE
UBICACIÓN DEL ORIFICIO DE TORNILLO
POSIZIONE DEL FORO
See, Voir, Siehe,
Vea, Vedere
Pag. 2 & 3
550
x
365
730
x
365
730
x
460
910
x
460
1000
x
550
1370
x
550
Fig. A
2
E & C E & C E & C E & C E & C E & C
Fig. A, C, D, E,
F, G
1
A & D A & D A & D A & D A & D A & D
Fig. H
1
A & C A & C A & C A & C A & C A & C
DIE BRÜSTUNG
EINSETZEN
D i e B r ü s t u n g s t e i l e n a c h -
e i n a n d e r a u f d e n o b e r e n
Metallplatten in Stellung bringen
und etwas anschrauben.
A u f d e r n e b e n s t e h e n d e n
Zeichnung ist angegeben.
Welche Löcher (je nach Größe
des Schwimmbeckens) zur
Befestigung der Brüstungsteile
vorgesehen sind. Nach dem
Einsetzen die Brüstungsteile
sorgfältig ausrichten, um eine
einheitliche Form zu erhalten,
und die Schrauben fest anzie-
hen abb. 17.
Harz Brüstung verwenden
Unterlegscheiben (Abb. 17a)
INSTALACION DE
LOS BROCALES
D
E
Posicionar los brocales uno por uno en las placas
metálicas superiores y atornillarlos ligeramente.
De acuerdo al tamaño de su piscina, el dibujo de
al lado le indicará cuáles son los orificios que cor-
responden a las fijaciones de los brocales. Una
vez instalados los brocales, ajústelos para obtener
una forma perfecta. Fijarlos luego definitivamente
apretando los tornillos fig. 17.
Utilizar arandelas en los brocales de resina
(fi g.17a)
COLLOCAZIONE DELLE SPONDE
Posizionate le sponde ad una ad una sulle piastre
metalliche superiori e avvitatele leggermente.
A seconda delle dimensioni della vostra piscina,
il disegno a lato vi indicherà quali sono i fori che
corrispondono ai fissaggi delle sponde. Una volta
installate le sponde, aggiustatele per ottenere una
forma perfetta. Fissatele quindi definitivamente
serrando le viti (fig. 17).
Usare rondelle sulle sponde di resina (fi g. 17a)
I
18
MOUNTING THE TOP COVERS
LE MONTAGE DES JOINT DE MARGELLE
SCHUTZKAPPEN ANBRINGEN
MONTAJE DE LOS CAPUCHONES
MONTAGGIO DEI CAPPUCCI DI PROTEZIONE
View Page:
Voir la page:
Ansicht Seite:
Ver Página:
Vedere pagina:
2
&
3
Fig. A, C, D, E
2
1
6 & 7 inch Top Covers
(
15cm / 18cm)
(View Page 2 & 3 • Fig. A, C, D, E)
GB
For 2-piece covers, insert bottom section into
top (fig. 1) so that it becomes one unit (fig. 2).
Then snap cover into place aligning tab on bot-
tom of cover with slot in the top plate of pool
(fig. 3) and secure with a 2,5cm screw (fig. 4).