Swim'n Play International Oval Pool User Manual
Page 39
3
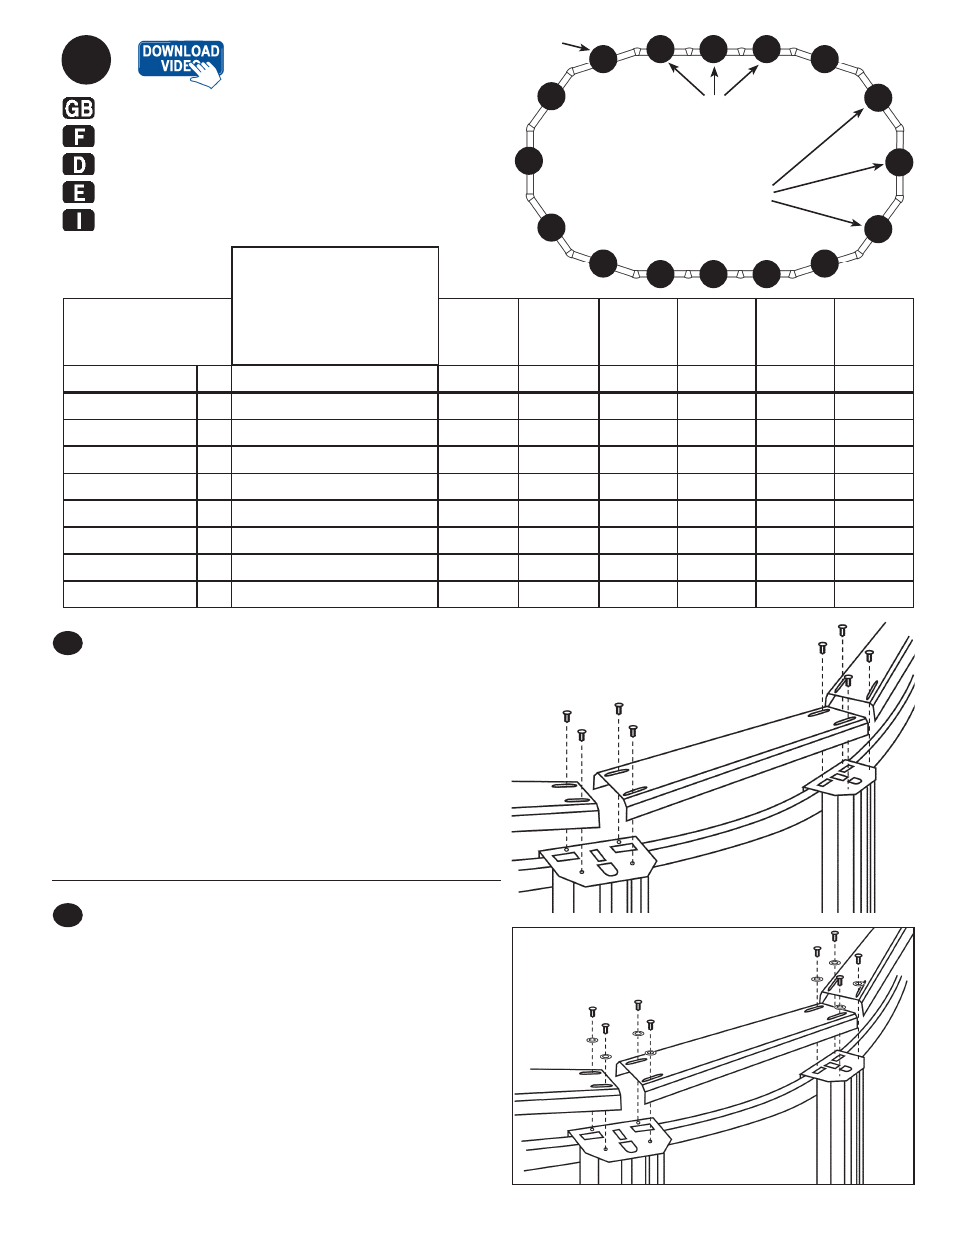
FIXING THE TOP LEDGE
Place the top ledges onto the metal top plates one
after another and insert screws, tightening only lightly.
Depending on the size of your swimming pool, togeth-
er with the table below the diagram will tell you which
holes correspond to the fixing points of the top ledges.
Once the top ledges are correctly placed, adjust them
so as to obtain perfect curvature. Then tighten the
screws securely (fig.17).
On resin ledges use washers (fi g. 17a)
LA MISE EN PLACE DES MARGELLES
Positionnez les margelles une à une sur les plaques
métalliques supérieures et vissez les légèrement.
Selon la taille de votre piscine, la notice de montage
vous indiquera quels orifices correspondent aux fixa-
tions des margelles. Une fois les margelles installées,
ajustez-les pour obtenir une forme parfaite. Fixez les
ensuite définitivement en ressérrant les vis (fig. 17).
Utilisent rondelles sur le margelles de résine
(fig. 17a)
GB
F
Fig. 17a
Fig. 17
17
FIXING THE TOP LEDGE
POSE DE MARGELLES
DIE BRÜSTUNG EINSETZEN
INSTALACION DE LOS BROCALES
COLLOCAZIONE DELLE SPONDE
B
B
B
B
B
B
C
C
C
A
A
A
A
A
A
C
120cm
STRAIGHT SIDE
LEDGES
STANDARD
LEDGES
TRANSITION
RAILS
See, Voir, Siehe,
Vea, Vedere
Pag. 2 & 3
550
x
365
730
x
365
730
x
460
910
x
460
1000
x
550
1370
x
550
All Pools
A
Straight Side Ledges
120 cm
120 cm
120 cm
120 cm
120 cm
120 cm
Resin Pools
B
Standard Ledges
113 cm
113 cm
142 cm
142 cm
142 cm
142 cm
Resin Pools
C
Transition Ledges
85 cm
115 cm
85 cm
115 cm
115 cm
115 cm
Fig. A
B
Standard Ledges
111.5 cm 111.5 cm 141 cm
141 cm
141 cm
-
Fig. A
C
Transition Ledges
84.5 cm
115 cm
84.5 cm 115 cm
115 cm
-
Fig. G
B
Standard Ledges
117 cm
117 cm 146.5 cm 146.5 cm 146.5 cm 146.5 cm
Fig. G
C
Transition Ledges
83 cm
113.5 cm
83 cm 113.5 cm 113.5 cm 113.5 cm
Fig. C,D,E,F,H B
Standard Ledges
112.5 cm 112.5 cm 55 5/8"
141 cm
141 cm
141 cm
Fig. C,D,E,F,H C
Transition Ledges
85 cm
115 cm
85 cm
115 cm
115 cm
115 cm
LEDGES
MARGELLES
BRÜSTUNG
BROCALES
SPONDE