Unpacking and assembly – Dyna-Glo Kerosene Portable Forced Air Heaters KFA400DGD User Manual
Page 4
3
NEVER LEAVE THE HEATER
UNATTENDED WHILE BURNING!
3. UNPACKING AND ASSEMBLY
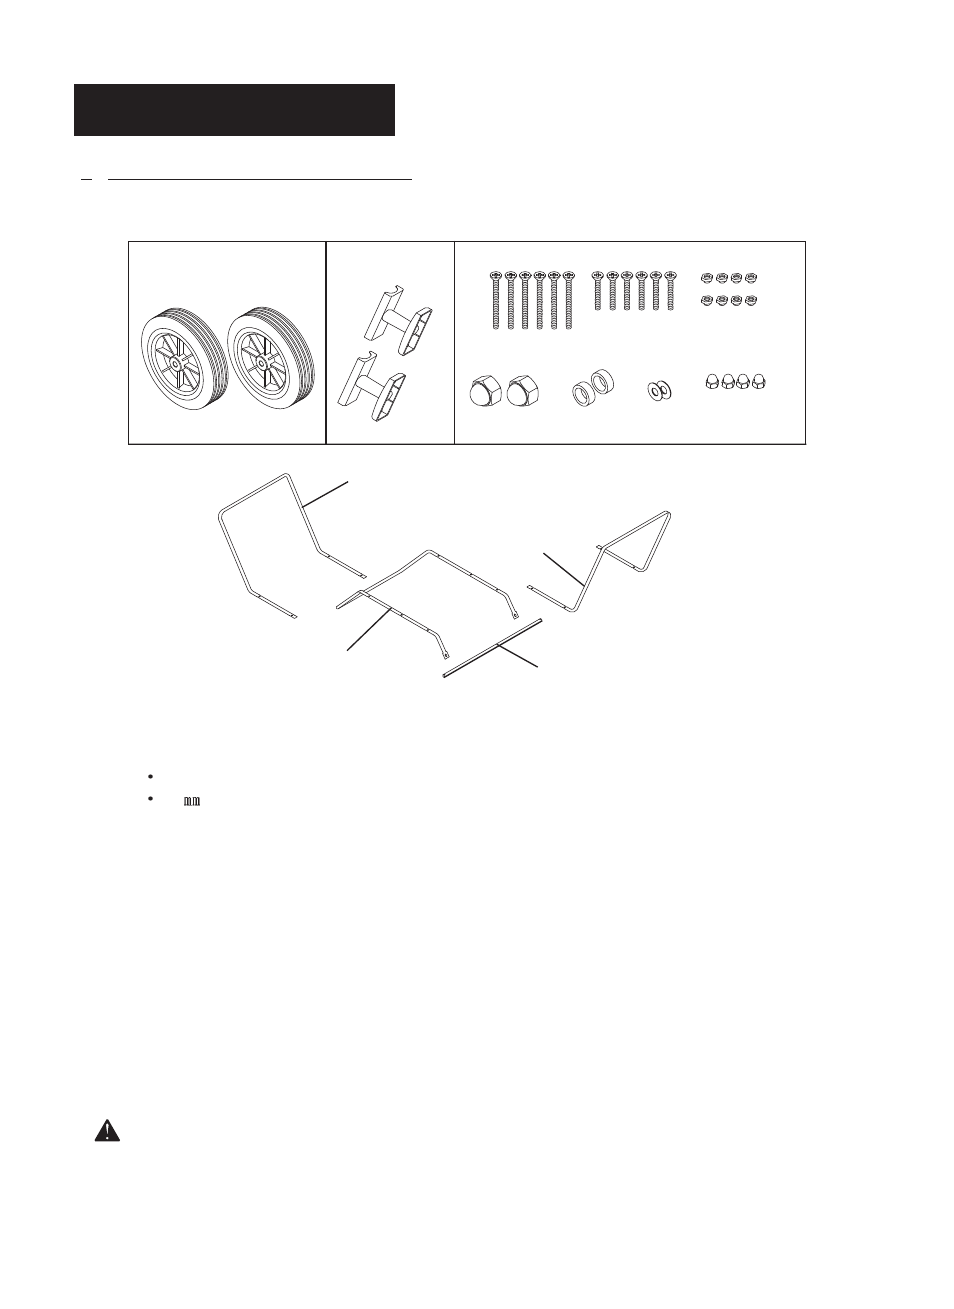
1. REMOVE THE HEATER AND ALL PACKING MATERIALS FROM THE BOX. (See Fig.2)
NOTE: Save the shipping carton and packing materials for future storage.
Handle
Wheels
Nuts
Screw(S)
Screw(L)
Washers
Bushings
)
S
(
s
t
u
N
p
a
C
)
L
(
s
t
u
N
p
a
C
Cord Wrap
Hardware Kit Part No : HW-KFA1019
Wheel Support Frame
Handle
Threaded Axle
Figure 2. PACKING MATERIALS
2. ASSEMBLING
Tools Required
Medium Phillips Screwdriver
24 Socket Wrench
Assembling wheel & handle & cord wrap
1) Slide threaded axle through the rear sectioon of the wheel support frame.
2) Slide one axle bushing on to each side of the axle. Slide one wheel on to each side of the axle.
Attach one cap nut on to each side of the threaded axle and tighten well.
3) Place heater on wheel support frame. Make sure air inlet end (rear) of heater is over wheels. Align the
holes on fuel tank flange. Insert screws(L) through handles (front and Rear), fuel tank flange, and
wheel support frame. Insert screws(S) through rear handle, fuel tank flange, and washer(S) as shown
in figure 3 and attach nut finger tight after each screw is inserted.
4) After all screws are inserted, tighten nuts firmly.
5) Align the hole on the rear handle with the mounting hole on the cord wrap.
6) Insert screws through cord wrap, rear handle as shown in Figure 3 and attach nut finger tight after each
screw is inserted.
7) After all screws are inserted, tighten nuts firmly.
CAUTION: DO NOT OPERATE heater without support frame assembled to tank.