Tab sensitivity adjustment, Remove the exit roller – Rena T-250 User Manual
Page 12
OPERATING THE TABBER
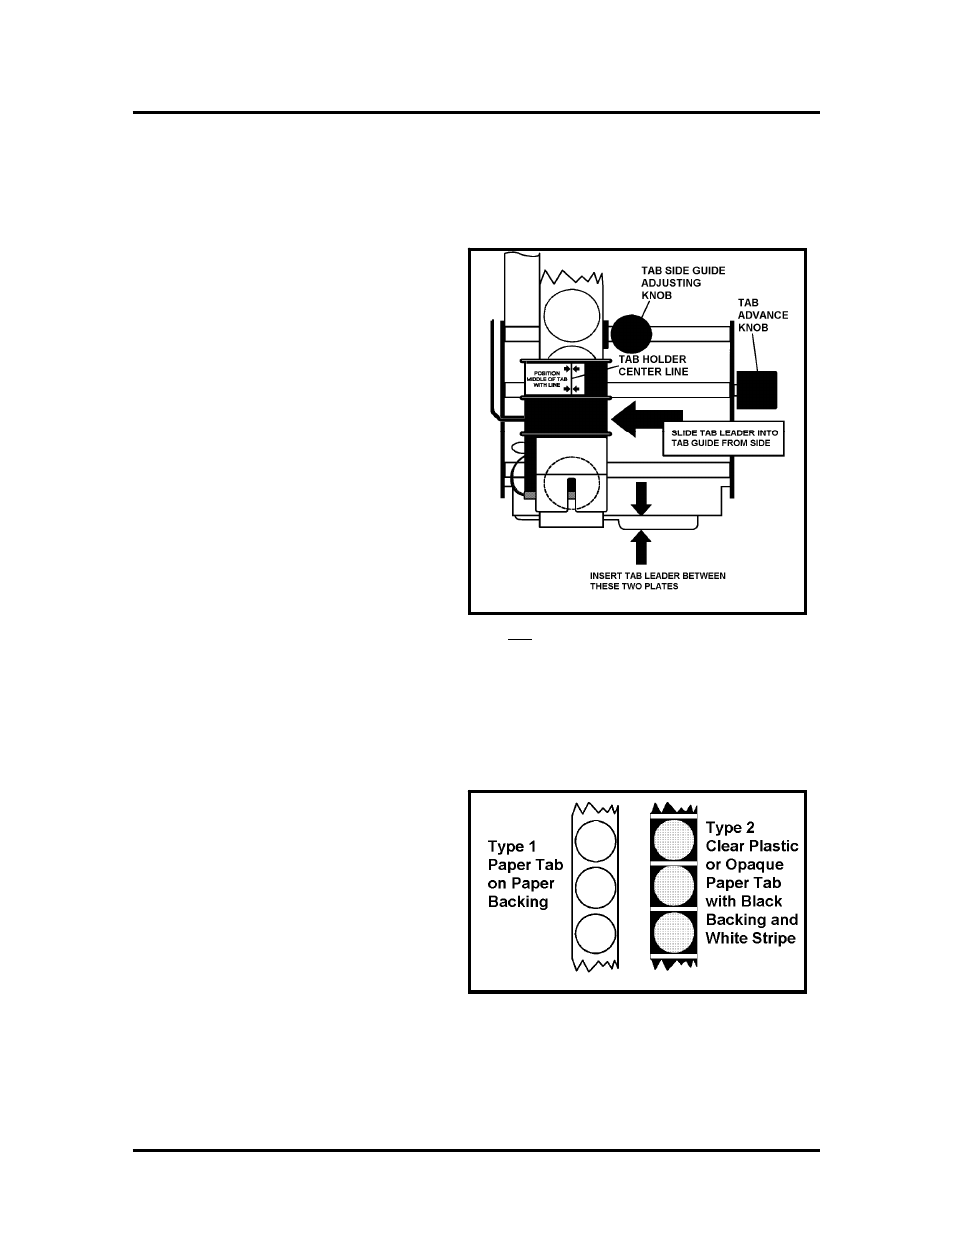
10. Slide the tabs stock into the open side of the black plastic Tab Guide and Sensor
Assembly.
Tip: Turning the Tab Pressure Knob to OFF helps with the alignment. Return
the pressure knob to the ON position after positioning.
11. Set the Tab Side Guide (post) to
confine, but not bind the tab
backing.
12. When using 1.25” wide or
narrower tab stock; adjust (slide)
the black plastic Tab Guide and
Sensor Assembly so that the red
centerline is in the approximate
center of the tab stock.
When running tabs larger than
1.25”, adjust (slide) the black
plastic Tab Guide and Sensor
Assembly so the inside of the
assembly just begins to touch the
left side of the tab stock; without
pushing the stock toward the
right. In this case, the red center line will not be centered on the tab stock.
13. Replace the Exit Roller by pushing it back into its holder.
Note: This roller is removed in next step (Tab Sensitivity Adjustment), so you can
leave it off, if you plan to do this adjustment.
Tab Sensitivity Adjustment
There are two types of tabs designed for
use in the T-250 Tabber. Type 1 is a
paper tab with a plain paper backing.
Type 2 is a clear plastic or translucent
paper tab with a black or brown backing
behind the tab and a white stripe between
the tabs. Do Not use clear tabs that have
a white backing behind the tab and a
black line between the tabs.
1. Remove the exit roller.
2. With the tab exposed under the sensor, turn the main power switch ON.
T-250 Operations Rev. 2/5/2010
12