Installation – REMKO FBR-2 User Manual
Page 7
7
Installation
Installation should only be
undertaken by an authorised
specialist.
NOTE
The remote control with room sensor
may only be installed to the internal wall
of the reference living space of heating
circuit 1 (direct heating circuit). It must
not be installed near to heating elements
or other heat-emitting devices.
If the room sensor effect on the heat
pump manager is switched off, it can be
installed in every x-optional room.
Mounting
1. Remove the caps from the socket at
the base.
Disassembly
1. Remove the caps from the socket at
the base.
2. Loosen all cable connections.
3. Unscrew the socket from the wall.
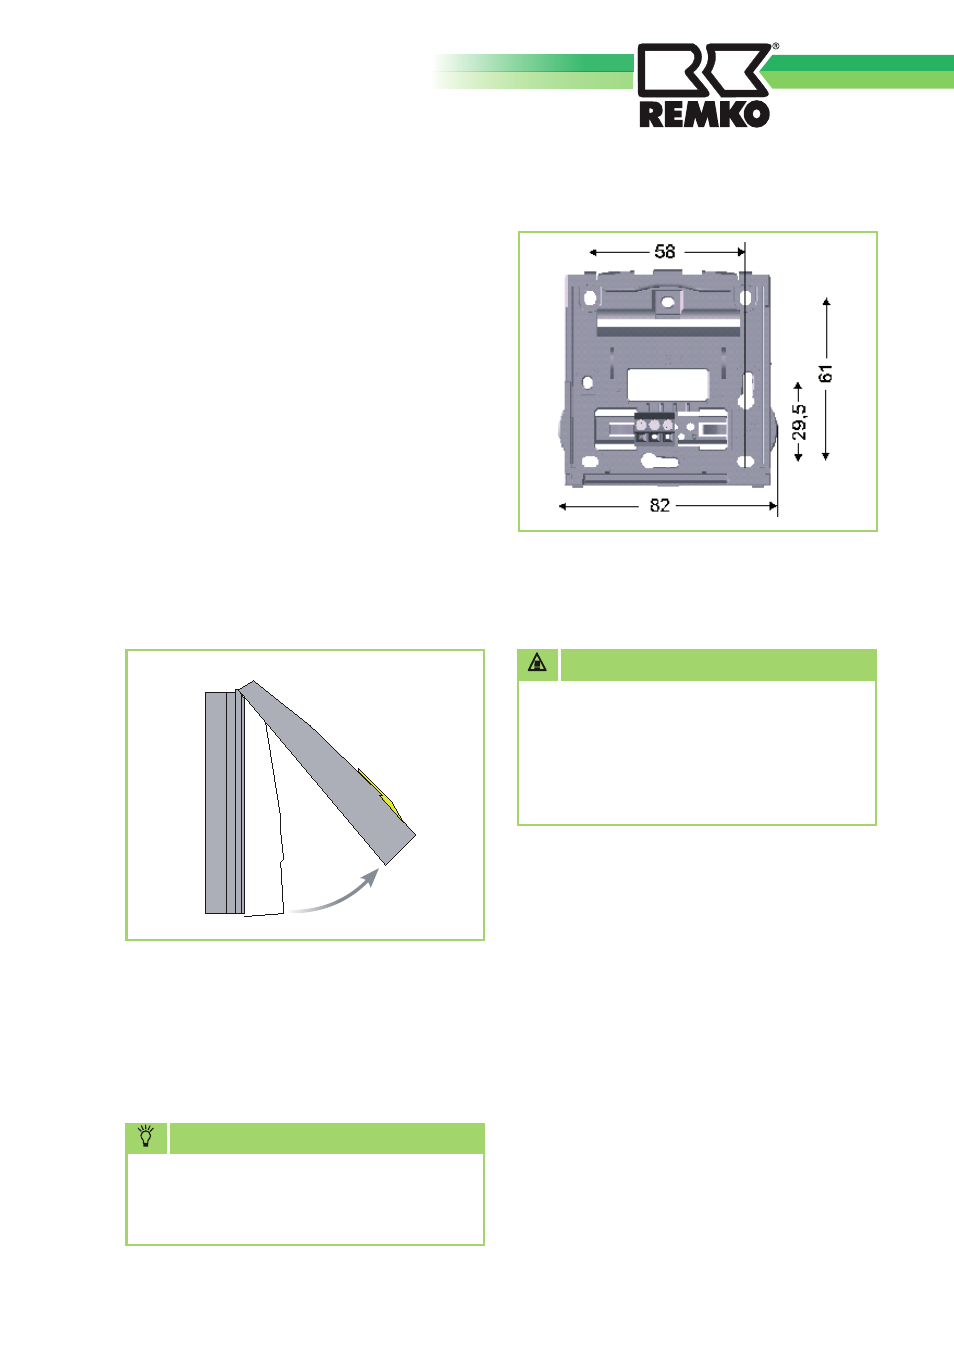
2. Secure the socket to the wall.
The hole spacing for the wall holes
can be found in the diagram shown.
An opening for cable passage is
available.
4. Position the top of the controller
on the upper side of the socket and
lightly press downwards on to the
socket until the top locks in place.
The resistance of the connection
cable influences the nominal setting
and room temperature measurement.
(See "Commissioning" section.)
CAUTION
3. Establish the electrical connection.