Installation – REMKO RKV 10 W User Manual
Page 12
12
Attaching the wall mount
The unit wall mounts are attached with screws and dow-
els suitable for attachment.
Installation
Make absolutely sure to follow the instructions below
prior to assembling the indoor unit:
à
When assembling the indoor unit, make sure that the
required minimum distances are observed.
à
Assemble the indoor unit in such a way that conden-
sation drainage is not blocked and air can always
flow freely in and out of the unit.
à
The indoor unit is attached by means of a wall
mount.
120
120
120
120
1500
Dimensions in mm
These safety zones ensure that air can flow freely in
and out of the unit, that maintenance and repair work
can be performed and to protect the unit from damage.
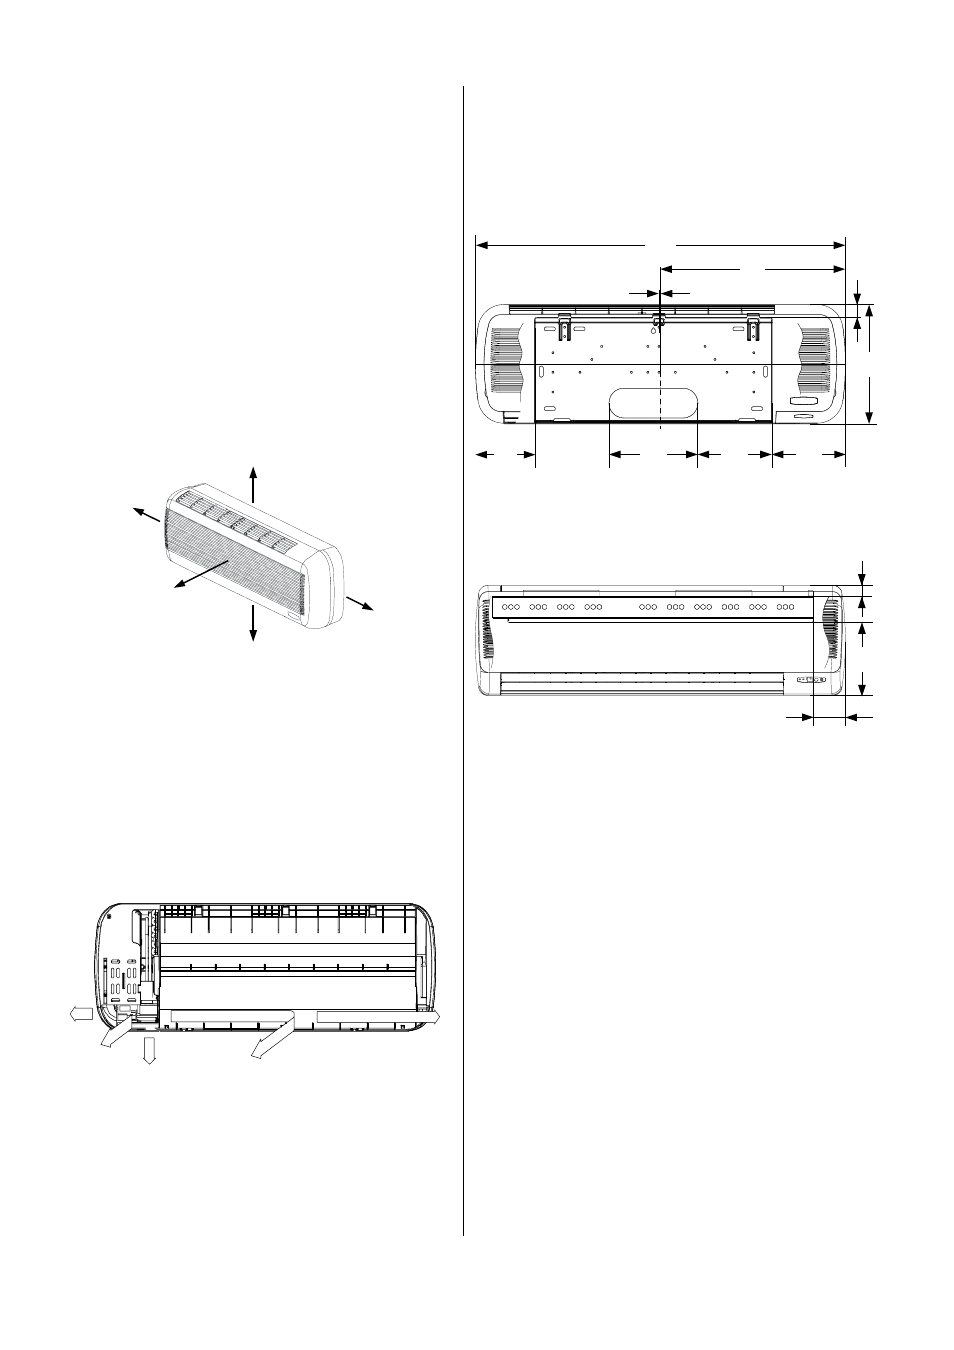
Minimum distances for the indoor units
The figure below shows the required distances to ensure
that the indoor units function properly.
RKV 24 W
Front view, all specifications in mm
240
107
36
Lead-through options
Prior to installation, take a look at the various options for
lead-throughs of the refrigerant, condensation and con-
trol lines (see figure below).
4
3
2
1
5
Units RKV 10 W, RKV 13 W and RKV 18 W can be
connected using all five options while the RKV 24 W
units can only be connected using options 1 to 3.
1 Outflow on the wall right 2 Outflow through the wall right
3 Outflow on the wall bottom 4 Outflow through the wall middle
5 Outflow on the wall left
Assembling the indoor unit
Installation is performed as follows:
1. The required line cross-sections are provided in the
"Technical Data” table.
Only use refrigerant lines with refrigerator quality.
2. Decide on a drainage option for the indoor unit and
cut the refrigerant connection line hose accordingly.
3. When assembling the unit, observe the bending radii
of the refrigerant lines and never bend the hose in
the same place twice.
This may cause the line to become brittle or crack
4. Remove the preinstalled swivel nuts of the units.
5. Keep in mind that the indoor units have been filled
with dry nitrogen as a sealant at the factory.
The pressurised nitrogen is released when the
swivel nuts are loosened.
Only use the swivel nuts supplied for further as-
sembly.
RKV 10 W / 13 W / 18 W
320
1000
midddle of the unit
5
160
240
200
200
35
500
Front view, all specifications in mm