Backstop, 2 instructions, Flexslide – PSE Archery Bow 2014 User Manual
Page 12: Installation and adjustment, Compound bow, User’s guide
PAGE
12
Compound Bow
USER’S GUIDE
1. Remove the set screws from the base using a T8 Torx wrench.
2. Install the Backstop
™
2 into the threaded hole below the
grip on the string-facing side of the bow.
3. Extend the Backstop
™
2 until it makes contact with the string. Mark the string ¼”
above and ¼” below where it makes contact with the string. Remove the Backstop
™
2
and add serving to that area of the string. Reinstall the Backstop
™
2.
4. Securely tighten the base to the bow handle.
6. Extend rod from base. Install the set screws to secure rod in this position.
Tighten set screws. It is desired to have some clearance (approximately 1/16”) between
the bumper and the bowstring at brace.
7. Rotation instructions- Adjust the Backstop™ 2 to the desired position and tighten the
rotator screw. The Backstop™ 2 design allows for the bumper to be positioned so the
string strikes the center of the bumper. It is desired to have some clearance
(approximately 1/16”) between the bumper and the bowstring at brace.
backstop
™
2 instructions
Serve string
in this area.
Set screws
Alignment
holes
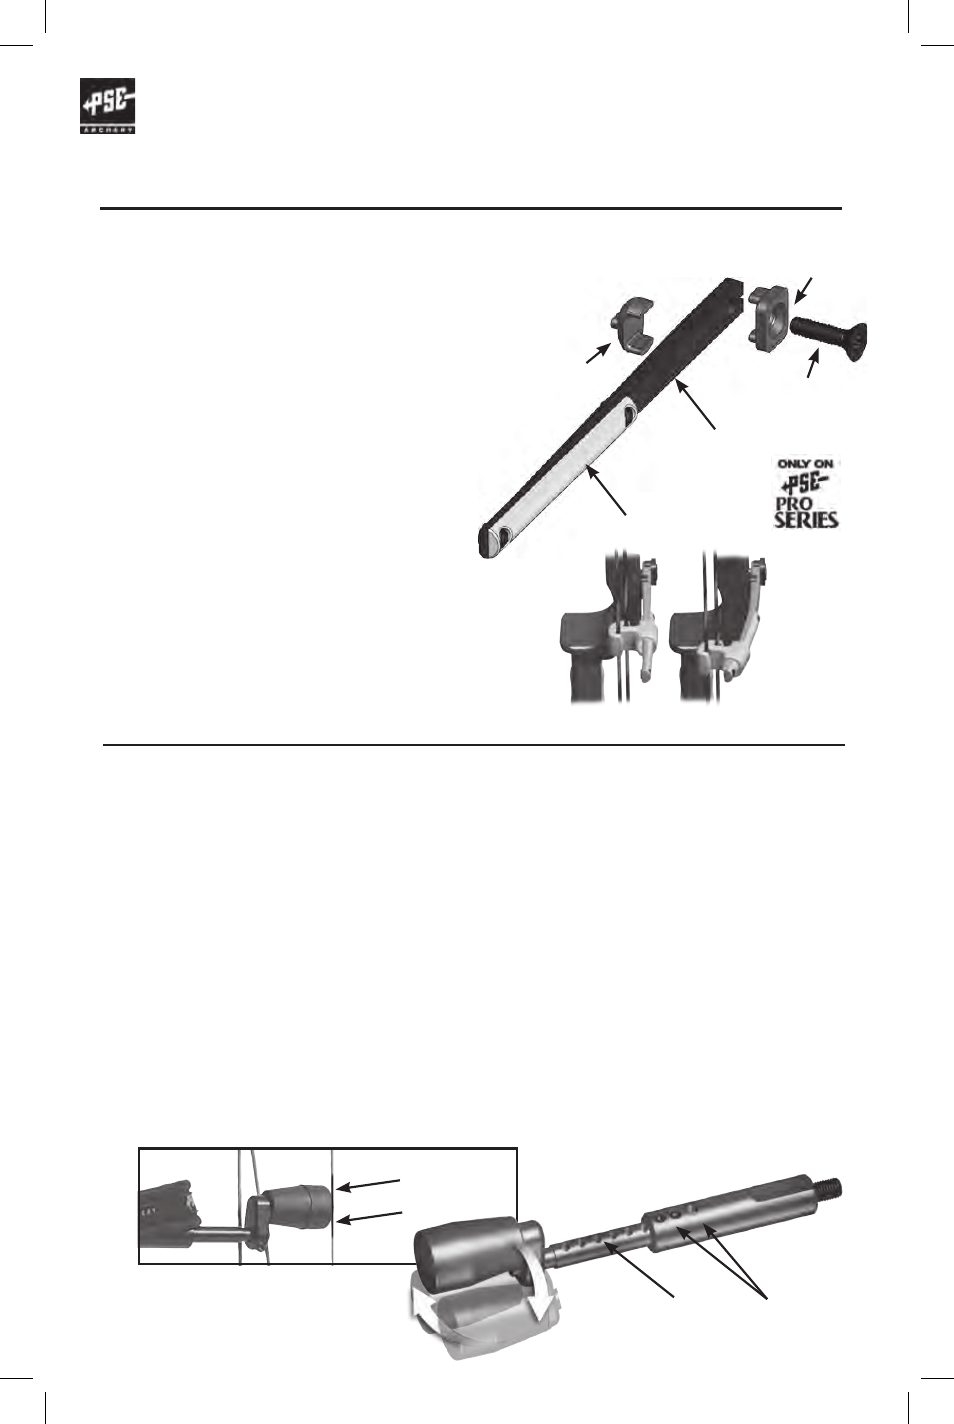
flexslide
™
installation and adjustment
FlexSlide
Washer with
Alignment Tabs
Lateral
Adjustment
Screw
FlexSlide
Pivot with
Alignment
Tabs
FlexSlide
Limb
Low Friction
FlexSlide Rod
Note: Many PSE bow models come from the factory with the Backstop
™
2 installed.
These instructions refer to reinstallation or adjustment if needed after making adjustments
to your PSE bow.
The PSE FlexSlide
™
cable guard system is based on the same advanced
design and analysis used to create PSE Limbs. The flex-tuned design
and adjustable offset are engineered to create more consistent lateral
loads through the draw cycle and improve bow accuracy.
1. The standard factory setting adjusts the
FlexSlide
™
to its bottom position for maximum
arrow clearance.
2. To adjust the lateral position, turn the
adjustment screw counterclockwise to
reduce arrow clearance or clockwise to
increase arrow clearance.
3. After making adjustments to your
FlexSlide
™
, check both arrow clearance
and BackStop
™
clearance. When drawing
the bow, the buss cable should never
contact the arrow shaft or any part of
the Backstop
™
.
4. If any contact exists, tighten the
adjustment screw to create adequate
clearance. One full turn on the adjustment
screw will move the slide approximately 1/8”.
NOTE: Lateral adjustments to the FlexSlide
™
may affect arrow tuning.
At rest
At full-draw