Preparing the main unit – Posiflex JIVA KS-7212X User Manual
Page 9
Part 9
screws. Slide down the upgrade kit and gently tighten the shoulder screws.
Do not overdo the tightening or unrecoverable
thread damage will occur. If the customer display
used is the USB interface model, the DC supply in
COM port is not required, it will be powered through
the USB port.
B
、
、
、
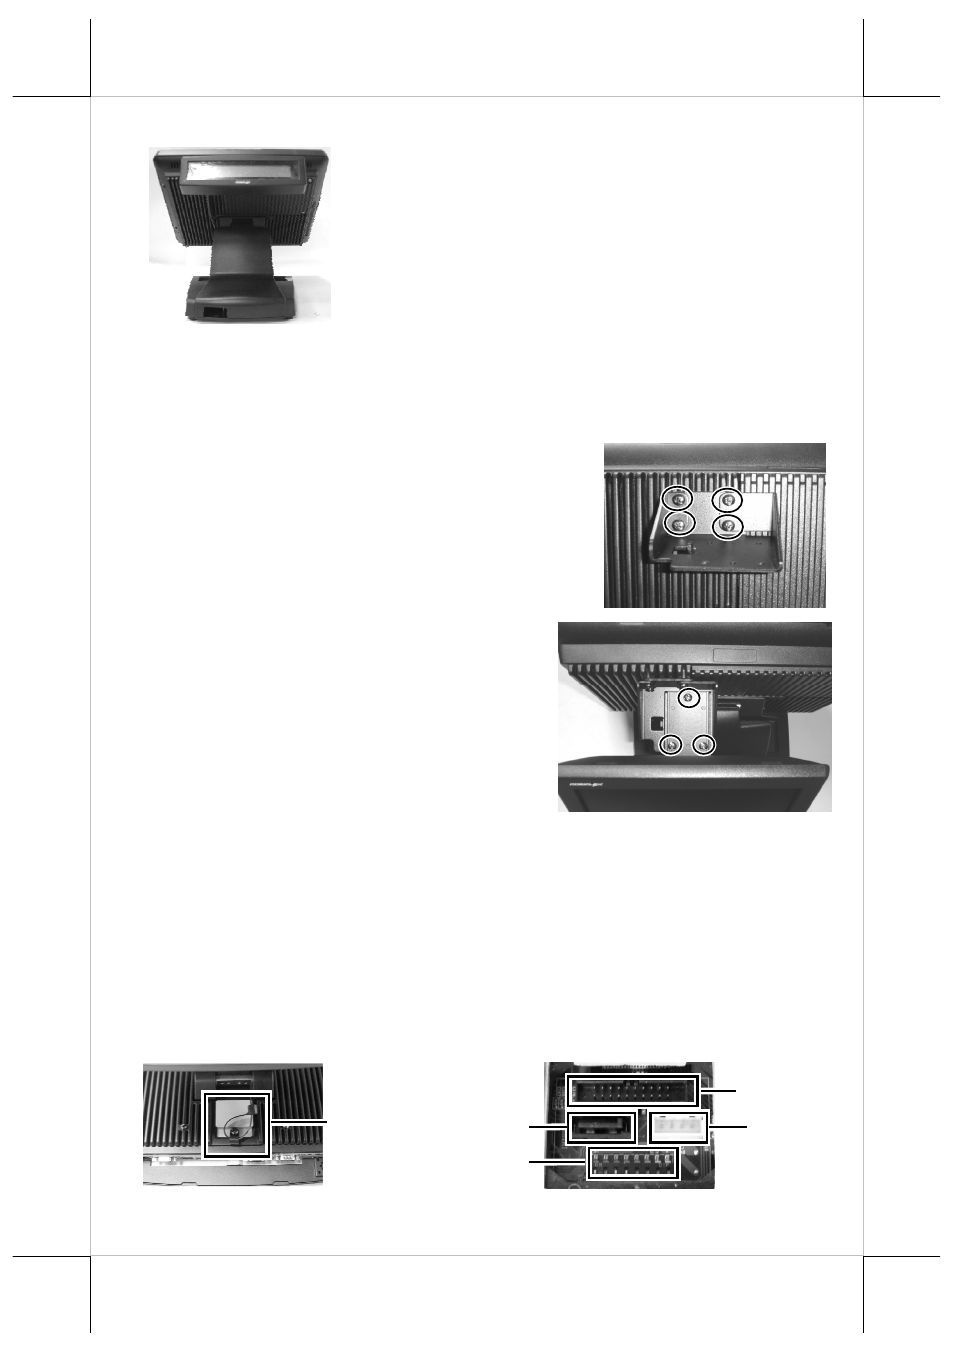
、 PD-6307/LM/TM-6307 LCD Display:
There are two parts of PD-6307/LM/TM-6307 bracket need to combine
during the installation process and please refer to the following steps to
assemble properly.
Please take out the join bracket and use the
attached 4 pcs long screws to fasten this bracket to
the main unit back cover which circled in the right
picture.
Then, hold the LCD monitor with bracket and
aim to join bracket which just fixed on the
main unit and fasten these 3 pcs short screws
which circled in the right picture to attach
LCD monitor to the terminal.
PREPARING THE MAIN UNIT
The service window, locating at the back of the main unit just below the pivot
hinge and concealed under a protective cover, provides a LPT port, a SATA
connector, HDD power connector, and a DIP switch.
To access the service window, place the main unit on a clean and flat surface
with the display facing downward, and then remove the securing screw and the
cover.
LPT
SATA1
PWR1
Service
Window
Cover
SW3