Using the on-screen menus, Changing the setup menu settings, Changing time settings – Dynex DX-PDP42-09 User Manual
Page 15: 15 using the on-screen menus, Using your tv
Using your TV
15
Using the on-screen menus
Your TV’s OSD (on-screen display) may differ slightly from that shown in
this manual.
Use your remote control to navigate in the on-screen menus.
To use the on-screen menus:
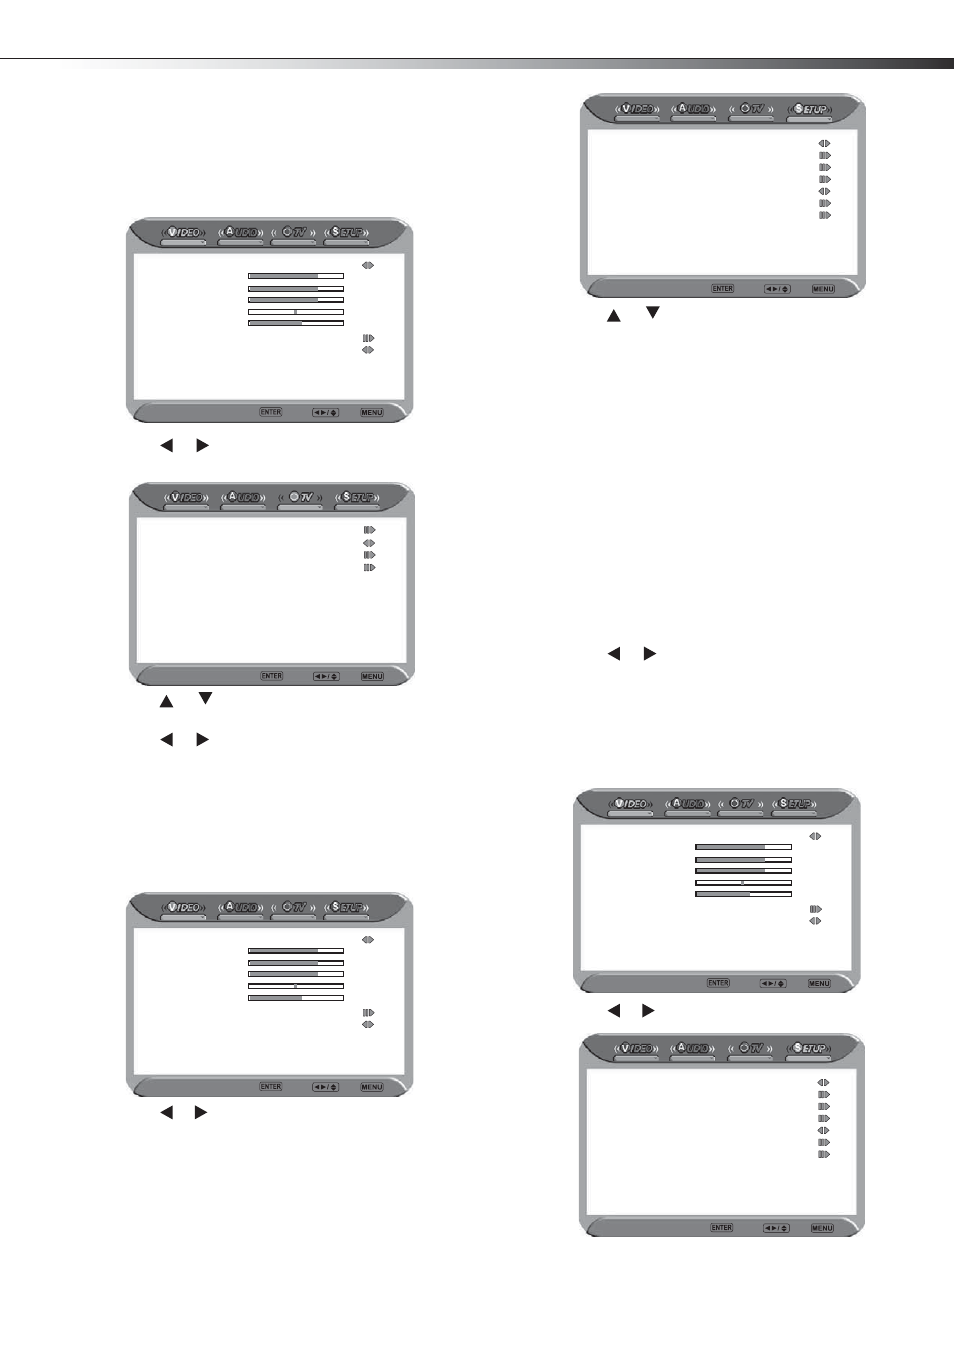
1 Press MENU. The main (Video) menu opens.
2 Press
or
to select the icon for the menu you want. The
selected menu opens (for example the TV menu).
3 Press
or
to select the option you want to change, or the
sub-menu you want to access.
4 Press
or
to change the setting of the selected option, or
press ENTER to enter the selected sub-menu.
5 Press MENU to exit a sub-menu, or press EXIT to close the menus
and return to normal viewing.
Changing the
SETUP menu settings
To change the SETUP menu settings:
1 Press MENU. The main (Video) menu opens.
2 Press
or
to select SETUP. The Setup menu opens.
3 Press
or
to select the option you want to change, or the
sub-menu you want to access. Options and sub-menus include:
• OSD Language—Lets you select an alternate language for
the on-screen menus. Choices include English, French, and
Spanish.
• Time Setup—Opens a sub-menu that lets you set time
options. See “To change the time settings:” on page 15.
• Closed Caption—Opens a sub-menu that lets you set
closed captioning options. See “To set the closed caption
options:” on page 16.
• Parental—Opens a sub-menu that lets you set parental
control options.
• Gamma—Lets you set the TV’s gamma correction, which
fine tunes both brightness and the red/green/blue ratio.
Settings include Middle, Dark, and Bright.
• Audio Only—Lets you turn off the picture. You can cancel
Audio Only by pressing any button on remote control.
• Reset Default—Lets you reset the TV settings to factory
default. Press ENTER to reset.
4 Press
or
to change the setting of the selected option, or
press ENTER to enter the selected sub-menu.
5 Press MENU to exit a sub-menu, or press EXIT to close the menus
and return to normal viewing.
Changing time settings
To change the time settings:
1 Press MENU. The main (Video) menu opens.
2 Press
or
to
select
SETUP. The Setup menu opens.
Picture Mode
Normal
Contrast
50
Brightness
50
Saturation
50
Hue
0
Sharpness
4
Color Temperature
Natural
Noise Reduction
Medium
Video Enter Select Exit
Channel Scan
Tuner Mode
Cable
Channel Skip
Favorite List
TV Enter Select Exit
Picture Mode
Normal
Contrast
50
Brightness
50
Saturation
50
Hue
0
Sharpness
4
Color Temperature
Natural
Noise Reduction
Medium
Video Enter Select Exit
OSD Language
English
Time Setup
Closed Caption
Parental
Gamma Middle
Audio Only
Reset Default
Setup Enter Select Exit
Picture Mode
Normal
Contrast
50
Brightness
50
Saturation
50
Hue
0
Sharpness
4
Color Temperature
Natural
Noise Reduction
Medium
Video Enter Select Exit
OSD Language
English
Time Setup
Closed Caption
Parental
Gamma Middle
Audio Only
Reset Default
Setup Enter Select Exit