Assembly - miter gauge – Kreg Precision Miter Gauge System User Manual
Page 5
Assembly - Miter Gauge
5.
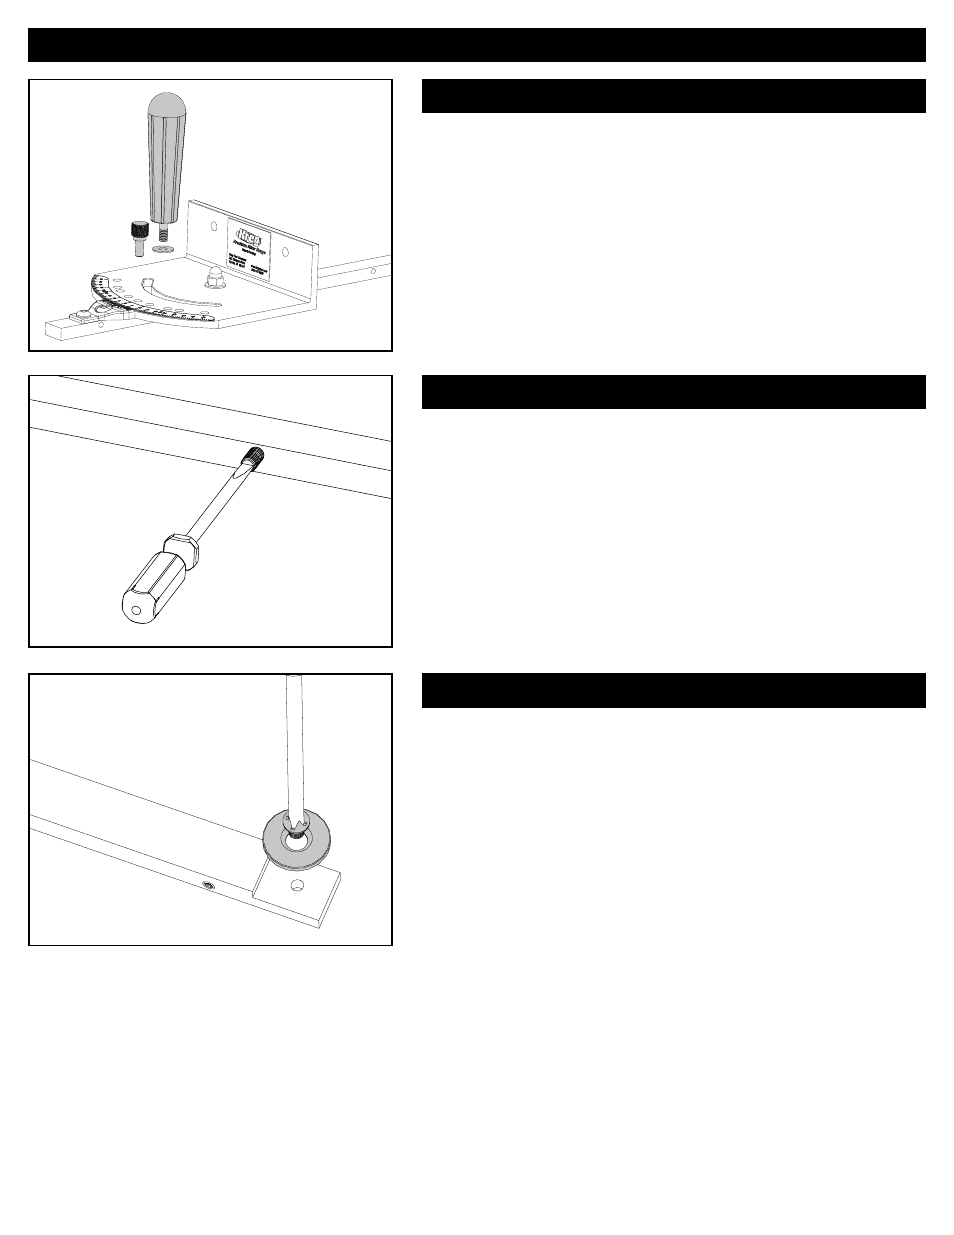
Set the miter-gauge angle to zero and insert the positioning pin into
the zero-angle positive-stop hole. Slip the ¼" nylon washer onto the
threaded stud on the handle and thread the handle into the guide bar.
Tighten the handle.
Install the miter-gauge handle
Using a small, fl at-blade screwdriver, thread fi ve #10-32 x ⅝" nylon set
screws into the holes in the side of the guide bar. Drive all of them from
the same side until they just start to project from the opposite side. Test-
fi t the miter gauge in your saw miter slot. Adjust each screw, removing
and replacing the miter gauge as necessary, until the miter gauge slides
smoothly all along the miter slot without any side-to-side play.
Adjust the guide bar
For a saw with a T-shaped miter-gauge slot, fasten the T-slot washer
to the bottom face of the notch at the leading end of the guide bar with
the #10-32 x 5/16" fl athead machine screw. Tighten the screw, being
careful not to strip the threads in the aluminum bar.
Attach the T-slot washer
(for saws with T-profi le miter-gauge slots only)