Using the miter gauge – Kreg Precision Miter Gauge System User Manual
Page 11
Using the Miter Gauge
11.
Using shop-built accessories with your miter gauge
The T-slots along the length of the fence allow you to attach auxiliary fences, custom shop-made stops, or other jigs and fi xtures
using standard ¼" hex head bolts. You also can use ¼" toilet-fl ange bolts available from hardware stores or home centers.
An auxiliary fence provides a renewable surface that can be extended
beyond the path of the blade to support a workpiece, resulting in
smooth crosscuts with minimum chipping. The auxiliary fence must be
¾" thick, 2⅝" high, and any length that suits your application, and can
be made from solid wood, plywood, particleboard, or medium-density
fi berboard (MDF). Attach the auxiliary fence with 1/4"-20 x ¾" hex
head bolts, ¼" washers, and nuts. Drill ¼" holes with ¾" counterbores
11/16" deep. The auxiliary fence can be repositioned or replaced
without effecting the Swing Stop™ calibration.
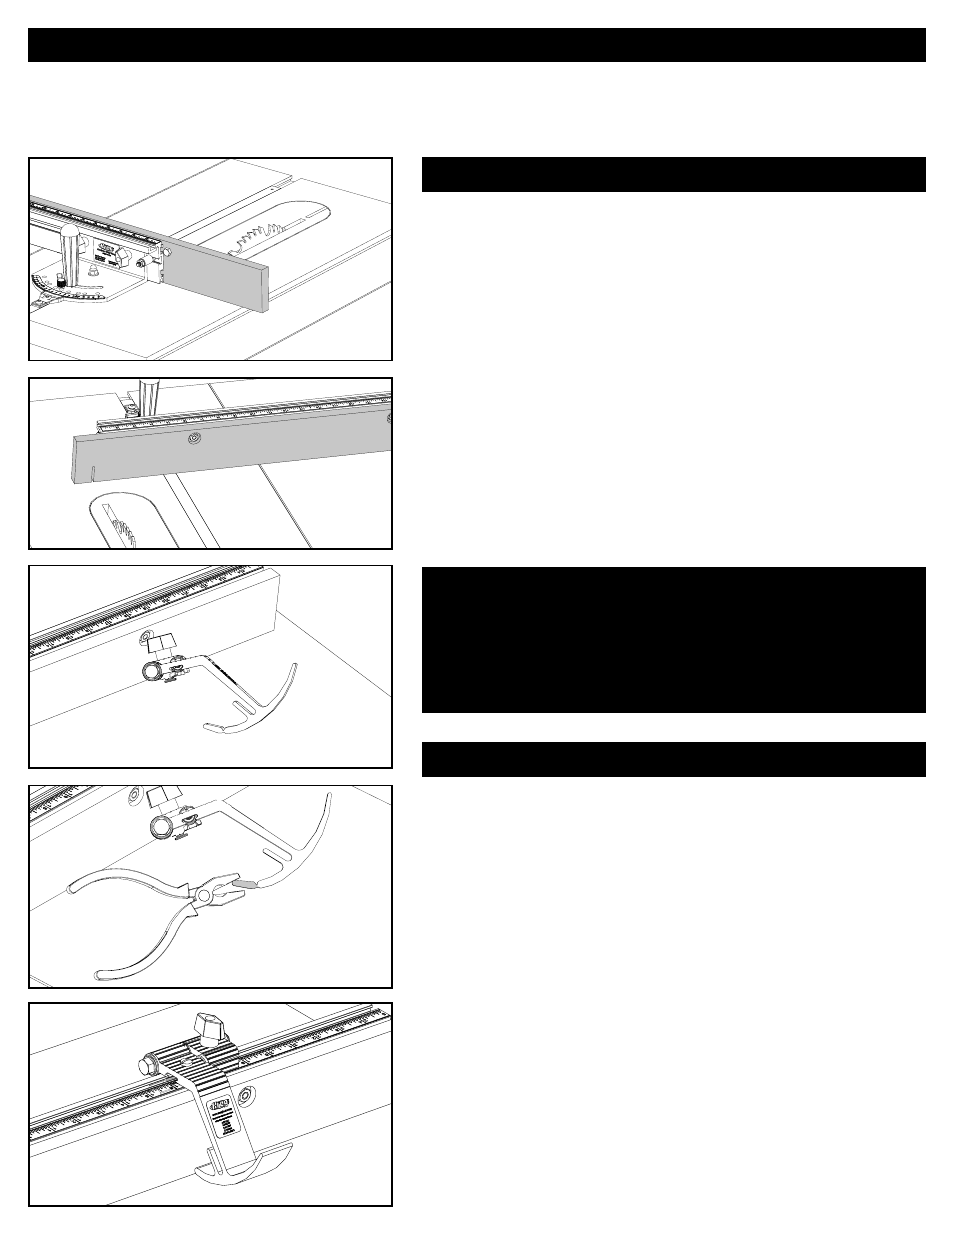
Adding an auxiliary fence
! ATTENTION
To use the Swing Stop™ with an auxiliary fence, you must modify
the stop arm so it properly seats against the fence when lowered,
as shown in this section. Once the stop arm has been altered,
it must be used with an auxiliary fence. The stop will not work
correctly if used without the auxiliary fence.
A groove (break line) is incorporated into the stop arm to provide a
simple means to shorten this portion of the Swing Stop™ for use
with a ¾”-thick auxiliary fence. If you intend to use an auxiliary fence,
remove the breakaway section of the arm, as shown.
Modifying the stop arm for an auxiliary fence
Three Simple Steps
1. Firmly hold the stop arm in your hand or a vise.
2. Use pliers to grip the breakaway portion of the stop arm and
snap off this piece.
3. File or sand the rough edge smooth.