Installation, Installing your remote lcd unit, Installing your remote control unit – TTI TCB-R2000 User Manual
Page 6: Installing your handsfree microphone
TCB-R2000
English
6
Installation
Plan the location of the remote LCD unit
for your convenient use. Use the flat
and even surface to keep the mounting
bracket safely standing against any im-
pacts from road conditions.
Strong adherent tape is used to support
the bracket installation, however the fix-
ing screws are highly recommended to
use to tightly fix the mounting bracket
onto your vehicle.
Install one Velcro tape on the remote control unit and the other wherever it is con-
venient to use.
Install the wire of the remote control unit to either of control unit connectors installed
on the front panel and the rear panel of the transceiver.
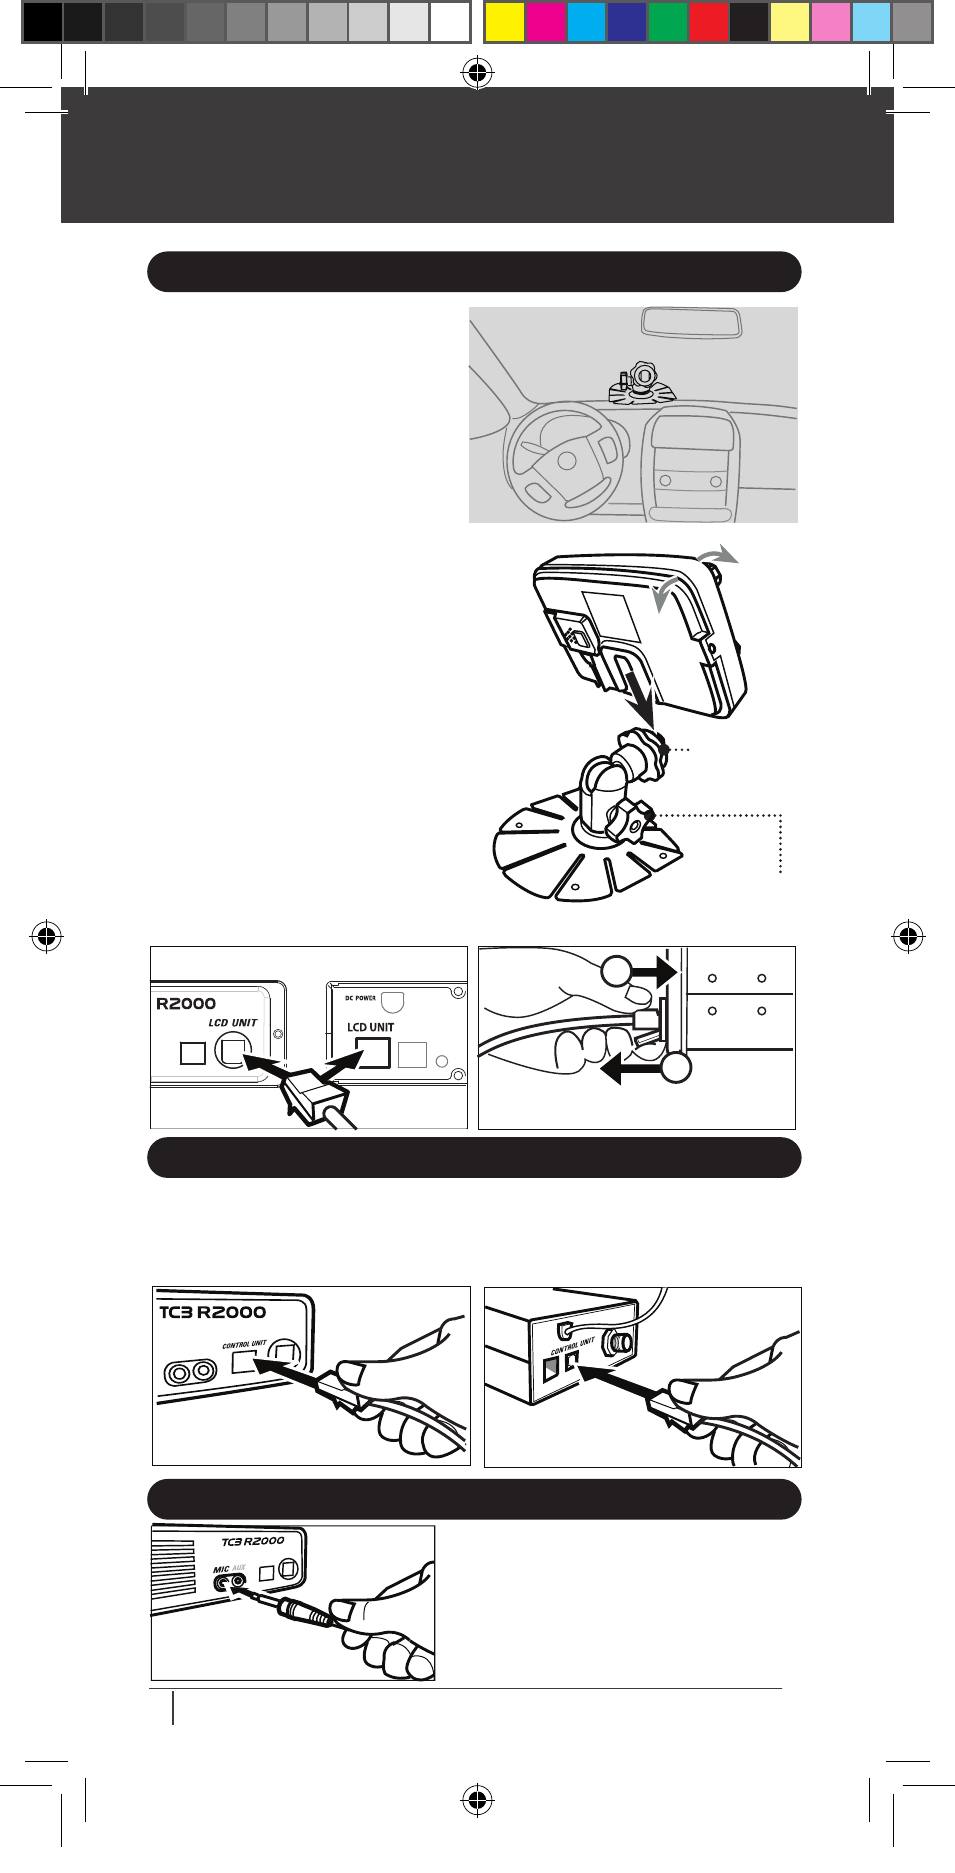
INSTALLING YOUR REMOTE LCD UNIT
Tilt &
Swivel Fixing Knob
LCD Unit
Fixing Knob
1
) Insert the mounting rail of the remote
LCD unit into the mounting bracket.
) Locate the LCD unit upright and tightly
fasten the LCD unit fixing knob.
) Slightly unfasten the tilt and swivel
fixing knob and adjust the view angle
of the LCD unit toward the direction you
prefer(up or down and left or right). Then,
tightly fasten the tilt and swivel fixing
knob.
4) Connect the wire of the Remote LCD
unit to either of the unit connectors in-
stalled on the front panel and the rear
panel of the transceiver.
INSTALLING YOUR REMOTE CONTROL UNIT
Install the mounting bracket on your sunvi-
sor or any proper place where you feel it is
convenient.
Install the microphone and connect the wire
to the MIC connector arranged on the front
panel of the transceiver.
INSTALLING YOUR HANDSFREE MICROPHONE
TCBR2000 man_reized.indd 6
2011.3.14 5:34:19 PM
*NOTE: Push in slightly and then
pull out the wire to disconnect.
1
2