Introduction installation – TTI TCB-R2000 User Manual
Page 5
TCB-R2000
English 5
1) Put the mounting bracket on the
proper location where you are going
to install.
) Drill holes and fix mounting bracket
on the location.
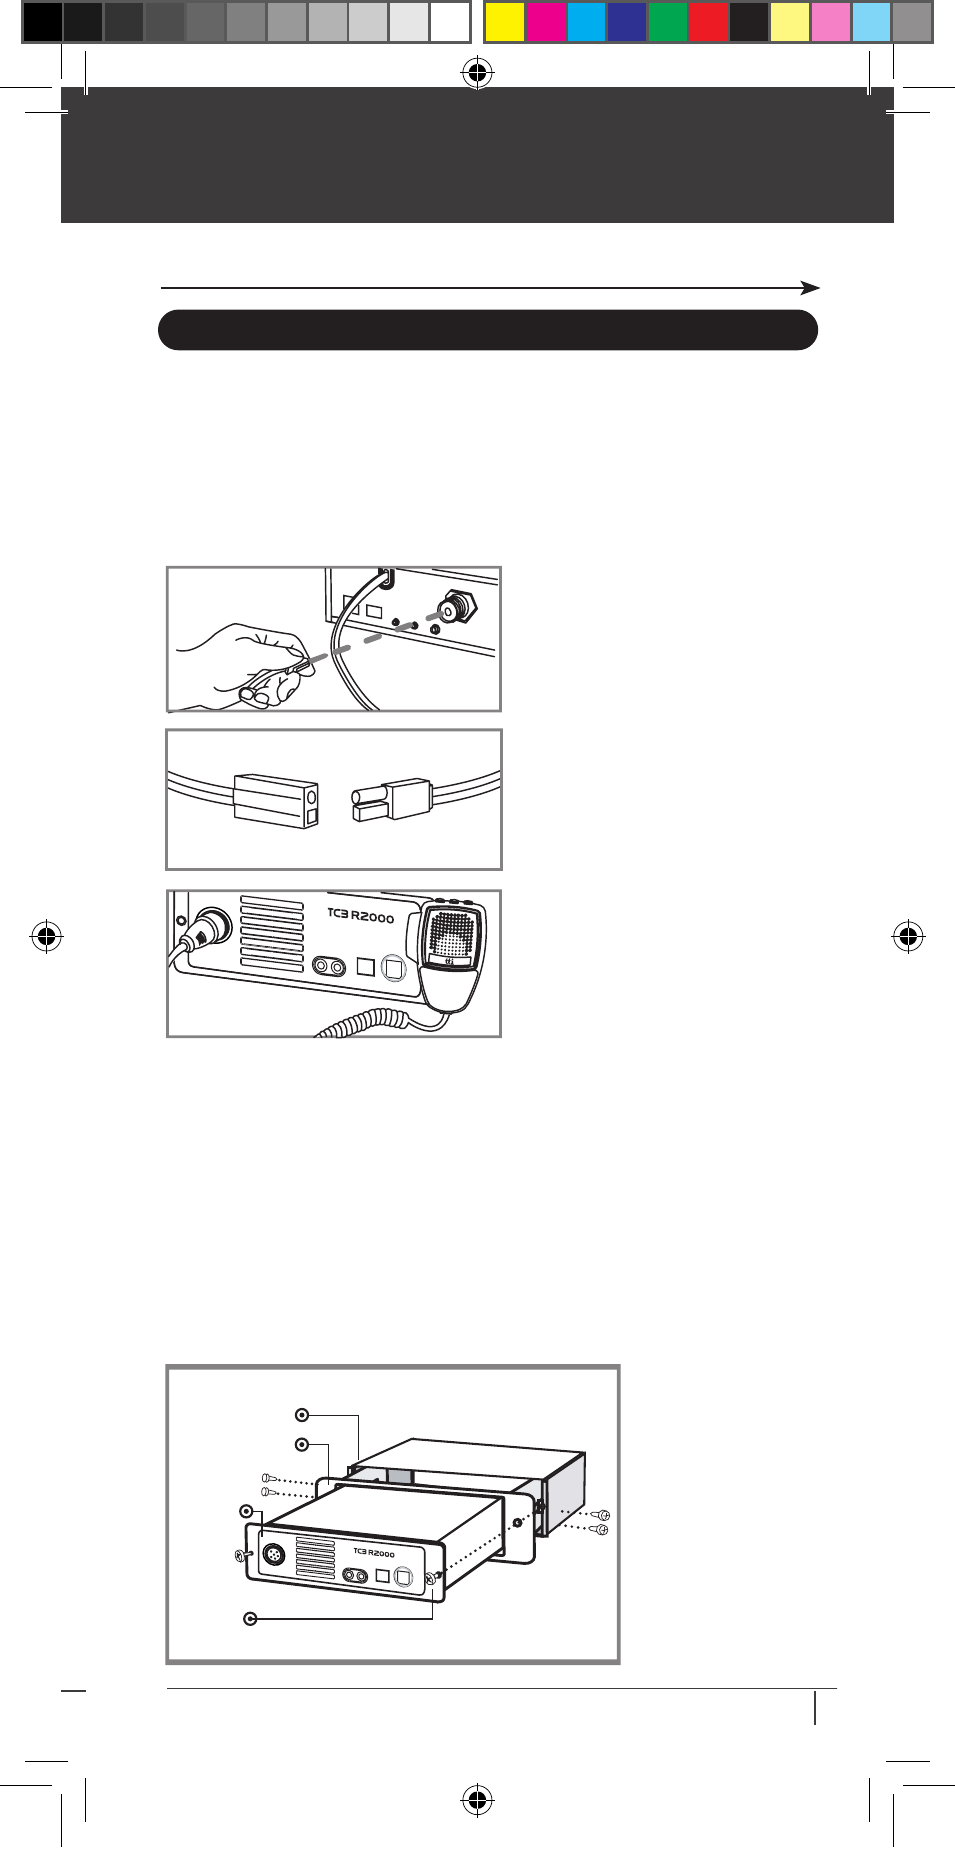
) Connect the antenna cable plug to
the standard receptacle on the trans-
ceiver, which is marked “ANT”.
4) Connect the power cable directly to
the vehicle battery or fuse box of the car.
Be careful to make sure of the polar-
ity of the battery first and connect the
cable.
(Red: Positive Pole(+), Black:Nega-
tive Pole(-). The same colors are shown
on the battery and in the fuse box of
the car.)
This transceiver is also designed to have the DIN size to be directly installed into the audio
compartment of your vehicle.
For this purpose, use the TTI supplied installation supporting DIN plates. All other con-
nections and installations are same as the above “Normal Installation Using Mounting
Bracket.”
- Installing into Audio Compartment
Introduction
Installation
- Normal Installation using Mounting Bracket
Plan the location of the transceiver and microphone first, which is most convenient for
the operation. The transceiver should normally be mounted horizontally, but may be
mounted vertically. The bracket supplied can be fitted above or below the case allowing
the TCB-R000 to be cradled by the bracket or suspended from it.
Consider that this location of the transceiver should not interfere with the driver and
passengers. Choose a spot where the microphone and all controls are easily accessible.
1) Install the Din-Body
plate into the audio com-
partment (center fascia) of
your vehicle.(Use the ready
made locking flaps.)a
) Set the transceiver in the
Din-Front plate, and insert
the transceiver in the Din-
Body plate.
) Fix the screws through
the transceiver, Din-Front
plate and Din-Body plate.
Din-Front Plate
Din-Body Plate
Screw
CB Radio
INSTALLING YOUR TRANSCEIVER AND MICROPHONE
3. Installation
5) Connect the power cable to the transceiver cable.
6) Mount the microphone bracket on one side of the transceiver, or near it using two
screws included.
7) Connect the microphone to the transceiver’s microphone receptacle.
TCBR2000 man_reized.indd 5
2011.3.14 5:34:18 PM