Transferring data to media x-change pro – Kanguru Exchange Pro User Manual
Page 9
Kanguru Media X-Change Pro 1.8”
- 9 -
3.
Transferring Data to Media X-Change Pro
Basic Operation
1. Connect the power cable to the back of the device and charge the battery
for 4 hours before using.
2. Press and hold the power button for 2 seconds to turn on the device.
3. Insert a flash card into the appropriate card reader slot. The LCD will
display an icon representing the type of flash card you have inserted.
4. Press the “COPY” button to begin copying your flash card to the internal
hard drive.
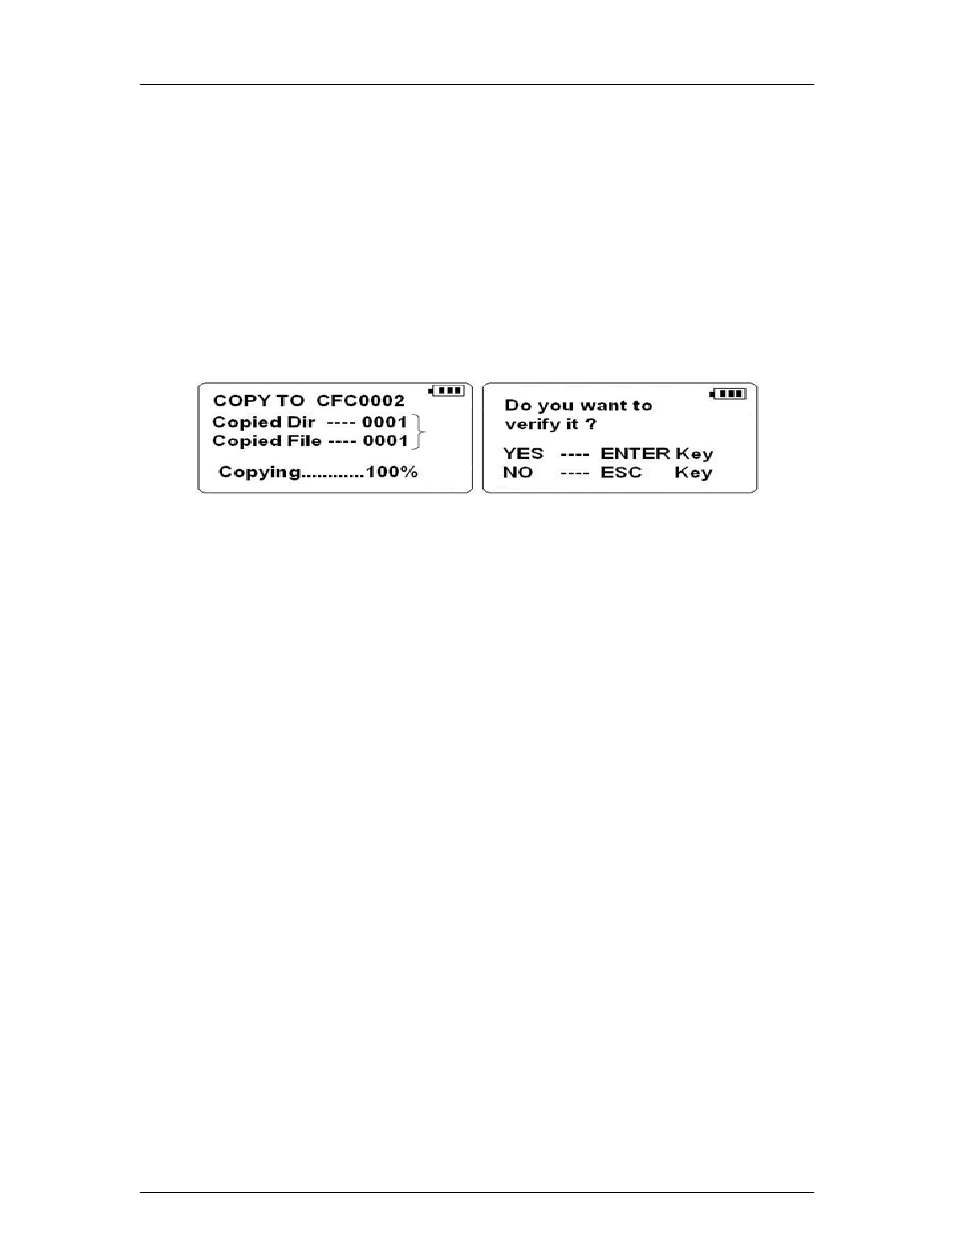
5. A 100% message will indicate the transfer is complete. You will then be
asked if you would like to verify the transfer. Press OK to verify, or Esc to
skip this process.
6. The files have now been transferred from your flash card to the internal
hard drive in the Kanguru Media X-Change. To view or transfer the file on
a PC, you will need to connect it using the included USB2.0 cable. Please
see the Downloading Files to a PC for detailed instructions.
Important Notes:
• The Kanguru Media X-Change Pro must be charged for 4 hours before
using for the first time.
• Do not attempt to copy more than 1 flash card at a time to the Media X-
Change Pro.
• All files transferred are stored onto the hard drive in folder numerically
ordered. For example, your CF card will create the following folders;
CFC0001, CFC0002, CFC0003, and so on. If you copy the same card
twice, then you will create two separate folders.
• To stop a transfer, press and hold the ESC button. The LCD will display
“COPY STOP” and you can press ESC again to return to the main screen.