Parts and functions, Hardware setup – Kanguru Copy Dock User Manual
Page 6
6
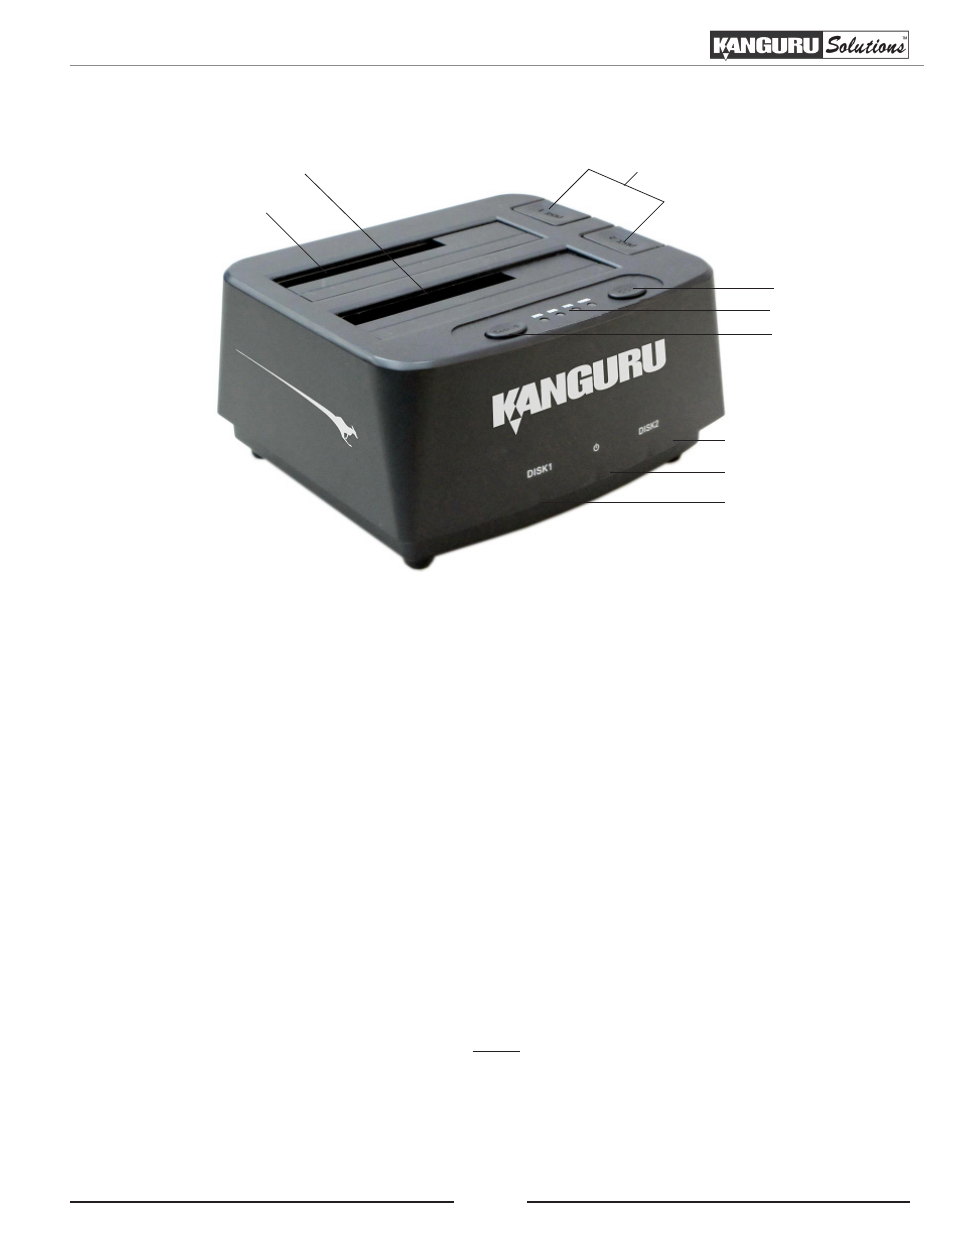
1.4 Parts and Functions
Disk 1 / Source Drive Bay
Disk 2 / Target Drive Bay
Disk Eject Buttons
Clone button
LED indicator
Backup button
Disk 2 activity indicator
Disk 1 activity indicator
Power indicator
1.5 Hardware Setup
1. Place the Kanguru Dock on a flat surface where there is proper ventilation. Avoid using the
Kanguru Dock in environments with high temperatures or extreme humidity.
2. Use the provided power adapter to connect your Kanguru Dock to a power outlet.
3. You are now ready to begin using your Kanguru Dock.
Things to remember
• Make sure that sufficient power is supplied to the Kanguru Dock. Incorrect power may cause
faulty operation.
• The Kanguru Dock supplies power to connected drives. There is no need to connect an external
power source to the drives. The unit can supply up to 1.5A at 12V and up to 1A at 5V to each
drive.
• It is OK to connect and disconnect drives while the Kanguru Dock is powered on. However, do
NOT connect or disconnect drives while any operation is running or if there are applications
accessing the drives.
• Connect all Master and Target hard drives before you execute an operation.
• We strongly advise that you make a data backup before attempting the cloning process in case
of a power failure during the cloning process. The manufacturer can’t accept the responsibility
for the loss of data or the misuse of the device.
• You must have permission from the copyright owner if you are duplicating copywritten material
to avoid violating the law.
Parts and Functions / Hardware Setup