Ivoclar Vivadent IPS e.max Abutment Solutions Cem Kit v.3 User Manual
Page 9
9
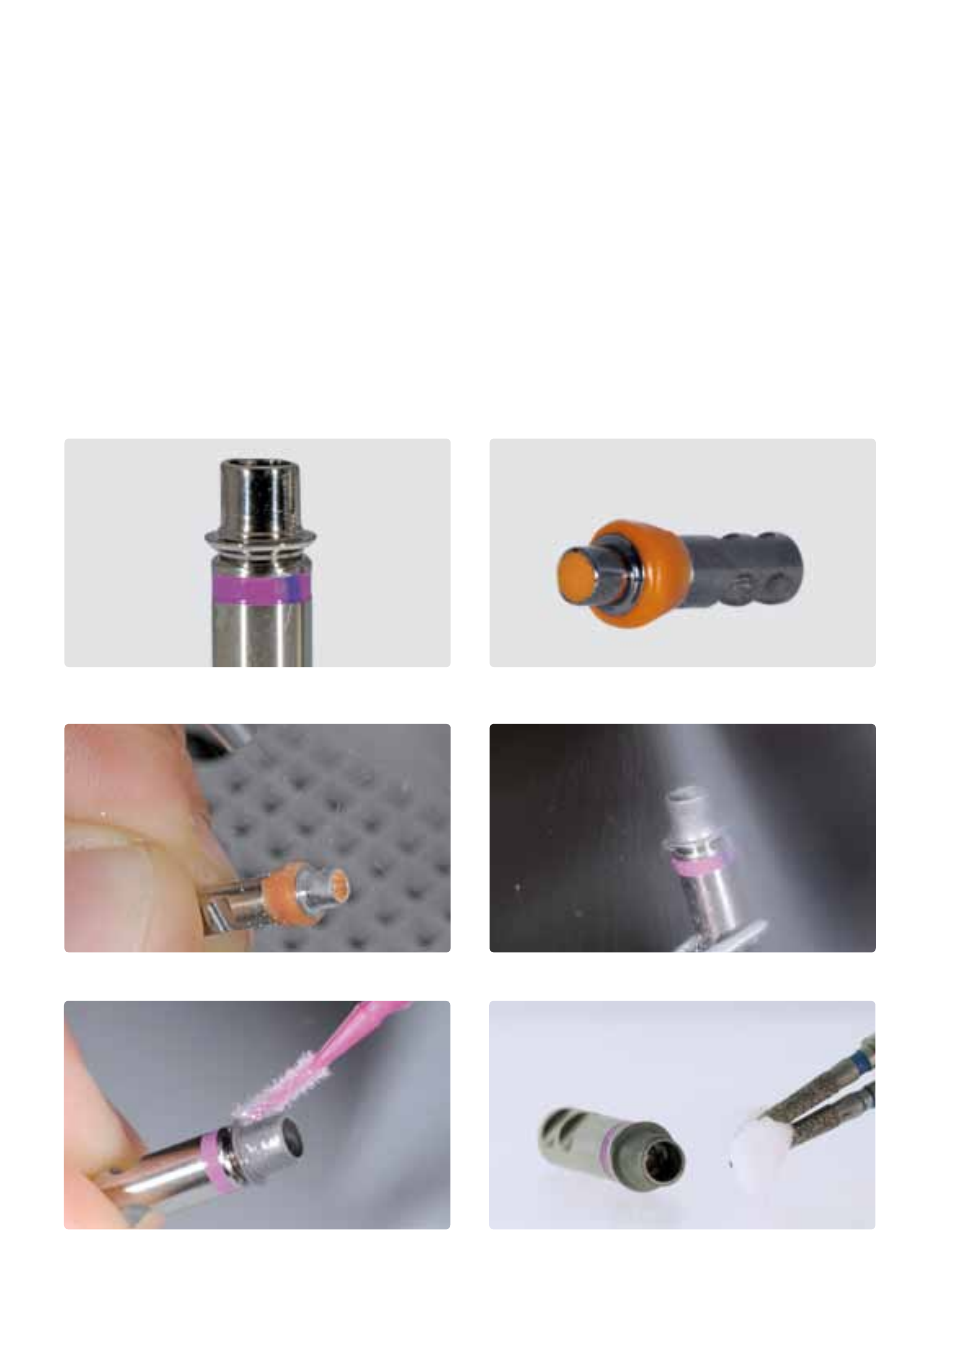
Screw Ti base onto a model analog. Mark the relative position to the
meso-structure.
Carefully blast the bonding area with Al
2
O
3
(50–100 µm) at low pressure
until an even mat surface has been achieved.
Apply wax to protect the emergence profile. In addition, seal also
the screw channel with wax.
Clean with an instrument and steam cleaner. Make sure that any
wax residue is carefully removed.
Apply Monobond Plus on the cleaned bonding surface and allow to react for
60 seconds. After the reaction time, dry the remaining residue with water-
and oil-free air.
Seal the screw channel with a foam pellet or wax.
Make sure that the bonding surface is not contaminated.
– Place the meso-structure on the Ti base and mark the relative position of the components. This facilitates locating
the correct position when the parts are assembled at a later stage.
– The emergence profile of the Ti base must not be blasted or modified in any way. To protect the emergence pro-
file, hard modelling wax is applied, as this material can be easily removed later on.
– Seal the screw channel with wax.
– Carefully blast the bonding area with Al
2
O
3
(50–100 µm) at low pressure until an even mat surface has been
achieved.
– Clean with an instrument and steam cleaner. Make sure that any wax residue is carefully removed.
– After cleaning, any contamination of the bonding surface must be prevented, since contaminations negatively
influence the bond.
– Apply Monobond Plus on the cleaned bonding surface and allow to react for 60 seconds. After the reaction time,
dry the remaining residue with water- and oil-free air.
– Seal the screw channel with a foam pellet or wax. Make sure that the bonding surface is not contaminated.