Maintenance and cleaning – Ivoclar Vivadent Quick User Manual
Page 13
13
This chapter describes the user maintenance and cleaning
procedures. All other tasks must be performed by qualified
service personnel at a certified Ivoclar Vivadent Service Center.
7.1 Monitoring and maintenance
The time for these maintenance procedures depends on the fre-
quency of use and the working habits of the users. For that rea-
son, the recommended times are only approximates.
Disconnect power before maintenance and cleaning,
since there is a risk of electrical shock.
This apparatus has been developed for typical use in the
dental laboratory.
If the product is used in a production facility, for industrial appli-
cations, or in continuous firing operation, premature ageing of
certain spare parts have to be expected.
These spare parts are e.g.:
– Heating muffle
– Insulation material
– Lamps
These spare parts are not covered by the warranty.
Please also observe the shorter service and maintenance
intervals.
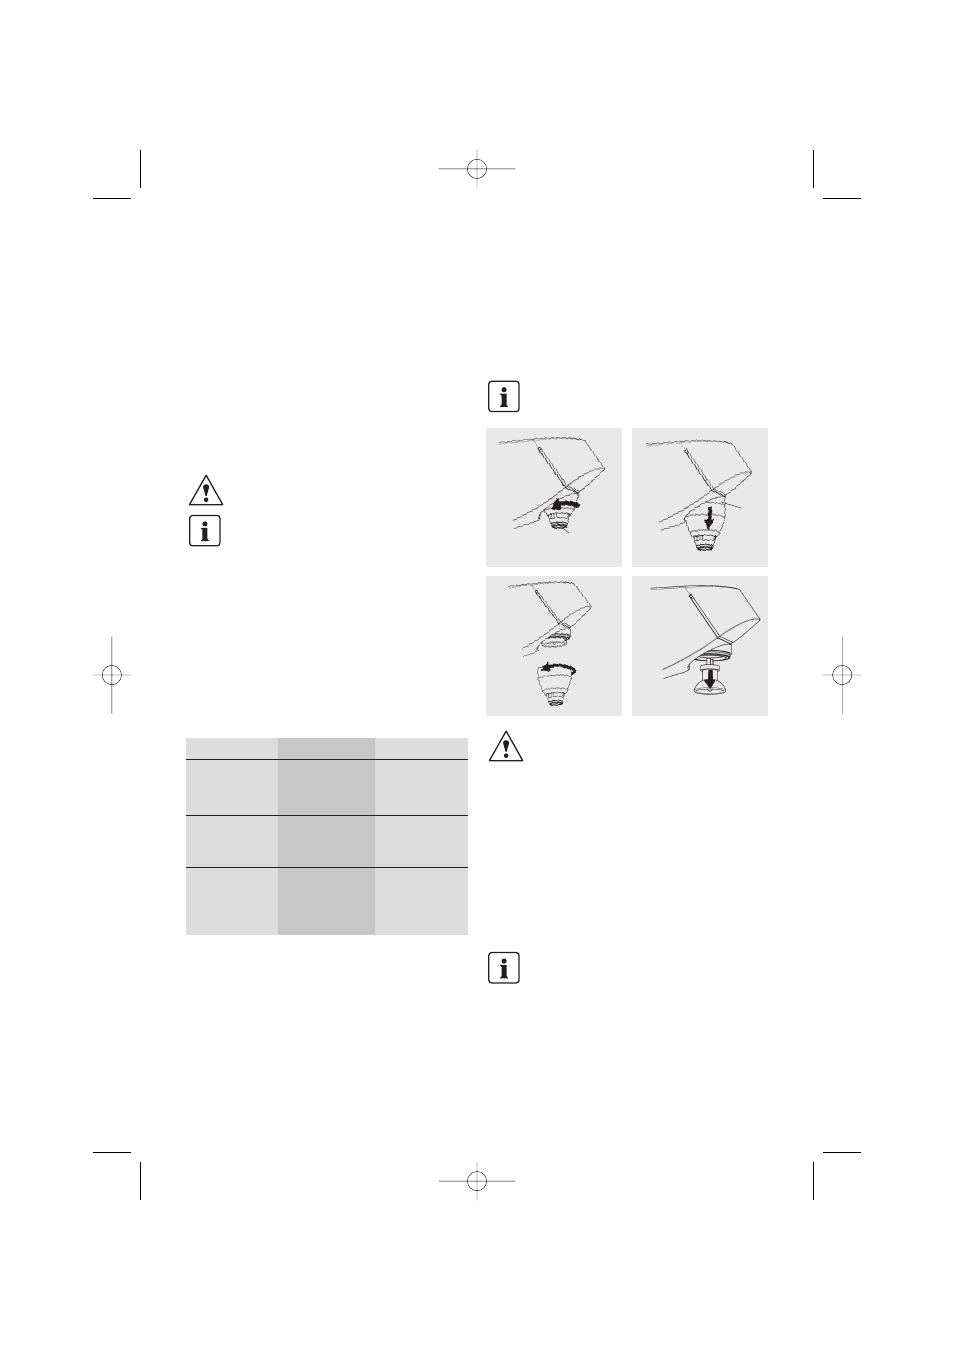
7.2 Changing the lamp
Defective lamps can be exchanged as follows:
Use only original Ivoclar Vivadent lamps (see Chapter 9)
Allow the lamps to cool before
changing them
1. Disconnect power cord (17)
2. Remove anti-glare shield (3) from its holder (4) (see Chapter
4.3)
3. Completely open the swivel arm (18)
4. Turn protective cap (11) 20° to the left (bayonet catch) (Pic-
ture A)
5. Pull down protective cap (11) with its holder (13) until it
stops (Picture B)
6. Unscrew protective cap and remove it from its holder (Picture
C)
7. Remove defective lamp from its socket (12) (Picture D)
8. Insert contact pins (10) of the new lamp (9) into the lamp
socket (12)
Do not touch the lamp. Hand sweat may damage the
lamp. (Use gloves)
9. Screw-on the protective cap (11)
10. Push up the part until only the protective cap (11) is
visible.
11. Turn protective cap 20° to the right (bayonet catch)
12. Reassemble anti-glare shield (3) (see Chapter 4.3)
7. Maintenance and Cleaning
What
Check power
connection for
correct fit
Clean sensor
surface with a dry
cloth
Check light per-
formance with a
suitable device
(e. g. Heliotest)
Part
Power plug
Sensor surface
Lamp
When
weekly or
if required
weekly or
if required
Every six months
or if required
A
B
C
D
20
°
11
13
Quick-BA-5spr.qxd 9.8.2006 7:28 Uhr Seite 13