Groth 2000A User Manual
Page 15
15
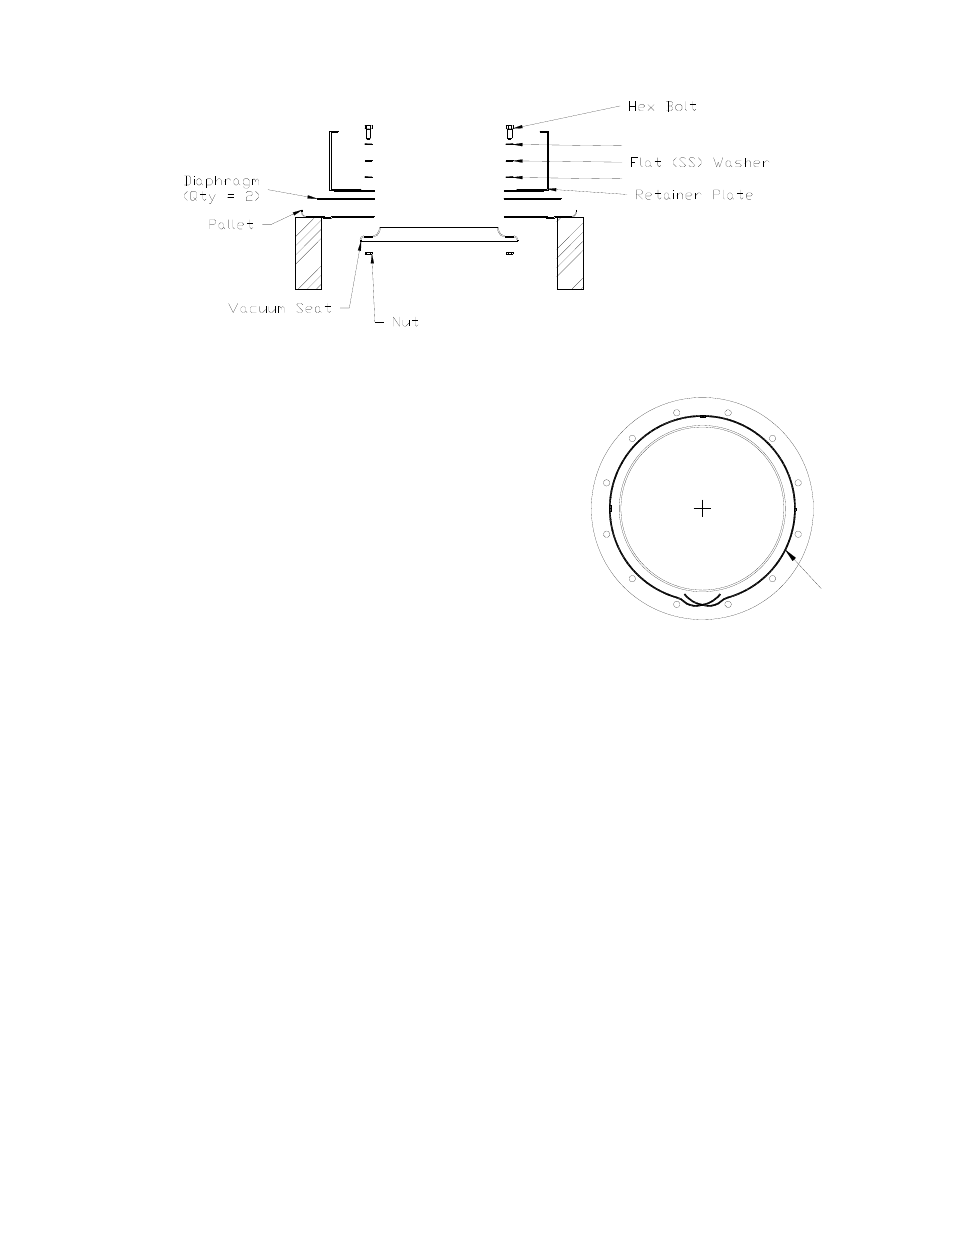
Figure 17 : Sealant tape on Vacuum Seat
4. Place retainer plate [3], align with pallet hole pattern.
5. Apply PTFE sealant tape around the inside hole pattern
of the vacuum seat [18] (Figure 17). Tape should be at
least 1/16” thick. Note: Other sealants (such as Silicone)
can replace the Fluoropolymer tape if compatible with
tank products.
6. Position the vacuum seat [18] as shown from beneath
the pallet.
7. Align vacuum seat with pallet and insert 4 bolts (at 90
degrees from each other) from the top using fasteners
shown in Figure 16 [7, 19, 20, 21].
8. Insert four more bolts, leaving four holes, at 90 degrees
from each other, open. The weatherhood posts are
installed in these holes.
9. Turn pallet assembly right side up, and place on support blocks again.
10. Run 3/8” hex nut up 1 1/2” from end on all thread and insert weatherhood posts [27] in remaining
holes. A Fluoropolymer washer, flat washer and nut are installed from the bottom. Allow
approximately 2 threads pass the nut to be free. The four weatherhood posts should all extend
approximately 11.13” above the pallet.
11. Lower the weight plate [29] (if needed for setting).
12. Set the hinge [4] above the weight plate, and insert the bolts [7, 8, 32]. Tighten.
13. Use a sealant tape around the inner edge of the weight plate. Note: Other sealants (such as Silicone)
can replace the Fluoropolymer tape if compatible with tank products.
14. Insert the waterdam [28] using the weatherhood posts [27] as a guide. Use sealant tape on bottom
side, outside of its hole pattern. Tighten nuts. Note: Do not over-tighten. It is suggested to first
hand tighten the nuts, torque 12 to 15 ft-lbs in an alternating criss-cross pattern.
15. Insert the spacers, and the stem guide [17]. Tighten nut to retain to pallet assembly.
Figure 16: Exploded View of Pallet Assembly (Upside Down)
Fluoropolymer Washer
Fluoropolymer Washer