Grip Factory Munich GF-9 User Manual
Page 5
GF-9 Crane System Instruction Manual
Page: 4
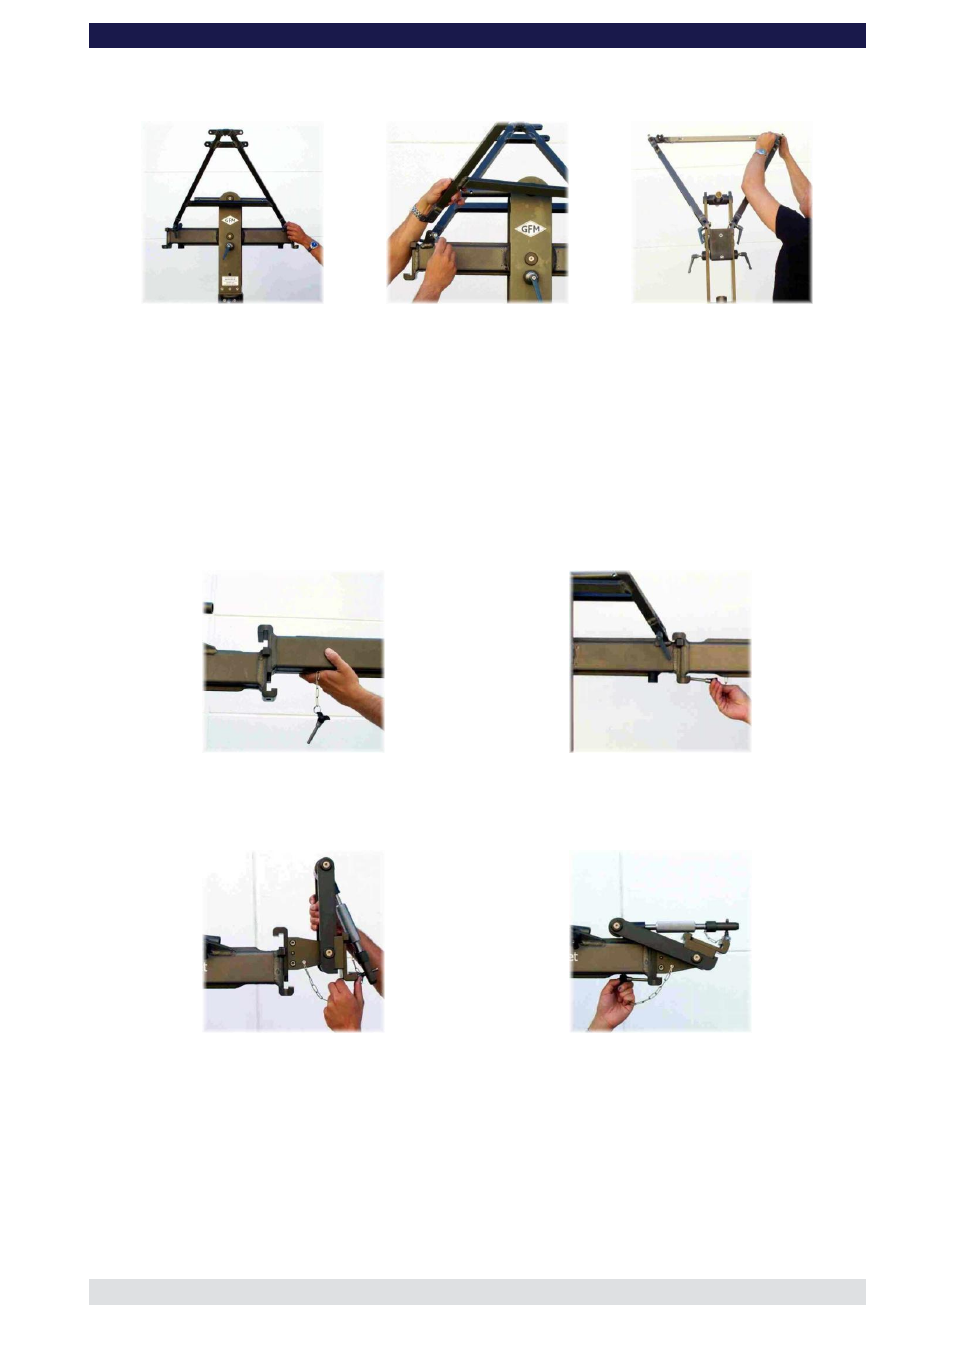
5.
Connect the 2 sections of the rigging harness to the middle section of the GF-9 and
lock securely with the 4 locking levers..
Rigging harness
assembly
6.
Connect the cross bar to stabilize the rigging harness. Ensure that the 2 locking pins
are inserted fully.
7.
Depending on the version being assembled, connect the 100cm section or the 150cm
section (this particular section has 4 connections for rigging rods) to the middle
section. Slip the connection flanges into each other and secure with the provided
safety pin.
Tip:
To avoid the sections jamming or getting stuck make sure that the sections
are joined parallel. Using a small amount of lubricant also helps. We suggest rubbing
the joints with an oiled.
Mounting an extension arm
Securing the arm with a safety pin
8.
Connect the angle adjuster to the end of the 100cm or 150cm section and secure it
from the inner side of the angle adjuster with the provided safety pin.
Mounting the angle adjuster
Securing it with a safety pin
9.
Connect the turnbuckles to the rigging harness. Depending on the rear length being
used, now connect the 4 rigging rods to the turnbuckles and in turn to the rigging rod
connections on the rear extension securing with the safety pins. Hand tighten the rods
by turning the turnbuckles until the rods are taut, then secure the turnbuckles with the
locking nuts.