Intake and discharge locations, Service clearances and access panel locations, Changing the discharge location – Greenheck MiniVent (459023) User Manual
Page 4
Energy Recovery Ventilator
4
®
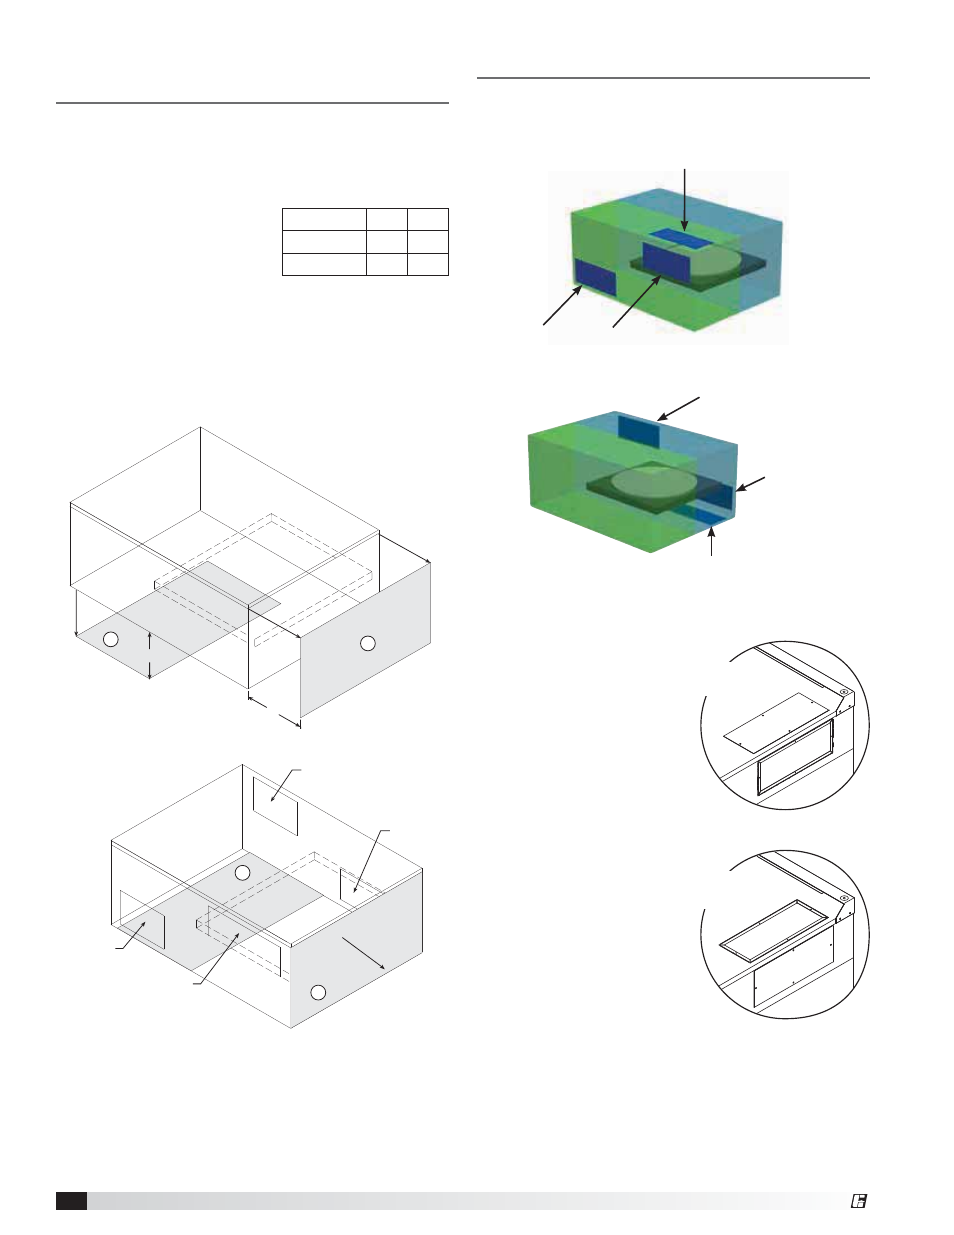
Changing the discharge location
Step 1
-
Remove the
metal cover for optional
intake by unfastening the
four sheet metal screws
holding it in place.
Step 2 - Hand bend
flanges out to form a
duct collar in the newly
uncovered intake opening.
Step 3 - Hand bend
flanges in on original intake
and replace metal cover
removed in Step 1.
Intake and Discharge Locations
Intake and discharge locations are shown. Both intake
locations are capable of being field relocated to suit
installation needs (see optional locations).
Discharge
Side “B”
Intake
Side “B”
Intake Side “B” (optional)
Intake Side “A” (optional)
Discharge
Side “A”
Intake
Side “A”
Intake Duct
Collar
Intake
Cover
Service Clearances and Access
Panel Locations
Access Panel Locations
1. • Outdoor and exhaust fans and motor
• Electrical connection
2. • Energy wheel cassette
• Internal filters
A
B
1
2
Discharge
Side “B”
Cassette
Slides Out
1
2
Intake
Side “B”
Discharge
Side “A”
Intake
Side “A”
Recommended Service Clearances
The MiniVent requires minimum clearances to perform
routine maintenance, such as filter replacement, energy
wheel cassette and fan inspection. Fan and motor
assemblies, energy recovery
wheel cassette and filter
sections are provided with
a service door or panel for
proper component access.
MiniVent
A
B
450
25
15
750
31
21
All dimensions are in inches.