Connect to a desktop computer, Connect to the projector, Side panel – Genee World GV-6100 User Manual
Page 6: Rear panel
Projector
RGB
Input
Screen
RS232
Cable
Side Panel
MIC
PROJECTOR
USB
RGB IN
AUDIO IN
RS232
PROJECTOR
Rear Panel
S-VIDEO
OUT
AUDIO VIDEO
OUT
AUDIO
AUDIO VIDEO
IN
S-VIDEO
IN
AUDIO IN
OUT -COMPUTER- IN
OUT-12V- IN
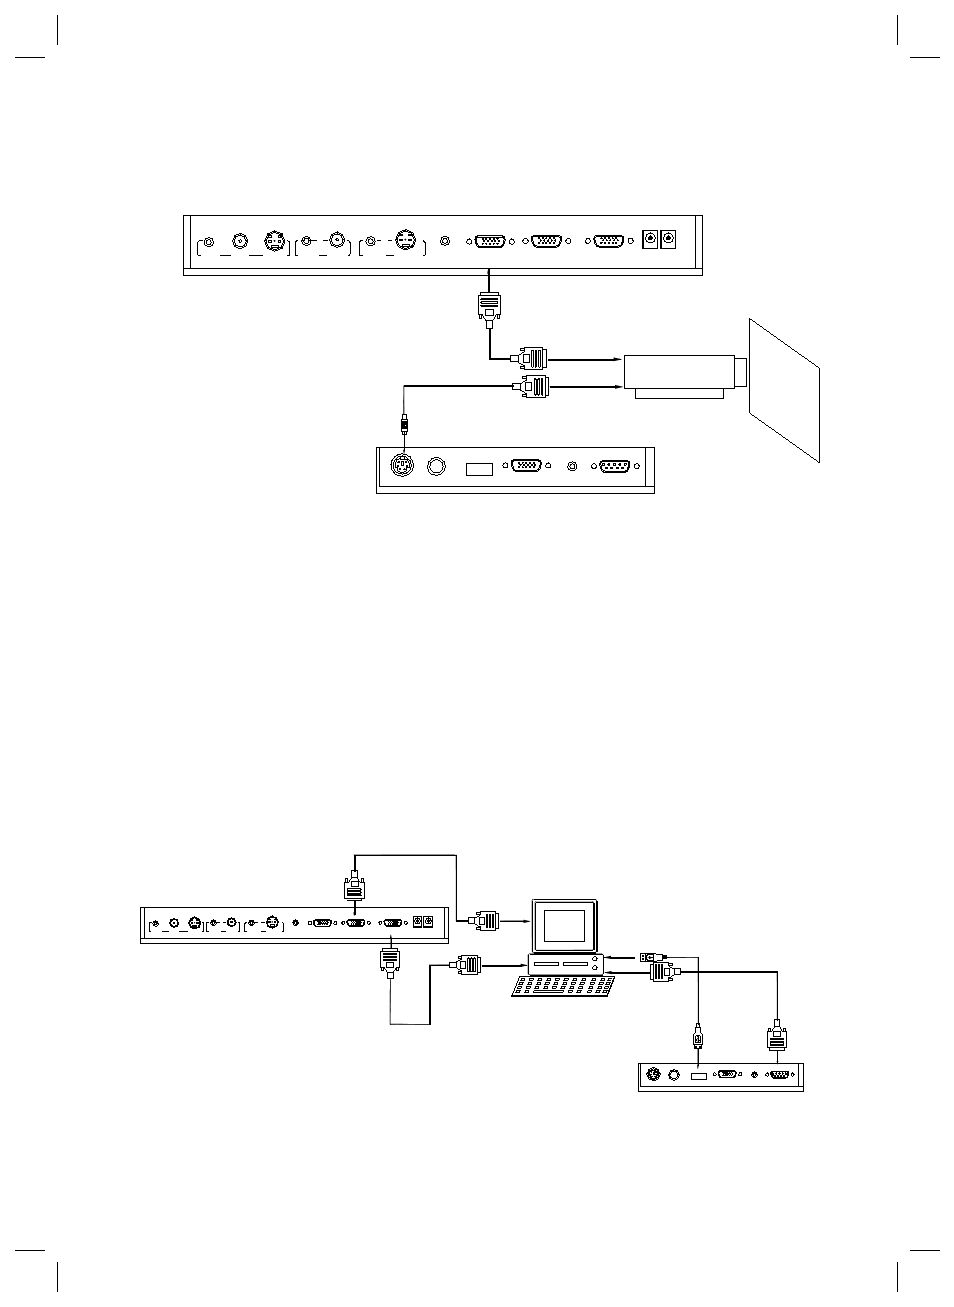
Connect visualiser’s PROJECTOR port to the RGB IN port of the projector port with the RGB cable
provided together the visualiser.
If you need control a projector with the visualiser, please use the projector RS232 cable (6-pin to
9-pin) to make the connection between the projector and the visualiser. Some projector models
may require a converter cable in addition to this standard RS232 cable to connect to the projector
control port, for the pin locations and shape of some projectors’ control port connector may be
different from the connector of a standard RS232 cable. After the visualiser is connected to the
projector, you can control projector’s power on, standby and input selection with the visualiser.
(For projectors other than Hitachi, the Code Writing program that comes with the visualiser is
required for this function.)
5
: Connect to a desktop computer.
4
: Connect to the projector.
AUDIO
IN
S-VIDEO
OUT
OUT
VIDEO
AUDIO VIDEO
Video equipment
S-Video out
Audio out
Audio input
(or amplifier/speaker equipment)
Projector
S-Video Cable
S-VIDEO
AUDIO
IN
PROJECTOR
Rear Panel
AUDIO IN
OUT-12V- IN
OUT -COMPUTER- IN
RS232
Cable
MIC
PROJECTOR
Computer
USB
RGB IN
AUDIO IN
RS232
Side Panel
RGB Output
To the
Monitor
USB Connector
AUDIO IN
OUT
AUDIO VIDEO
OUT
VIDEO
AUDIO
S-VIDEO
IN
S-VIDEO
AUDIO
IN
PROJECTOR
OUT -COMPUTER- IN
OUT-12V- IN
Rear Panel
Note: You can connect a laptop computer to the
RGB IN port of side panel with a RGB cable.