Installing the new microphone assembly – GAI-Tronics 12521-002 Microphone Assembly Replacement Kit for 293 & 294 Series Phones User Manual
Page 2
Pub. 42003-224A
M
ODEL
12521-002
M
ICROPHONE
A
SSEMBLY
R
EPLACEMENT
K
IT
Page:
2 of 2
09/09
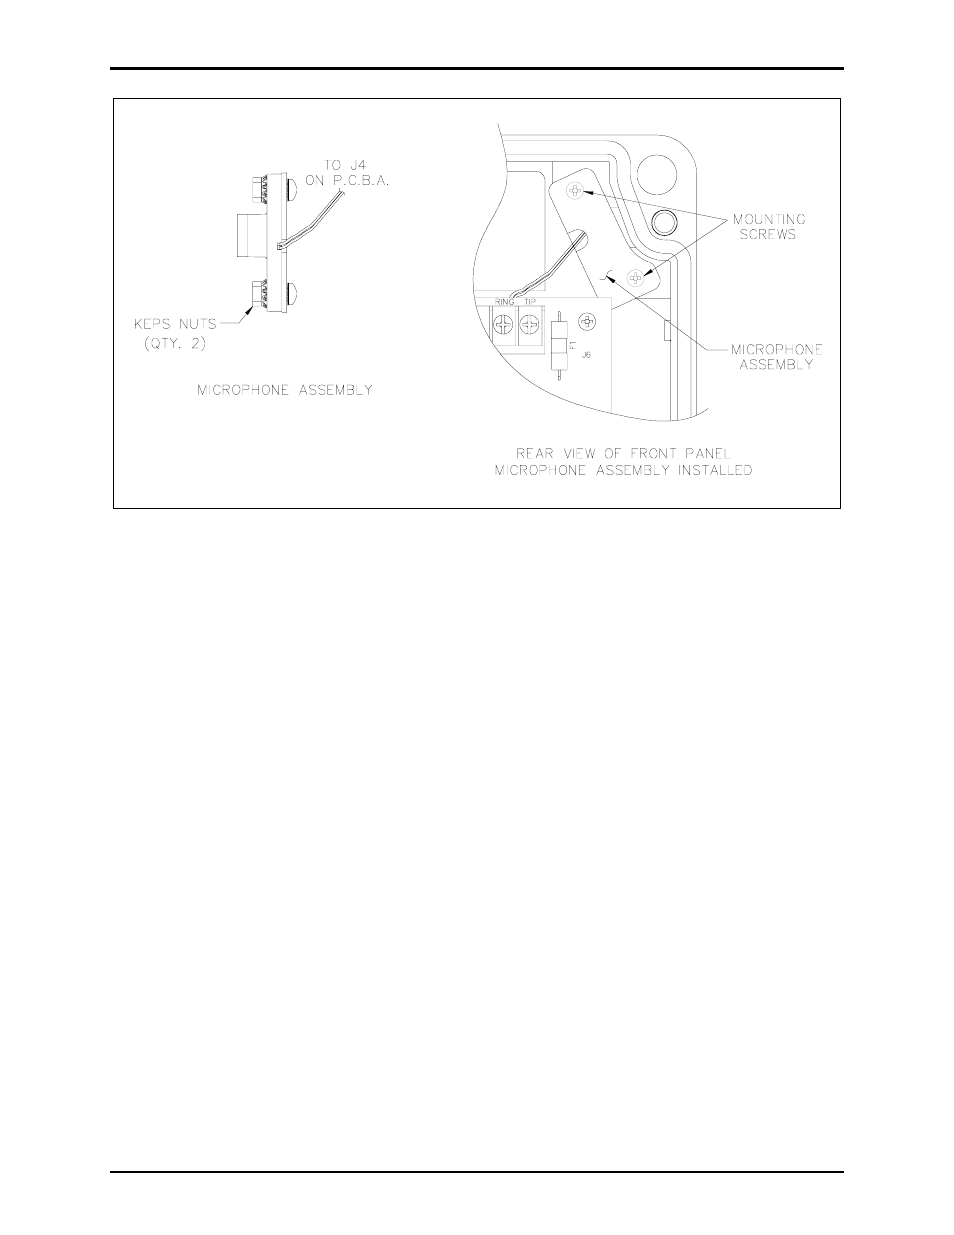
Figure 1. Microphone Assembly
Installing the New Microphone Assembly
Refer to Figure 1.
1. Remove the two Keps nuts holding the new microphone assembly together. These nuts are for
shipping purposes only and are not used in the phone. Keep the two Phillips head screws. These will
be used to mount the new microphone assembly to the phone.
2. Position the microphone in the front panel as shown in Figure 1 and use the screws from step one to
mount the microphone in place. Make sure the wires from the microphone are not pinched by the
pressure plate as you tighten the screws.
3. Route the microphone wires under the PCBA and plug the microphone connector into J4.
4. Using the supplied tie wrap re-anchor the speaker, hookswitch, and microphone wires to the tie
anchor.
5. Reconnect all field wiring as noted in step 1 of the “Removing Old Microphone Assembly” section.
6. Place the front onto back box, tighten the tamper-resistant screws, and make a test call from the unit.
N
OTE
: Installation of a new microphone may require the volume level to be readjusted. In this case, see
the unit’s original installation manual for adjustment instructions.