Installation procedure – GAI-Tronics 297-003RT4 Retrofit S.M.A.R.T. ADA-Compliant Emergency Phones User Manual
Page 6
Pub. 42004-355G
R
ETROFIT
ADA-C
OMPLIANT
S.M.A.R.T.
E
MERGENCY
P
HONES
P
AGE
5 of 17
f:\standard ioms - current release\42004 instr. manuals\42004-355g.doc
11/09
Installation Procedure
1. Remove the back box from the front cover.
2. Feed the telephone line through either the top or bottom cutout. Using
the bottom entry is recommended.
3. Re-install the back box.
4. The telephone line is equipped with a USOC RJ11C-type modular
connector. (An inline coupler is provided for use, if necessary.) Plug
the connector into the mating connector inside the enclosure.
5. If configuration changes are necessary, remove the back box, and
using the Setup section of this manual,
• Make hardware configuration changes. See the Hardware
Configuration section on page 7 for details.
• Adjust the audio levels if necessary. See the Audio Level
Adjustment section on page 8 for details.
• Perform the initial programming. See the Programming section
on page 10.
6. Verify operation by calling to and from another phone.
7. Complete the installation by attaching the front panel assembly to the
rear enclosure using the tamper-resistant screws.
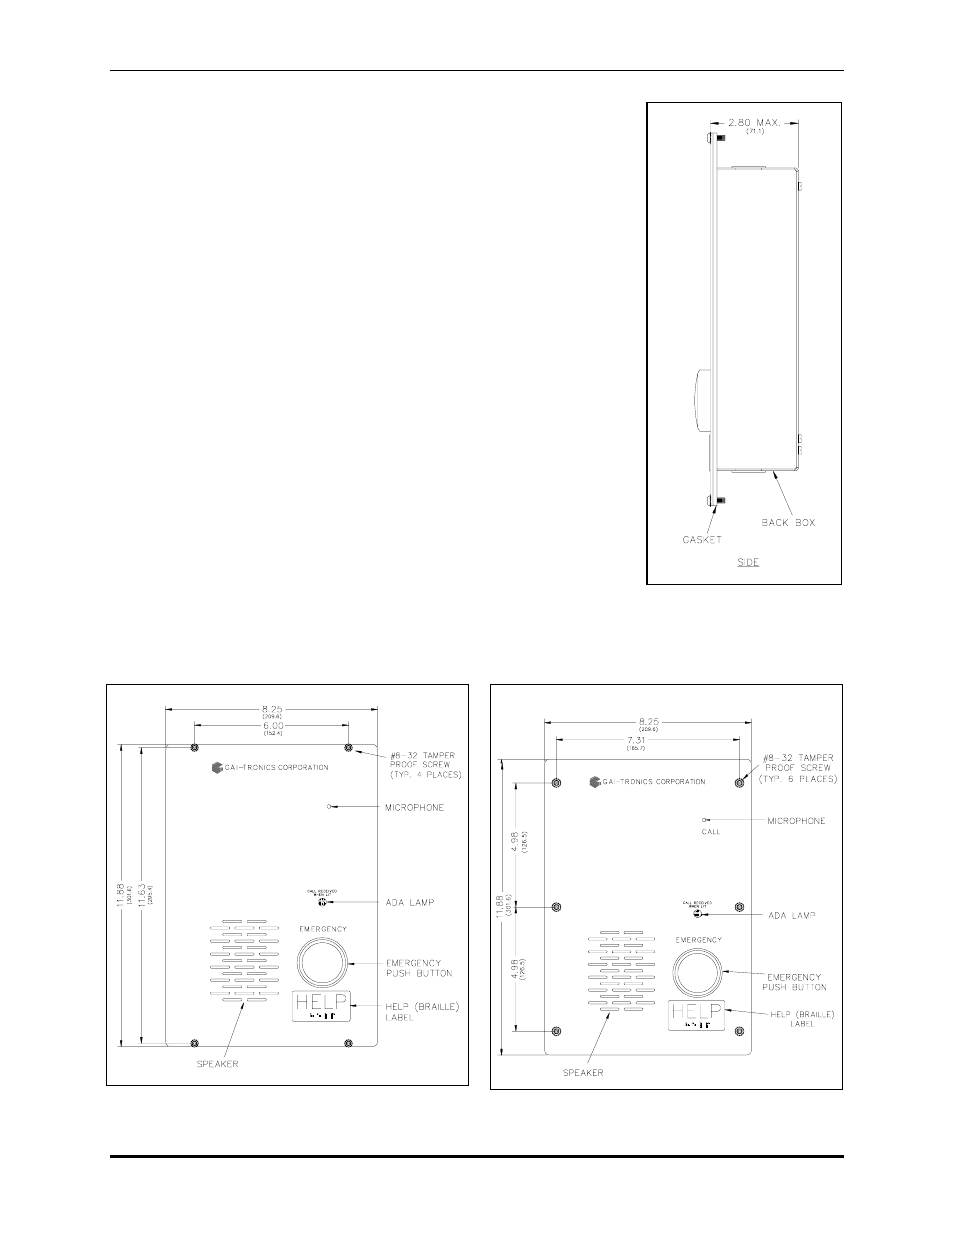
Figure 2. Model 297-003RT4
Figure 3. Model 297-003RT6
Figure 1. Typical Side View
of Telephone Assembly
- 297-003RT6 Retrofit S.M.A.R.T. ADA-Compliant Emergency Phones 298-003RT4 Retrofit S.M.A.R.T. ADA-Compliant Emergency Phones 298-003RT6 Retrofit S.M.A.R.T. ADA-Compliant Emergency Phones 297-003CB6 Retrofit S.M.A.R.T. ADA-Compliant Emergency Phones 298-003CB6 Retrofit S.M.A.R.T. ADA-Compliant Emergency Phones