DR Power Redi-Plow Plus (Sept. 2013 - Present) User Manual
Page 7
CONTACT US AT www.DRpower.com 7
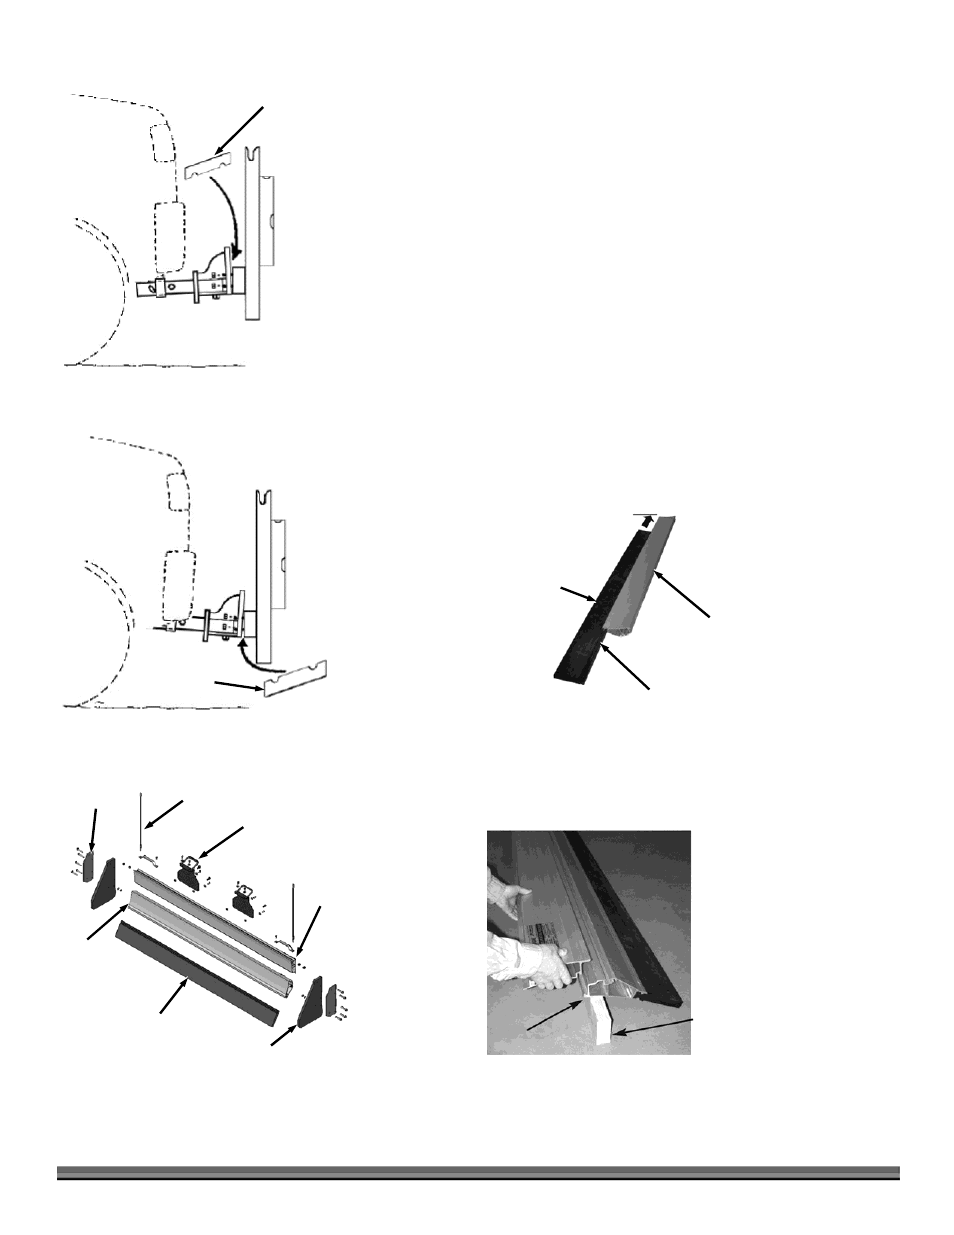
5. If the push frame leans towards front of vehicle. Shim at top pair of bolts
(Figure 5). If the push frame leans away from front of vehicle. Shim at
bottom pair of bolts (Figure 6).
WHEN SHIMMING IS COMPLETE – TIGHTEN ALL BOLTS.
6. Refer to exploded view components for plow blade parts before performing
next step (Figure 7).
Note: Rubber Blade should be room temperature before assembly.
7. Apply soapy water solution to channel areas of the Rubber Blade and bottom
section of Aluminum Blade where they will mate together (Figure 8).
8. Slide end of rubber edge with matching channel in bottom half of aluminum
blade and center on bottom half.
9. Turn bottom half of blade over and set it on wood blocks, one at each end as
shown (Figure 9). Take top half and connect tongue and groove joint with
bottom half. Slide top half until centered with bottom half of blade.
Shim Here
Figure 5
Shim Here
Figure 6
End Plate
Figure 7
Blade Marker
Slide Hinge
Top
Section of
Aluminum
Blade
Box End
Rubber Blade
Bottom
Section of
Aluminum
Blade
Rubber
Blade
Figure 8
Bottom Section of
Aluminum Blade
Apply Soapy
Water Solution
Use 2x4 to prop
bottom of Blade
up at both ends
Figure 9
Tongue and
Groove
Joint