Assembly & set up, Warning, Attach the handlebars – DR Power 6.0 HP Pro Power Wagon (June 2002 - January 2007) User Manual
Page 7
POWERWAGON
™
Safety & Operating Instructions
7
Assembly & Set Up
The DR
®
POWERWAGON
™
is shipped almost completely assembled. Please read the following
instructions to complete assembly.
Parts Bag Contents:
• (2) 5/16" x 1-1/2" bolts & lock nuts for the
handlebars
• (1) 1/4" x 1-1/4" bolt & lock nut for the shift
lever coupling
• (3) cable ties for the cable assembly
Attach the Handlebars
Tools Needed:
• (2) 1/2" open-end, box or socket wrenches
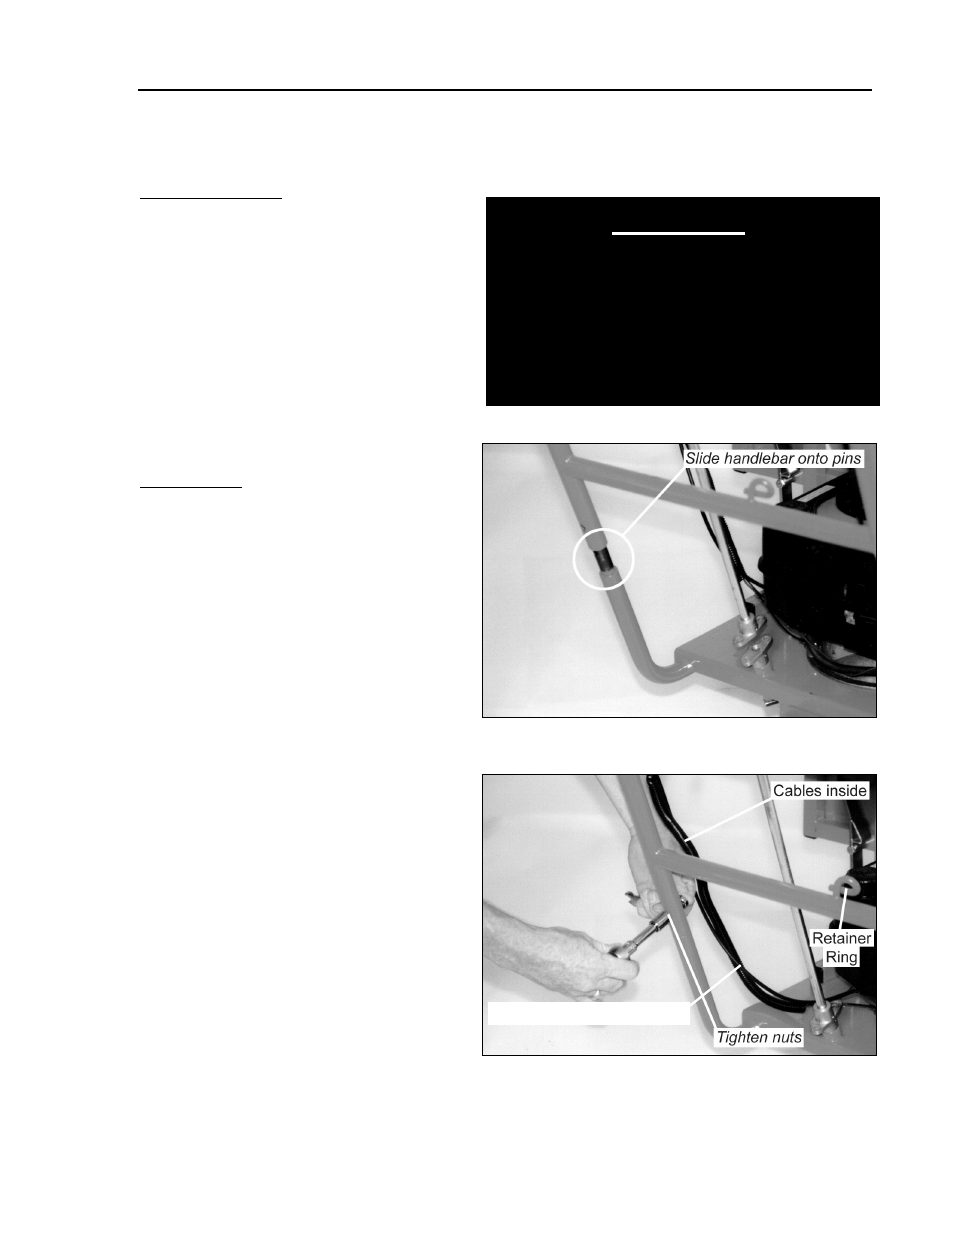
1. Remove the handlebar bolts (5/16" x 1-
1/2" long) and nuts from the parts bag.
2. Lift the handlebars out of the bed,
turning them to the right (clockwise)
into operating position, and slide them
onto the handlebar pins on the frame
(Figure 1). Be careful not to pinch the
control cables. Locate the cables on the
inside of the handlebars: the ignition
and throttle cables on the left (Figure
2), and the brake cable on the right
3. Push the handlebars all the way down
and insert the handlebar bolts from the
inside out. Tighten the nuts (Figure 2).
Use the cable ties as needed to snug the
control cables against the handlebars.
4. Pull the recoil/starter rope out slowly
and insert the rope through the curled
retainer ring on the handlebar crossbar
(Figure 2).
Figure 1
Figure 2
WARNING!
THIS MACHINE IS SHIPPED WITHOUT OIL!
TRACES OF OIL MAY BE IN THE RESERVOIR
FROM FACTORY TESTING, BUT YOU MUST
ADD OIL BEFORE STARTING THE ENGINE.
FILL THE RESERVOIR SLOWLY, CHECKING
THE DIPSTICK FREQUENTLY TO AVOID
OVERFILLING.
Cable tie harness to handlebar