DR Power Walk-Behind 11.50 fpt (August 2010 - Present) User Manual
Page 20
20
DR
®
LEAF AND LAWN VACUUM
Chapter 5: Vacuum Kit #284221
Tools Needed:
5/16" Wrench
7/16" Wrench
Short Flat Head Screwdriver
Wire Cutters
Utility Knife
1. Cut the Tape on the Box Flaps with a Utility Knife.
2. Remove the parts from the Box and lay them out on a flat clean area.
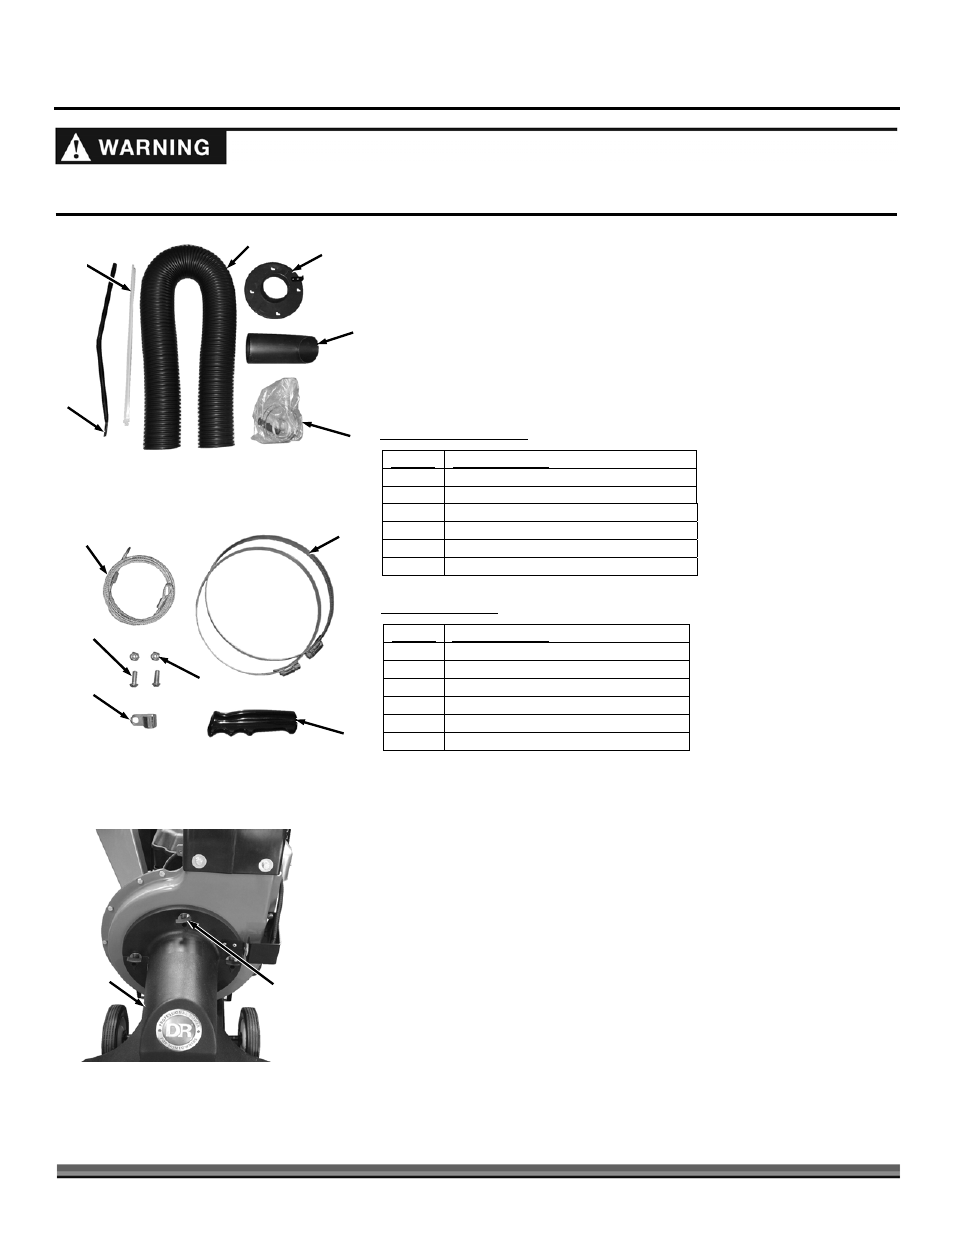
Shipping Box Contents (
Figure 29 and Table Below)
ITEM# DESCRIPTION
1
Hose, 6" Dia. X 8' Long
2
Adapter, Vacuum
3
Snout, Pick-up
4
Poly Bag
5
Cable Tie, 32"
6
Handle
Poly Bag Contents (
Figure 30 and Table Below)
ITEM# DESCRIPTION
1
Tether, Wire
2
Clamp, Hose, 6-1/8"
3
Grip, Handle
4
Guide, Cable
5
Screw, Machine, Rd Hd, 1/4-20 x
6
Nut, Nylon Lock, 1/4-20
Compare the contents of the Shipping Box and Poly with the “Contents” lists
above. If you have any questions please contact us at www.DRpower.com or call
1-800-DR-OWNER (376-9637) for assistance.
NOTE: Assembly should be done on a clean, level surface.
3. Unscrew the Hand Knobs and remove the Vacuum Snout from the machine
(Figure 31).
Figure 30
6
5
1
2
3
4
Figure 29
5
1
3
2
4
6
Figure 31
Hand
Knobs
Vacuum
Snout
Shut down the engine, remove the spark plug wire and wait 5 minutes for parts to cool before performing before installing the
Vacuum Kit.