DR Power Walk-Behind 11.50 fpt (August 2010 - Present) User Manual
Page 11
CONTACT US AT www.DRpower.com 11
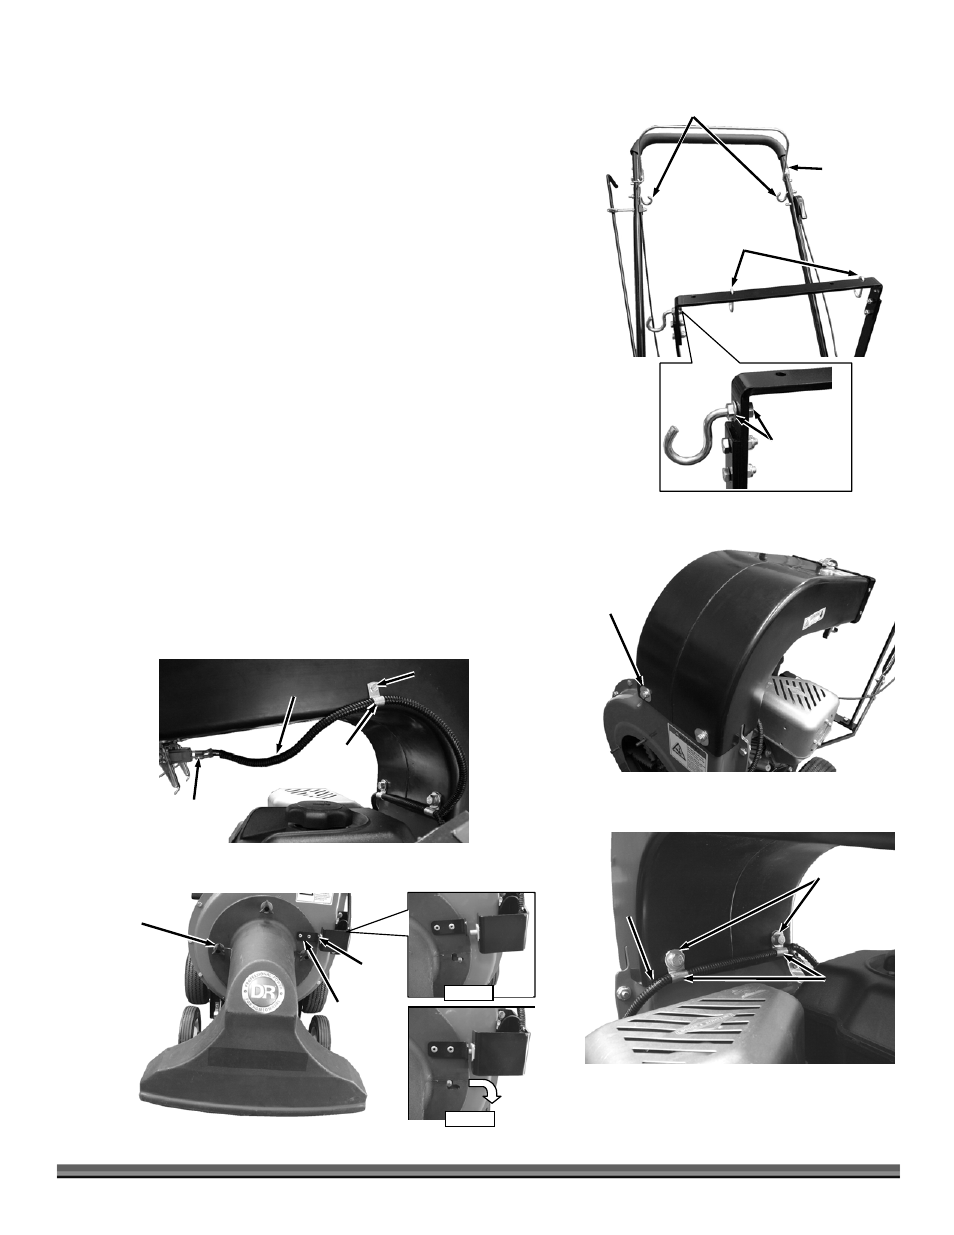
9. Locate the two Carabiners, three Bag Hanger Hooks and four 5/16-18 Wiz
Nuts included in the Bolt Bag. Mount the two upper Hooks through the
upper holes in the Handlebar Assembly with the Hooks on the inside
(Figure 11). Secure with a Wiz Nut on the outside of the Upper Handlebar.
10. Thread a Wiz Nut onto the one remaining Hook as far as it will go on the
threads so that the flat side of the Nut is facing away from the Hook (See
detail).
11. Insert the Hook into the right side of the Bag Hanger Frame and secure with
a Wiz Nut.
12. Install the two Carabiners onto the Bag Hanger Frame with wider side down
and clip facing the rear of the machine.
13. Place the Plastic Discharge Tube on top of the Housing (Figure 12). Be sure
the discharge opening is directed to the rear of the machine and between
the Handles. Secure the Tube to the front of the Housing with two 5/16”-18
x 5/8" Bolts, Lock Washers and Fender Washers.
14. Secure the Tube and two Safety Wire Harness Cable Clamps to the rear of
the Housing with two 5/16”-18 x 5/8" Bolts, Lock Washers and Flat Washers
(not fender washers) (Figure 13).
15. Connect the Safety Harness onto the Terminals of the Bag Safety Switch
(Figure 14) and secure the Cable Clamp to the hole in the side of the Plastic
Discharge Tube with the Self Tapping Screw using a 5/16" Wrench.
16. Place the Vacuum Snout onto the front of the Housing (Figure 15) so the
studs are located in the right hand side of the lower slots (Detail A). Slide
the Snout to the right and down so the Plunger Bracket on the Snout
pushes the Safety Switch in (Detail B). Install four 5/16-18 Hand Knobs
with Fender Washers onto the studs to secure the Vacuum Snout.
Plastic Discharge Tube
Figure 13
Bolt, Lock
Washer and
Flat Washer
Safety Switch
Harness
Cable
Clamps
Carabiner
Figure 11
Bag Hanger Hook
with Wiz nut
Bag Hanger
Hook with
Two Wiz nuts
Upper
Handlebar
Plastic
Discharge
Tube
Figure 12
Bolt, Lock
Washer and
Fender
Washer
Housing
Plunger
Bracket
Figure 15
Detail A
Safety
Switch
Detail B
Vacuum
Snout
Hand
Knobs
Safety Switch
Harness
Figure 14
Safety Switch
Terminals
Cable
Clamp
Screw
Plastic
Discharge
Tube