Removing the mow-ball, Support assembly – DR Power Self-Propelled 6.75 (2004 - September 2010) User Manual
Page 35
CALL
TOLL-FREE
1-800-DR-OWNER 31
Removing the Mow-Ball
™
Support Assembly
BEFORE PERFORMING ANY MAINTENANCE PROCEDURE OR INSPECTION, STOP THE ENGINE, WAIT FIVE (5)
MINUTES TO ALLOW ALL PARTS COOL. DISCONNECT THE SPARK PLUG WIRE, KEEPING IT AWAY FROM THE
SPARK PLUG.
Tools Needed: You will need the Head Locking Tool supplied with your DR TRIMMER/MOWER or a #3
Phillips head screwdriver with at least a 6" shank. We recommend wearing Gloves when
tightening or loosening the Mow-Ball
™
Support Assembly.
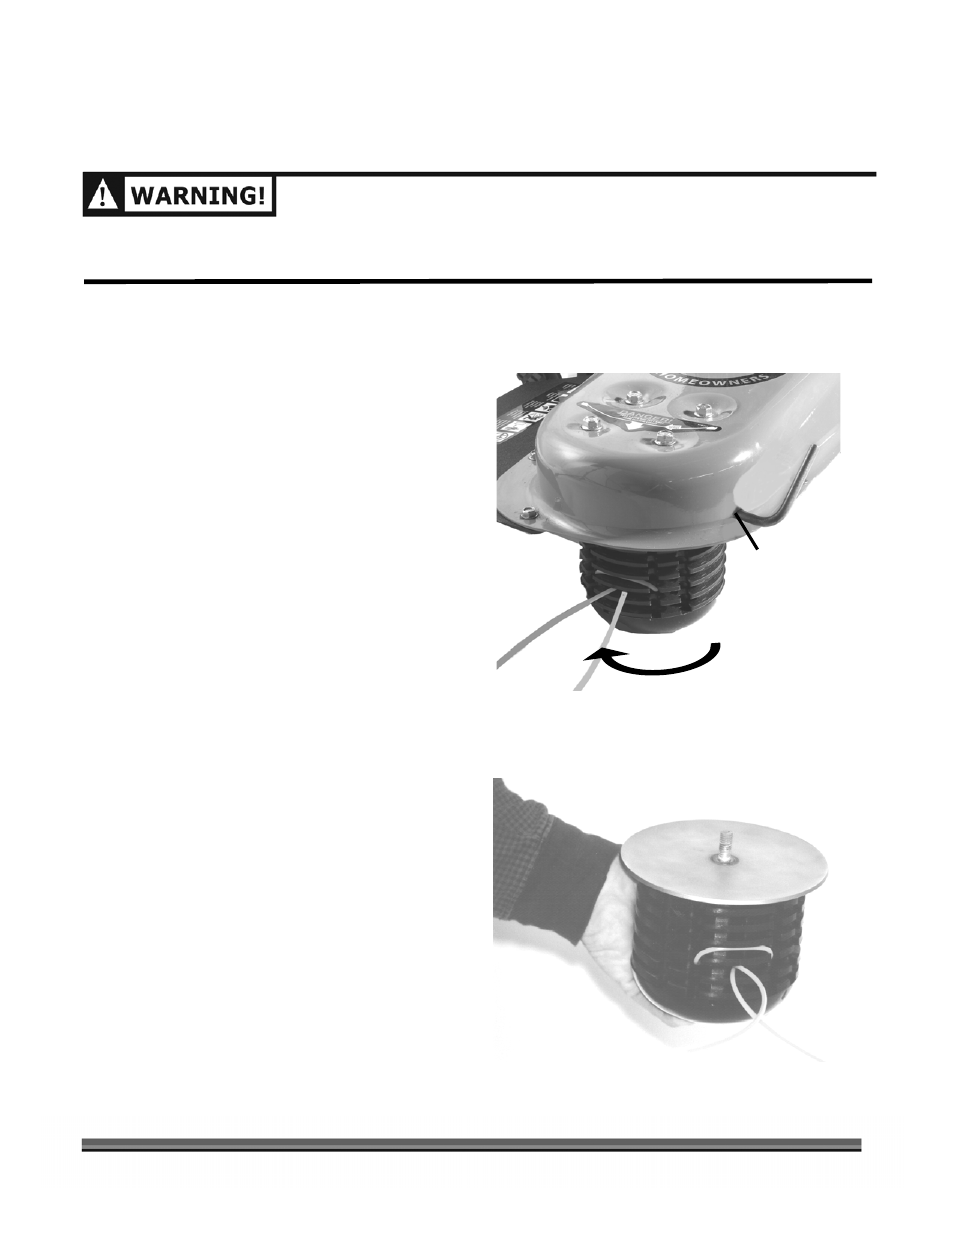
1. Insert the Head Locking Tool or screwdriver
into the hole in the Frame, then rotate the
Mow-Ball
™
Support Assembly until the tool
fits into a second hole in the shaft, locking it
into place (Figure 19).
2. Looking down at the top of the Frame, turn
the Mow-Ball
™
Support Assembly clockwise
until it unscrews completely from the bearing
housing (Figure 20). Remove the tool or
screwdriver after you have removed the Mow-
Ball
™
Support Assembly.
NOTE: If the Mow-Ball
™
Support Assembly
continues to turn, but does not come off,
check to be sure the Head Locking Tool or
screwdriver is locked into the shaft.
3. To reinstall the Mow-Ball
™
Support
Assembly, reverse the above instructions.
Figure 19
Figure 20
Loosen
Head Locking Tool
inserted here
Frame