Installing cords – DR Power Self-Propelled 6.75 (2004 - September 2010) User Manual
Page 27
CALL
TOLL-FREE
1-800-DR-OWNER 23
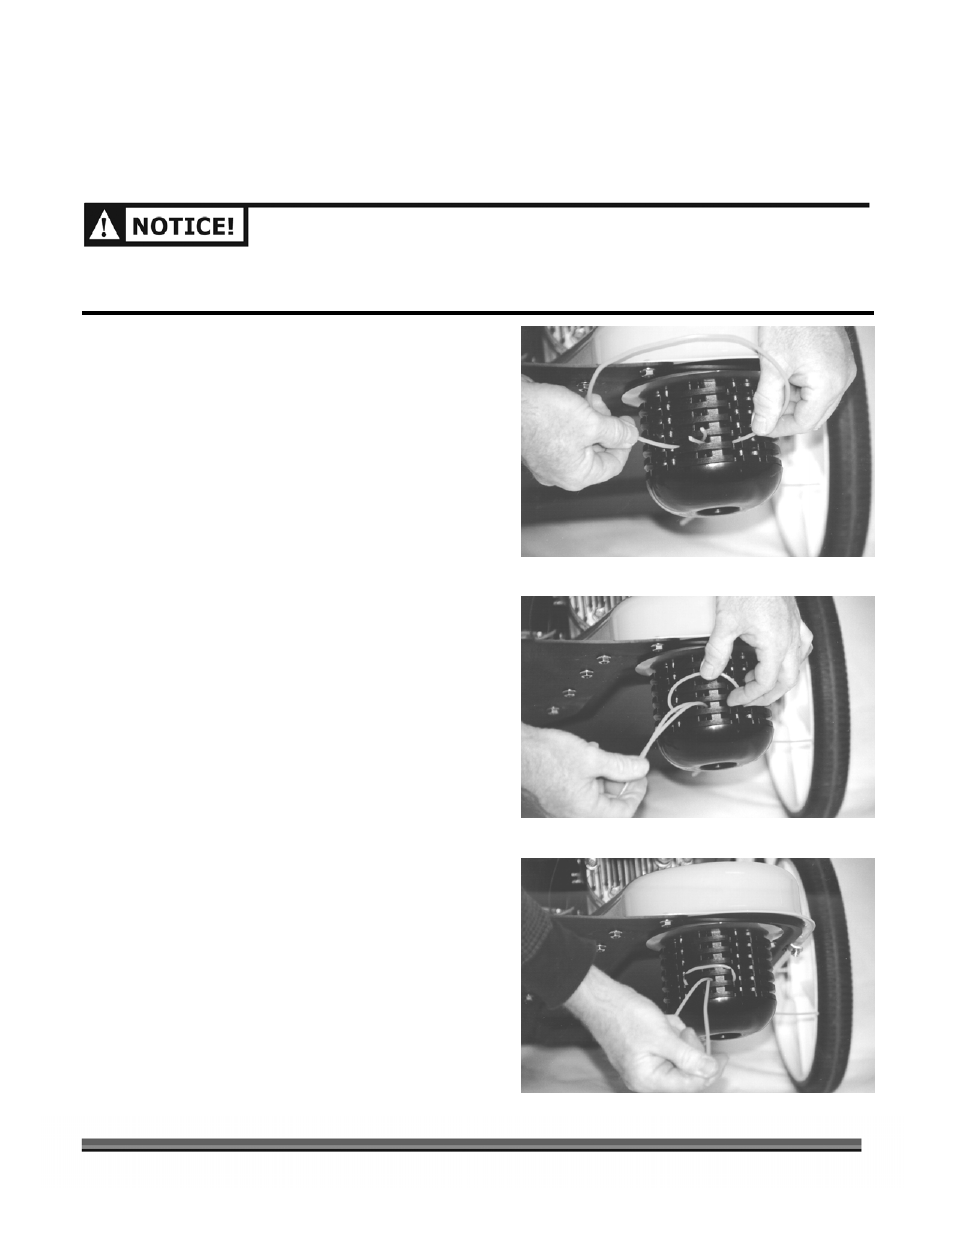
Figure 11
Installing Cords
The Cord installation method is shown in Figures 11–13. Your DR TRIMMER/MOWER shipped from the
factory with the Cords installed in this manner.
WHEN USING PTA
™
, INSTALL THE CUTTING CORDS IN ONE OF THE BOTTOM FOUR LINE PLATES.
INSTALLING THE CUTTING CORDS ON THE UPPER LINE PLATES CAN CAUSE THE CORD TO HIT THE
WHEEL. FOR MORE INFORMATION ON USING PTA
™
, SEE USING PTA
™
ON PAGE 20.
NOTE: After you install the Cords, and before
trimming, engage the Cutting Head with
the engine running and spin new Cords for
a few seconds so they pull tight and are set.
1. Insert the ends of the Cords into the
openings in the Line Plate, as shown in
Figure 11. There are different sized arrows at
the insertion points to indicate what size
Cords fit the holes.
2. Push the Cord through until it comes out the
center hole in the Line Plate as shown in
Figure 12. You may also reference Figures 9
and 10 for installing the Cords. Adjust the
Cords so the tips are even.
3. Pull the Cords through the loop and push the
loop up into the Line Plate groove above
them, (Figure 13), and then pull the Cords
tight.
Figure 12
Figure 13