Establish account with iboot cloud server, Upgrade iboot to cloud compatible firmware – Dataprobe iBoot-G2 Cloud Service Setup Guide User Manual
Page 2
V1.0
iBCS.Beta.Setup.Guide
Page 2
1.
Establish Account with iBoot Cloud Server
Visit
from your browser
Click on Register
Complete the information
Confirm Registration by clicking on the link provided in the email.
2. Upgrade iBoot to Cloud Compatible Firmware
If you purchased Cloud Compatible iBoot’s from Dataprobe for the Beta, This step can be omitted.
Contact Dataprobe Sales or
The easiest way to upgrade the iBoot is
using the Device Management Utility on
a PC that is on the same local subnet as
the iBoot device. If no physical access
to a PC at the iBoot location is possible,
you can use Remote Desktop, LogMeIn
or another type of remote access tool to
use a local PC.
1. Download the iBoot Cloud
firmware and Device Management Utility. The firmware
and latest DMU are located in the
. This is a private forum for beta testers. If
you did not already receive the forum confirmation e-mail,
please contact
2. Copy the appropriate firmware (G2 or G2+) and install the DMU to the local machine.
The local machine needs to be on the same subnet as the iBoot.
3. Log onto iBoot-G2 and confirm the checkbox is enabled for upgrade.
Log in with Administrator rights
Click on Setup
Click on Device
Check the box Upgrade Enable (if not already checked)
Click Save
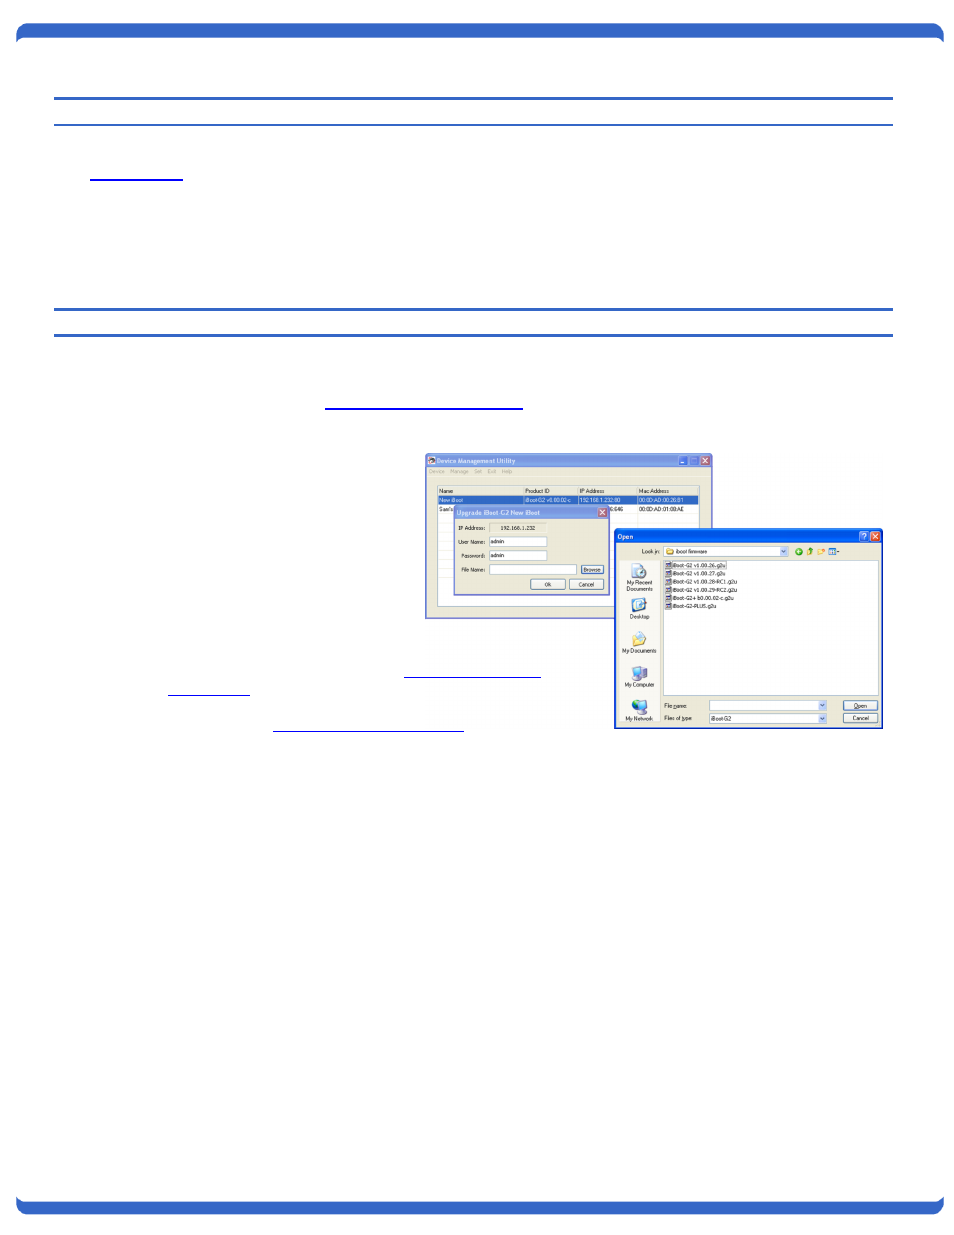
4. Run the Device Management Utility (DMU) on local machine. (same subnet)
Click Device
– Click Discover (from Submenu)
Click on the specific iBoot to upgrade from the list generated
Click Manage
– Click Upgrade Firmware
Enter Username admin and Password as set for admin. (default admin)
Enter Filename or browse for the *g2u file desired
Click OK
While upgrading, the DMU will show a progress bar. The Unit
’s Power LED will rapidly flash during upgrade.
The unit will power down during upgrade.