Remove a module behind a power supply, Figure 10 . en, R emove a module behind a p ower s upply – Daktronics 4000 Series Digital Billboard User Manual
Page 16
10
R emoving Modules from the Dis play
Figure 10: Gravity Load Pegs
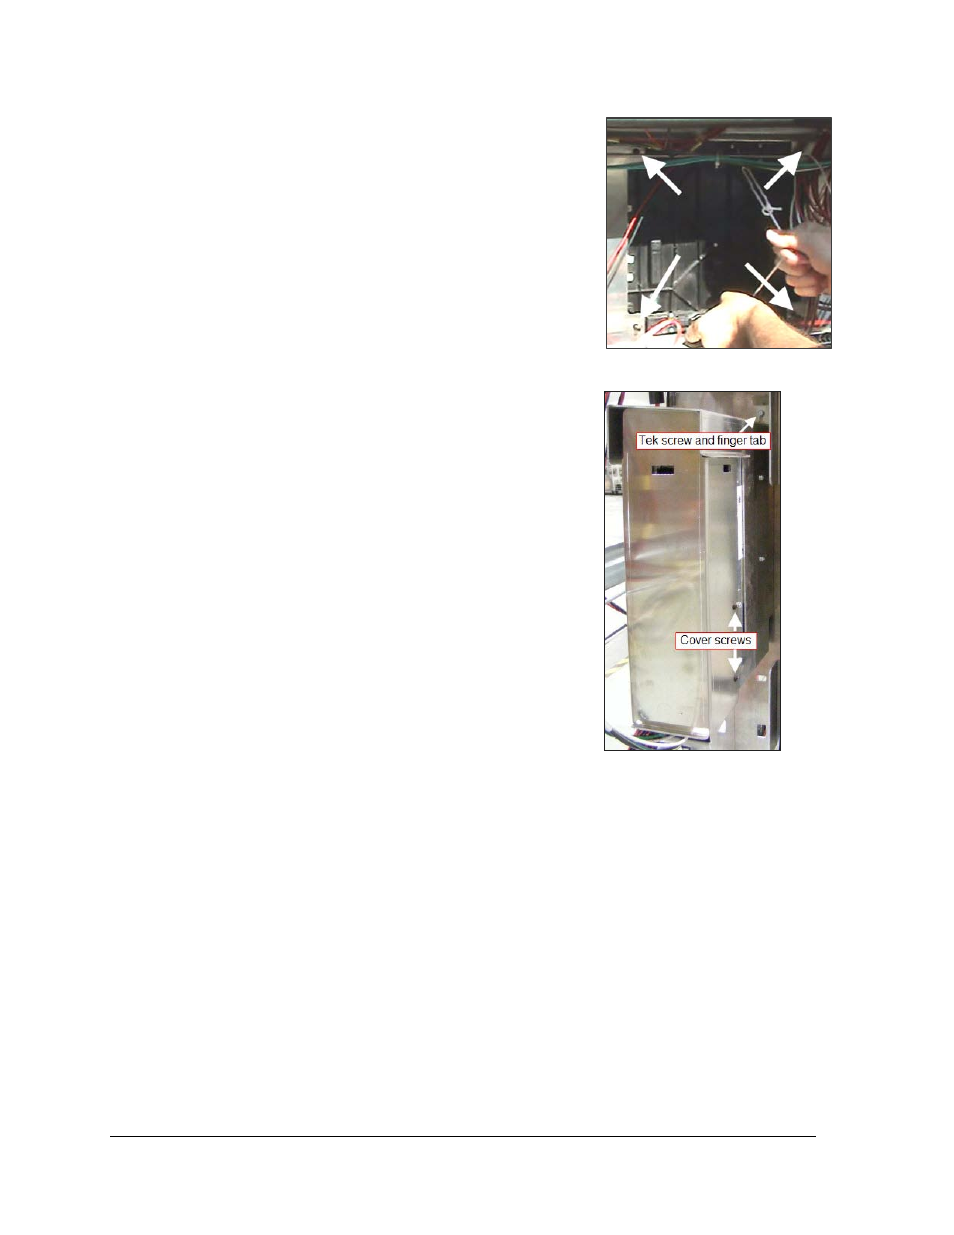
Figure 11: Power Supply
7. Once the module is in place, use the bottom
module lanyard rings or the lanyard to pull the
module tight against the facesheet. This is to
ensure the module latches clear the facesheet
when engaging the latches.
Note: Use care when engaging the module latches.
It is possible to damage the module latches if they
do not clear the facesheet.
8. With the
1
/
8
" hex wrench, turn the bottom latch
release approximately a quarter turn counter-
clockwise to engage the bottom latch. Verify the
latches clear the facesheet.
9. Repeat Step 8 to secure the top latch.
10. Connect signal cables and the power cable. Verify
the cables are properly seated.
11. Remove the module safety lanyard and return it to
the parts box/installation kit.
Note: Sometimes it may be necessary to remove
the module beside, above, or below in order to
access the target module. For example, you may
need to remove a module from the top-most
section of the display. In this case, you may need
to remove the module directly below the top-most
module, and pull the top-most module through
the lower opening.
R emove a Module behind a P ower S upply
Required tools: Phillips screwdriver,
5
/
16
" nut driver
Refer to Figure 13 for an example of the power supply.
1. Turn off power to the display.
2. With a Phillips screwdriver, remove the two screws that hold the cover to the power
supply.
3. Disconnect all power and signal cables from the power supply.
4. With a
5
/
16
" nut driver, remove the Tek screw below the finger tab. Refer to Figure 13
for Tek screw and finger tab location.