Daktronics 4000 Series Digital Billboard User Manual
Page 15
R emoving Modules from the Dis play
9
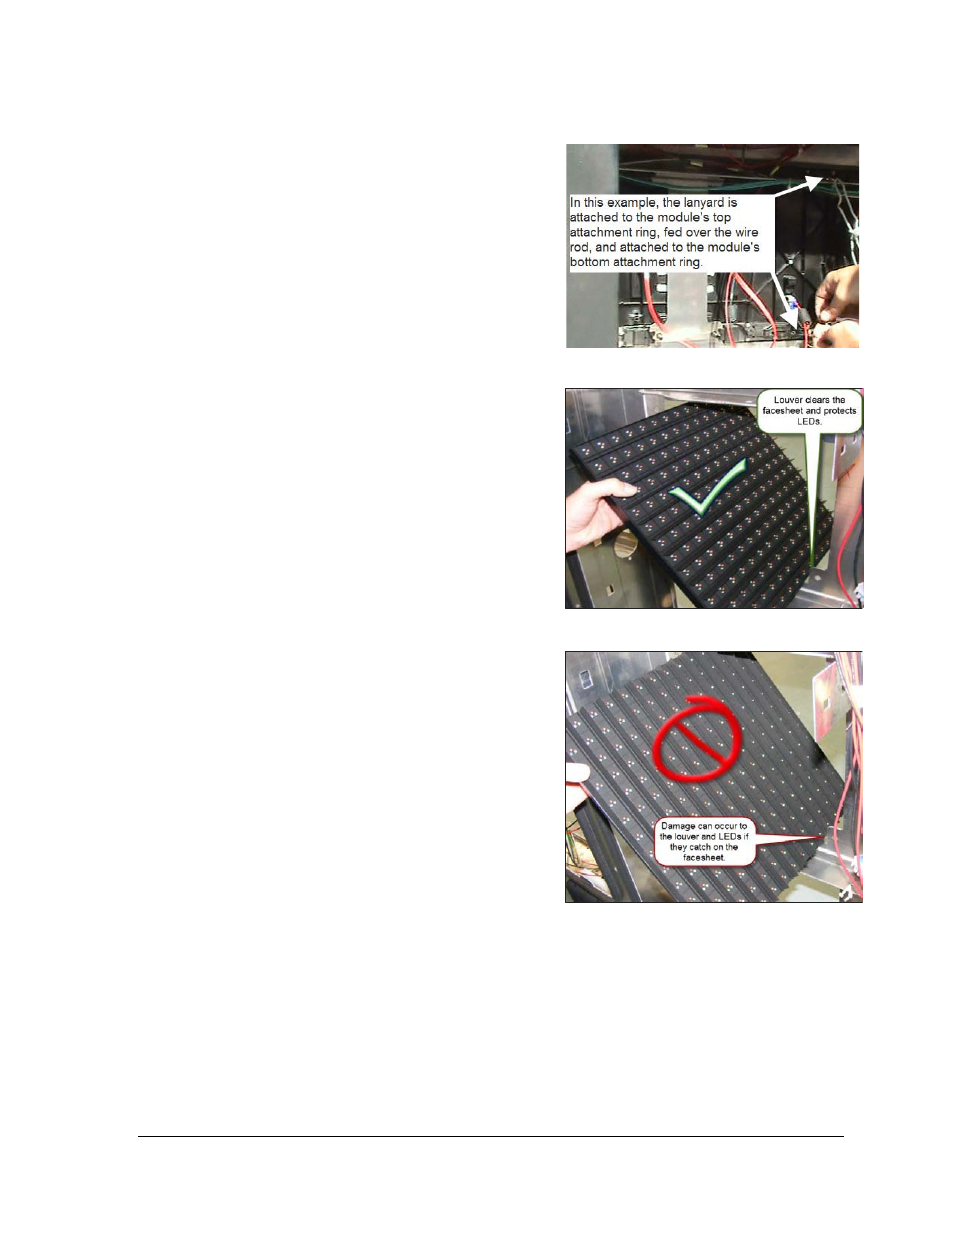
Figure 7: Attach Safety Lanyard to Module
Figure 8: Proper Module Removal
Figure 9: Improper Module Removal
1. Use a safety lanyard. Refer to Figure 7 when performing steps 1a-1c.
a. Attach one end of the safety lanyard
to a lanyard attachment ring on the
top of the module.
b. Feed the lanyard over a wire rod, or
through a nearby upright. Do not
anchor the lanyard to another
module.
c. Attach the other end of the safety
lanyard to the lanyard attachment
ring on the bottom of the module.
2. Disconnect the signal cables and power
cable.
3. With a
1
/
8
" hex wrench, turn the top and
bottom latch releases approximately a
quarter turn clockwise to disengage the
module latches.
Note: Always maintain a firm grip on
the module as you carefully remove the
module from the face sheet of the
display.
4. Rotate the module in a way that allows
you to guide it through the frame
opening without catching the louvers or
LEDs on the cabinet. Refer to Figure 8
and Figure 9 for examples of proper and
improper removal of modules.
5. To reinstall a module, rotate and
carefully guide the module through the
opening.
Note: To ensure proper alignment, the
word “top” is printed on the back of the
module, in the upper-left and upper-
right corners. In addition, if the module
is upside down, the precision alignment pegs will bind on the facesheet.
6. Once the module is through the opening, align the module with the facesheet so the
gravity load pegs fit in the gravity load peg holes. Refer to Figure 10. Ensure the
lanyard or cables are not pinched between the module and the display.