Controller replacement – Daktronics Galaxy AF-3500/3550 User Manual
Page 30
26
Parts Replacement
Notes:
• Weather stripping on the back edge of the module must be in good condition and returned to its
proper position to prevent water from entering the display.
• Module latches must be fully engaged to create a watertight seal around the edge of the module. The
module seats firmly against the display when the latches are fully engaged.
Controller Replacement
Tools required:
1
/
8
" hex wrench,
5
/
16
" nut driver, and
flathead screwdriver
Complete the following steps to replace a controller
in the display:
1. Turn off power to the display.
2. Remove the module directly in front of
the controller in the lower left area of the
display. Refer to
3. Loosen screws and remove the cover in
front of the controller.
4. Disconnect the power input.
5. Remove all power and signal connections
from the board. Label the cables as they are
removed to ensure proper replacement.
6. Remove the six nuts holding the board in
place using a
5
/
16
" nut driver.
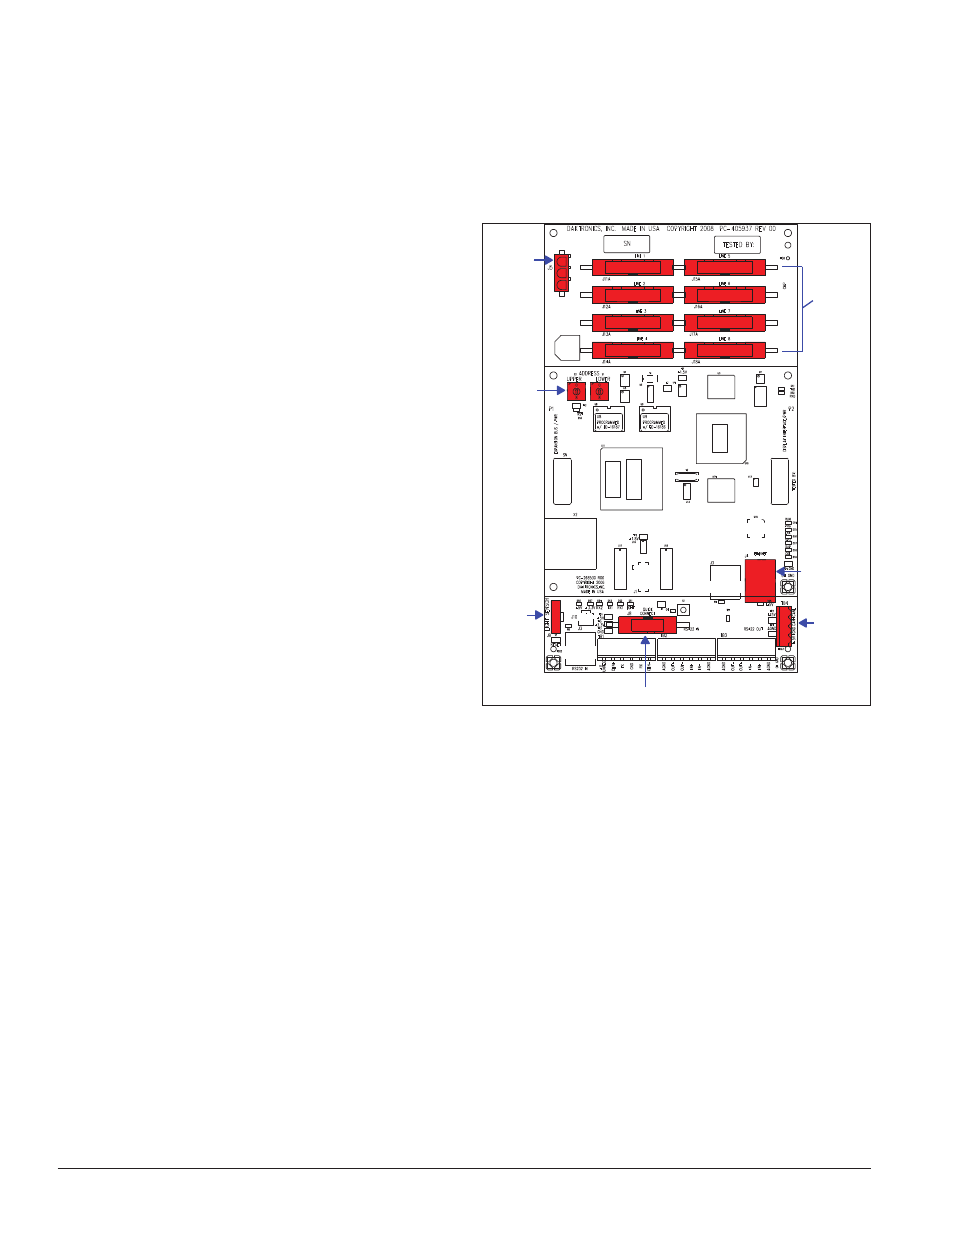
7. Take note of the rotary address on the
controller to ensure the address on the
replacement board is the same. See
8. To install the new controller, replace the six nuts holding it to the display back. Reconnect power and
signal cables. Turn on power, observe the boot-up sequence, and note that the pixel in the lower-right
corner shows power.
Power
Input
Address
Switches
Light
Sensor
Input
Quick Connect Input
Module
Outputs
Ethernet
Input
CAN
Input
Figure 22: Galaxy Controller