2 tripod mounting, Tripod mounting – Daktronics PC-2001 Pace Clock System User Manual
Page 12
6
Mechanical Installation
2.2 Tripod Mounting
Mounting the display to a tripod requires the optional tripod mounting kit (Daktronics part
number 0A-1153-0325). A camera tripod is not sturdy enough to safely support the display
and will not attach to the display or adapter plate. An appropriate “speaker stand” tripod is
available from Daktronics (part number A-1580).
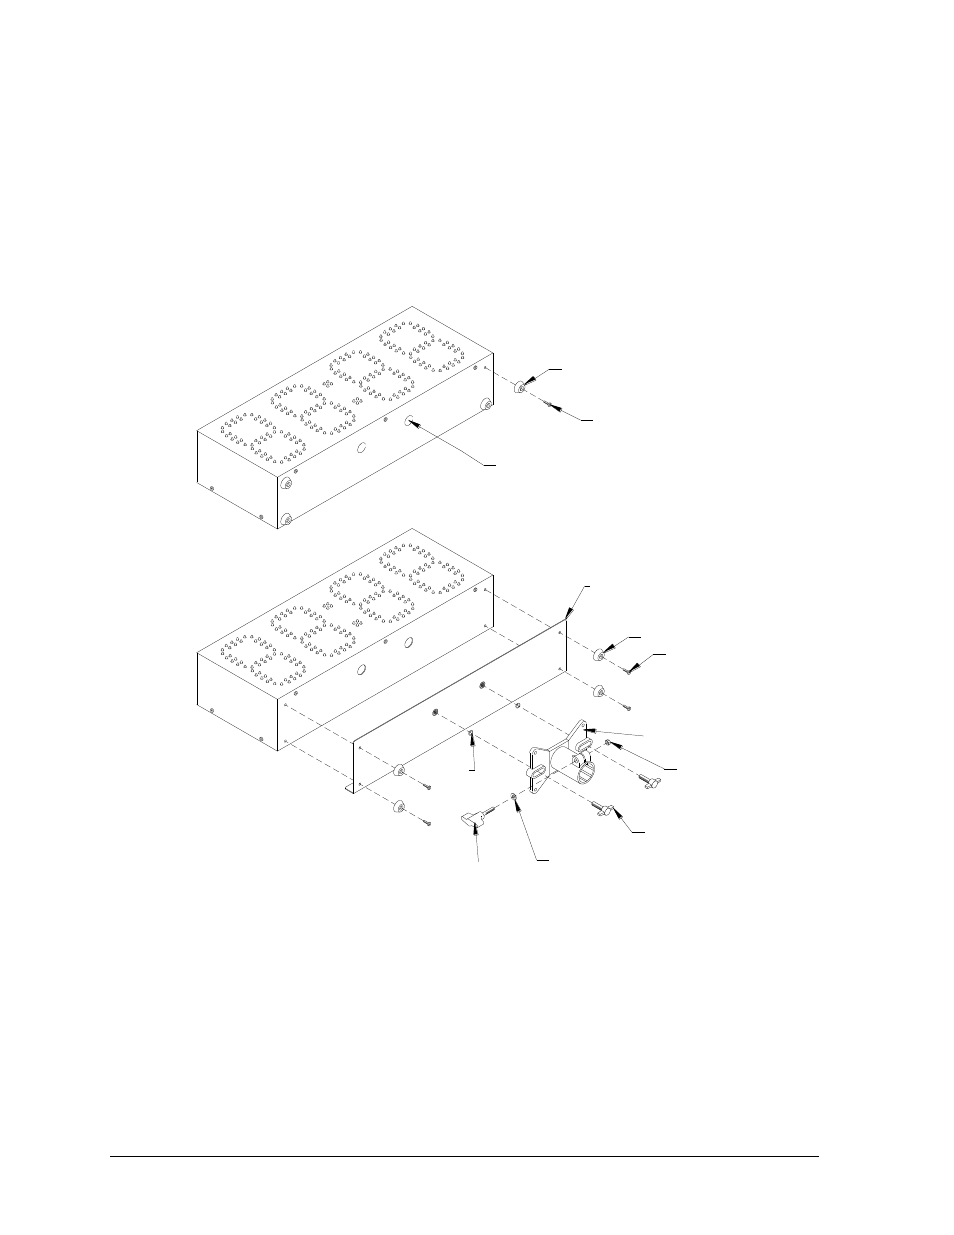
Refer to Figure 5 for instructions on preparing the display for mounting:
4. Install the knob, washer, and nut
on the tripod adapter.
5. Attach the bracket to the adapter plate
using the o-rings and T-bolts.
T-bolt
(HS-1315)
2. Remove the two knockouts from
the bottom by pushing them in.
3. Attach the tripod adapter plate,
using the rubber bumpers and screws.
O-ring
Bumper
Tripod bracket
(HS-1306)
Screw
Tripod adapter plate
(0S-1153-0036)
Screw
(HC-1489)
1. Remove the rubber bumpers
from the bottom of the display.
Bumper
(HE-1080)
Figure 5: Tripod Mounting Kit Installation
1. Remove rubber bumpers
from bottom of display.
Bumper (HE-1080)
Screw (HC-1489)
2. Push in and discard 2
bottom knockouts.
3. Attach tripod adapter plate using
bumpers and screws.
Tripod Adaptor Plate
(0S-1153-0036)
Bumper (HE-1080)
Screw (HC-1489)
Tripod Bracket
(HS-1306)
Nut
O-ring
Knob
Washer
T-Bolt
(HS-1315
4. Install knob, nut, and washer
on the tripod adaptor.
5. Attach tripod bracket to adaptor
plate using O-rings and T-bolts.