Cloud Electronics PS16 User Manual
Page 5
4
Pump Station 16-R: I
NSTALLATION AND OPERATION MANUAL
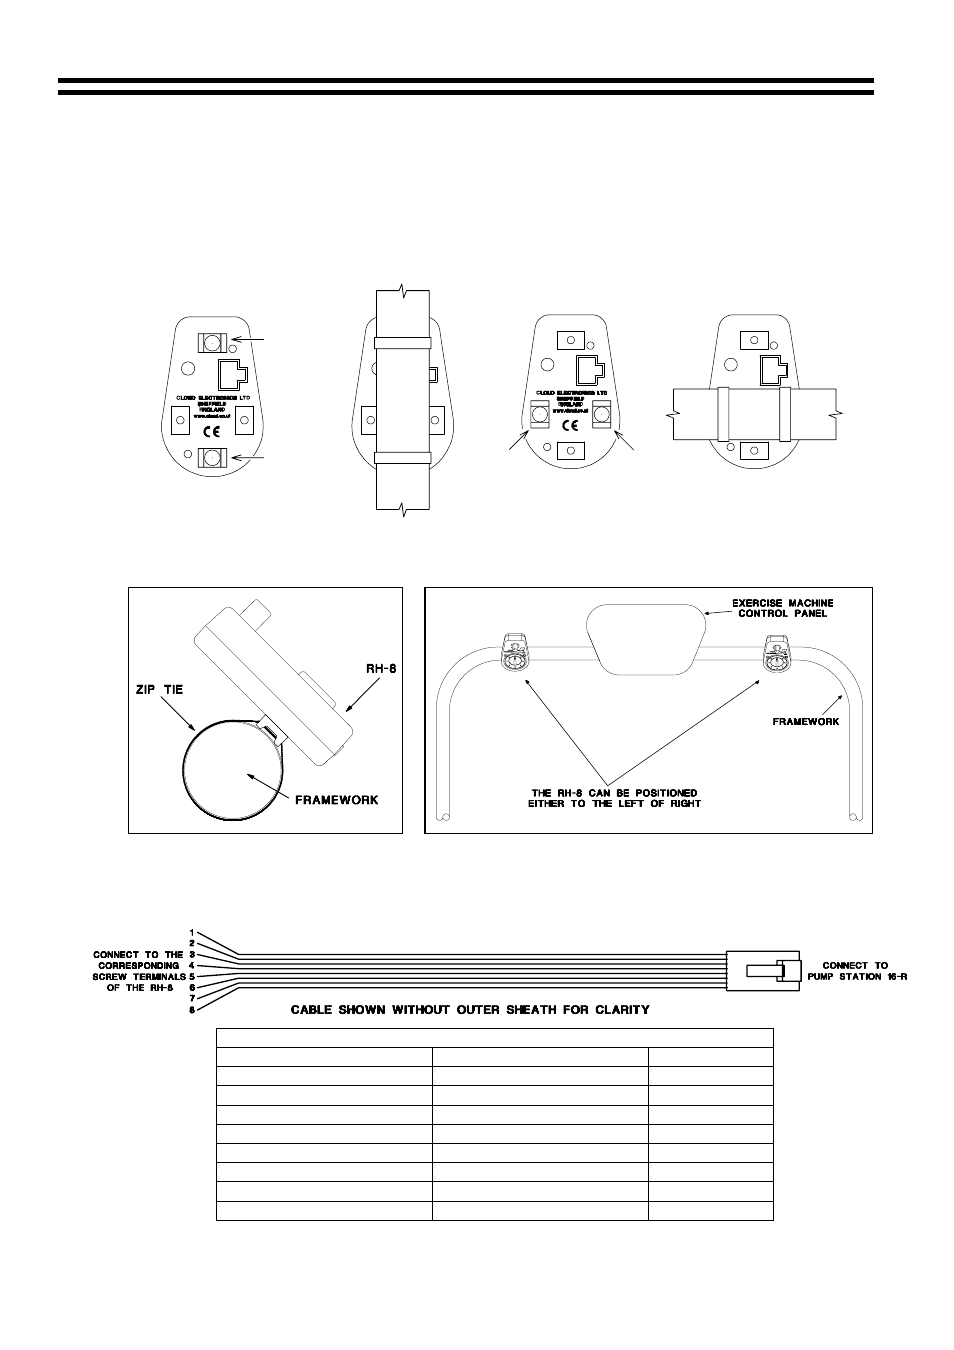
The RH-8 is supplied with mounting accessories allowing it to be mounted onto the frame of an
exercise machine or fixed to a flat surface such as a wall or bulkhead. When the RH-8 is
mounted onto the framework, two small nylon brackets should be fastened to the body of the
moulding using the nylon rivets provided. With the brackets in place, loop a nylon tie through
each of the two brackets and use these to securely fasten the RH-8 to the frame. To prevent
rotation on smooth surfaces, we suggest that self-amalgamating electrical insulating tape is
wound around the tube before the ties are fitted. The nylon brackets can be fitted in two
positions to suit the exercise machine.
BRACKET
HERE
FIT
BRACKET
HERE
FIT
BRACKET
HERE
FIT
BRACKET
HERE
FIT
When mounted to framework the RH-8 should be positioned at 45
o
(see left hand diagram
below), Ideally the RH-8 should also be positioned to one side of the user instead of directly in
front (See right hand diagram below)
When mounted directly on to a wall or perhaps the bulkhead of an exercise machine, it may be
preferable to hard wire a cable directly to the RH-8 using its internal screw terminals, a diagram
and wiring information for this are shown below.
Cable for Hard Wiring an RH-8 to a Pump Station 16-R
Cable Information for Hard Wiring the RH-8
RH-8 (Screw Terminals)
Pump Station 16-R (RJ45)
CAT 5*
Pin 1
Pin 8
Brown/White
Pin 2
Pin 7
White/Brown
Pin 3
Pin 6
Green/White
Pin 4
Pin 5
White/Blue
Pin 5
Pin 4
Blue/White
Pin 6
Pin 3
White/Green
Pin 7
Pin 2
Orange/White
Pin 8
Pin 1
White/Orange
*The CAT 5 colour is described as the dominant colour first with the tracer second.
16-07-02 V2.1