Operation – Beisler 1282-4 User Manual
Page 24
- 15 -
Closing Seam Machine 1282-4 Working Instructions
Beisler Automated Sewing Equipment
B.3
Operation
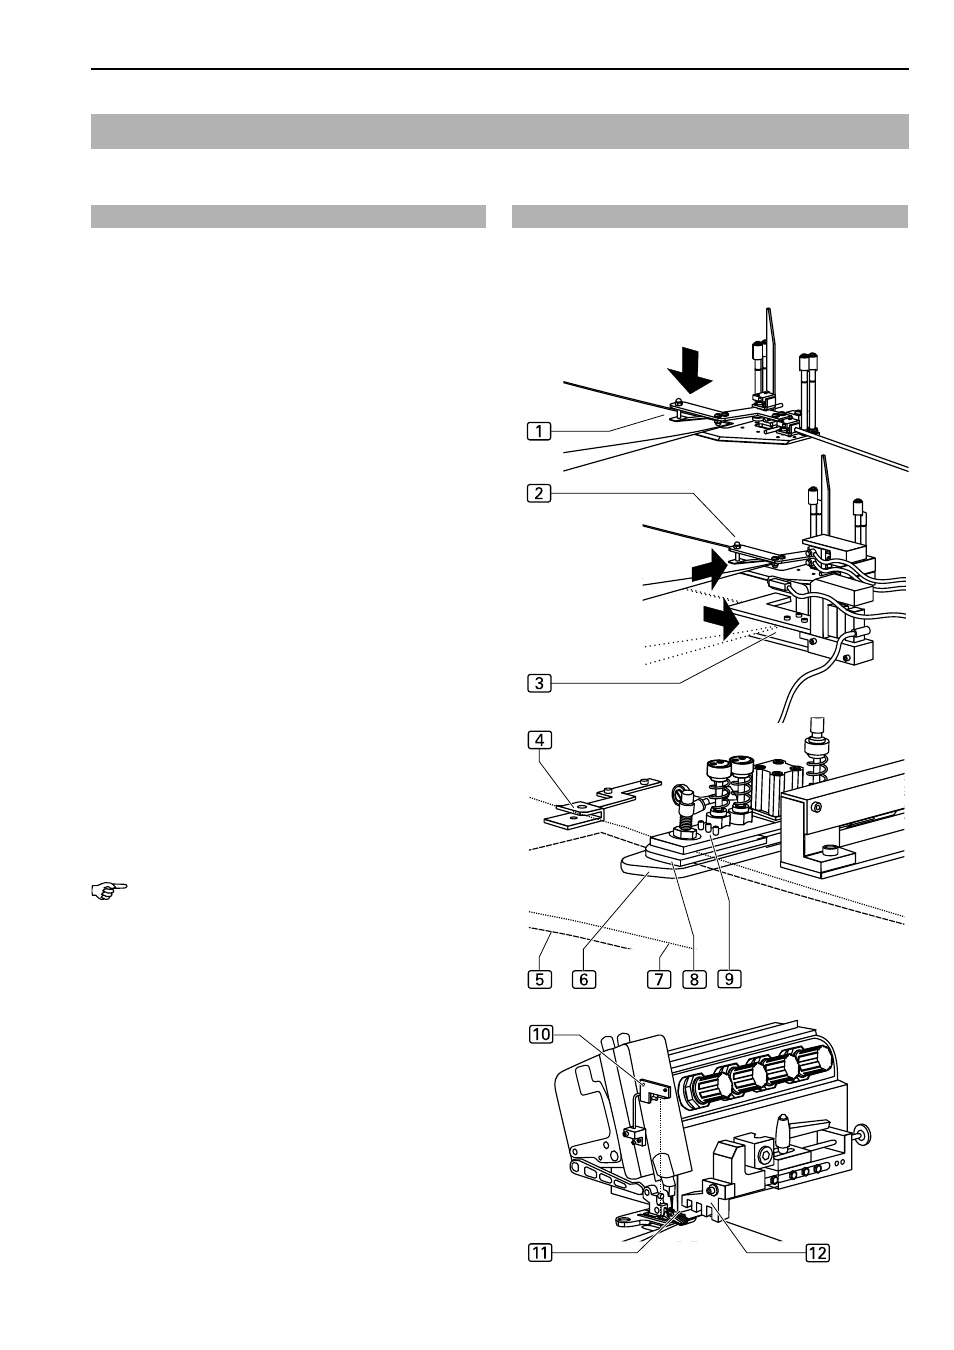
B.3.7 Line-up and alignment of sewing pieces
1. Fig. 15: Place trousers components on top of each
other with the seams being flush. The sequence
depends on the preselected sewing progrem.
2. Make sure that the guide clamp is at the line-up
position (right side of working plate).
3. Push the ends of the two trousers components from
the front into the needle clamp
1
of the guide clamp
and push the clamp down.
If the machine is equipped with the optional cloth trans-
fer machine component, the ends of the trousers com-
ponents are pushed into the cloth transfer
3
from the
front.
The cloth transfer transfers the trousers ends to the
guide clamp
2
, where the needle clamp fixes them
automatically.
4. Line the trousers components up at the contour gui-
de. Place the lower trousers component
5
over the
baseplate
6
and under the center tab
8
and the
upper trousers component
7
over the center tab
8
of the contour guide. Push both trousers com-
ponents
9
of the contour guide all the way to the
stop.
If equipped with a contour guide for tailor quality, the
front trousers component must be pushed into the cloth
guide
4
all the way to the stop.
Depending on the seam, the rear trousers component
is lined up above or below the cloth guide.
5. Line up the hip-side end of the trousers components
at the rule stop
c
and push it under the pressure
foot
b
all the way to the needle.
NOTE - Resetting the insertion process!
If the insertion process is to be cancelled, pull the trou-
sers components away from the light beam of the photocell
a
. When the photocell recognizes bright light, the ma-
chine cycle is interrupted.
Fig. 15
Fig. 15