Using the remote control unit, Setting up the system, English – Denon AVR-1603 User Manual
Page 9: 9 using the remote control unit, 10 setting up the system
ENGLISH
9
Following the procedure outlined below, insert the batteries before using the remote control unit.
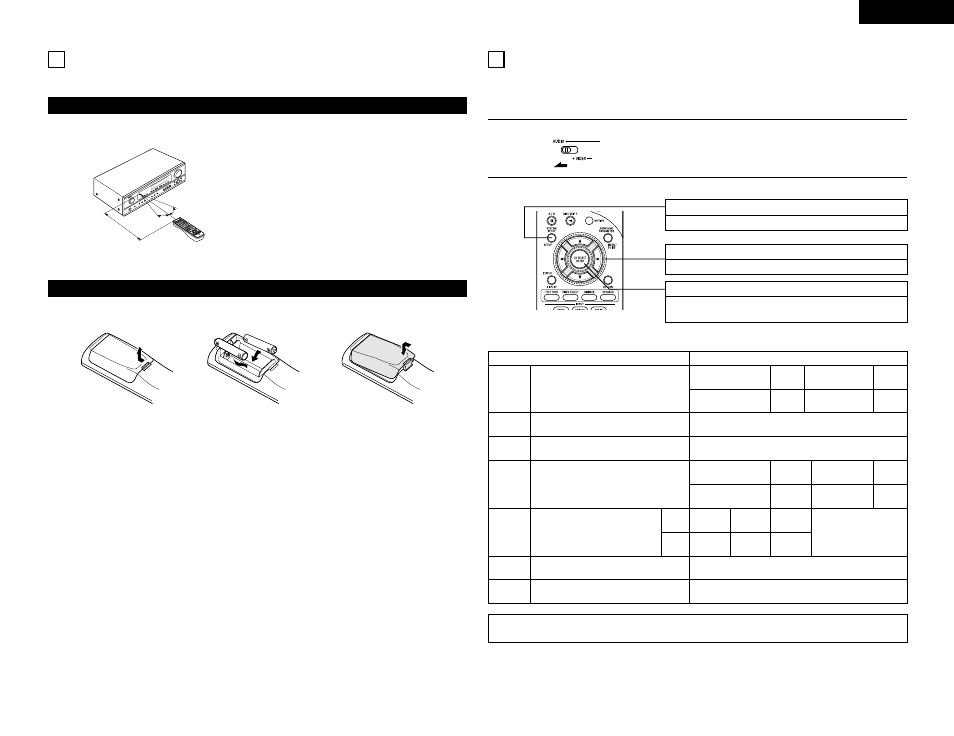
Point the remote control unit at the remote control
sensor as shown on the diagram at the left.
NOTES:
• The remote control unit can be used from a straight
distance of approximately 7 meters, but this distance
will shorten or operation will become difficult if there
are obstacles between the remote control unit and
the remote control sensor, if the remote control
sensor is exposed to direct sunlight or other strong
light, or if operated from an angle.
• Neon signs or other devices emitting pulse-type noise
nearby may result in malfunction, so keep the set as
far away from such devices as possible.
Approx. 7 m
q Press as shown by the arrow
and slide off.
w Insert the R6P/AA batteries properly,
as shown on the diagram.
e Close the lid.
NOTES:
• Use only R6P/AA batteries for replacement.
• Be sure the polarities are correct. (See the illustration inside the battery compartment.)
• Remove the batteries if the remote control transmitter will not be used for an extended period of time.
• If batteries leak, dispose of them immediately. Avoid touching the leaked material or letting it come in contact
with clothing, etc. Clean the battery compartment thoroughly before installing new batteries.
• Have replacement batteries on hand so that the old batteries can be replaced as quickly as possible when the
time comes.
• Even if less than a year has passed, replace the batteries with new ones if the set does not operate even when
the remote control unit is operated nearby the set. (The included battery is only for verifying operation.
Replace it with a new battery as soon as possible.)
30°
9 USING THE REMOTE CONTROL UNIT
Range of operation of the remote control unit
Inserting the batteries
30°
10 SETTING UP THE SYSTEM
• Once all connections with other AV components have been completed as described in “CONNECTIONS” (see
pages 5 to 8), make the various settings described below on the display.
These settings are required to set up the listening room’s AV system centered around the this unit.
SYSTEM SETUP button
Press this to display the system setup on the display.
CURSOR buttons (•, ª, 0, 1)
Press this change what appears on the display.
ENTER button
Press this to switch the display.
Also use this button to complete the setting.
• System setup items and default values (set upon shipment from the factory)
Input the combination of speakers in your system and
their corresponding sizes (SMALL for regular speakers,
LARGE for full-size, full-range) to automatically set the
composition of the signals output from the speakers and
the frequency response.
Front Sp.
Center
Sp.
Surround Sp.
Subwoofer
Large
Small
Small
Yes
System setup
Speaker
Configuration
This selects the subwoofer speaker for playing deep bass
signals.
This parameter is for optimizing the timing with which
the audio signals are produced from the speakers and
subwoofer according to the listening position.
Subwoofer
Mode
Delay Time
Default settings
Set the slide switch to “AUDIO”.
1
Use the following buttons to set up the system:
2
Subwoofer mode = Normal
Front & Subwoofer
Center
Surround L & R
—
3.6 m
3.6 m
3.0 m
—
NOTE:
• The system setup is not displayed when “HEADPHONE ONLY” is selected.
Digital
Inputs
Input
source
Digital In
Assignment
This assigns the digital input jacks for the
different input sources.
COAXIAL
CD
OPTICAL-1
OPTICAL-2
DVD/VDP
TV/DBS
Set the frequency (Hz) below which the bass sound of
the various speakers is to be output from the subwoofer.
Crossover
Frequency
80 Hz
Auto surround mode function setting.
Auto Surround
Mode
Auto Surround Mode = ON
Set the Ext. In Subwoofer channel playback level.
Ext. In SW
Level
Ext. In SW Level = +15 dB