BDI 9981 REVO User Manual
Page 3
3
assembly
instructions
bdiusa
.
com
customerservice
@
bdiusa
.
com
1.
2.
3.
3.
1.
2.*
2.*
2.
2.
3.
1.
1.
Figure 2
Figure 1
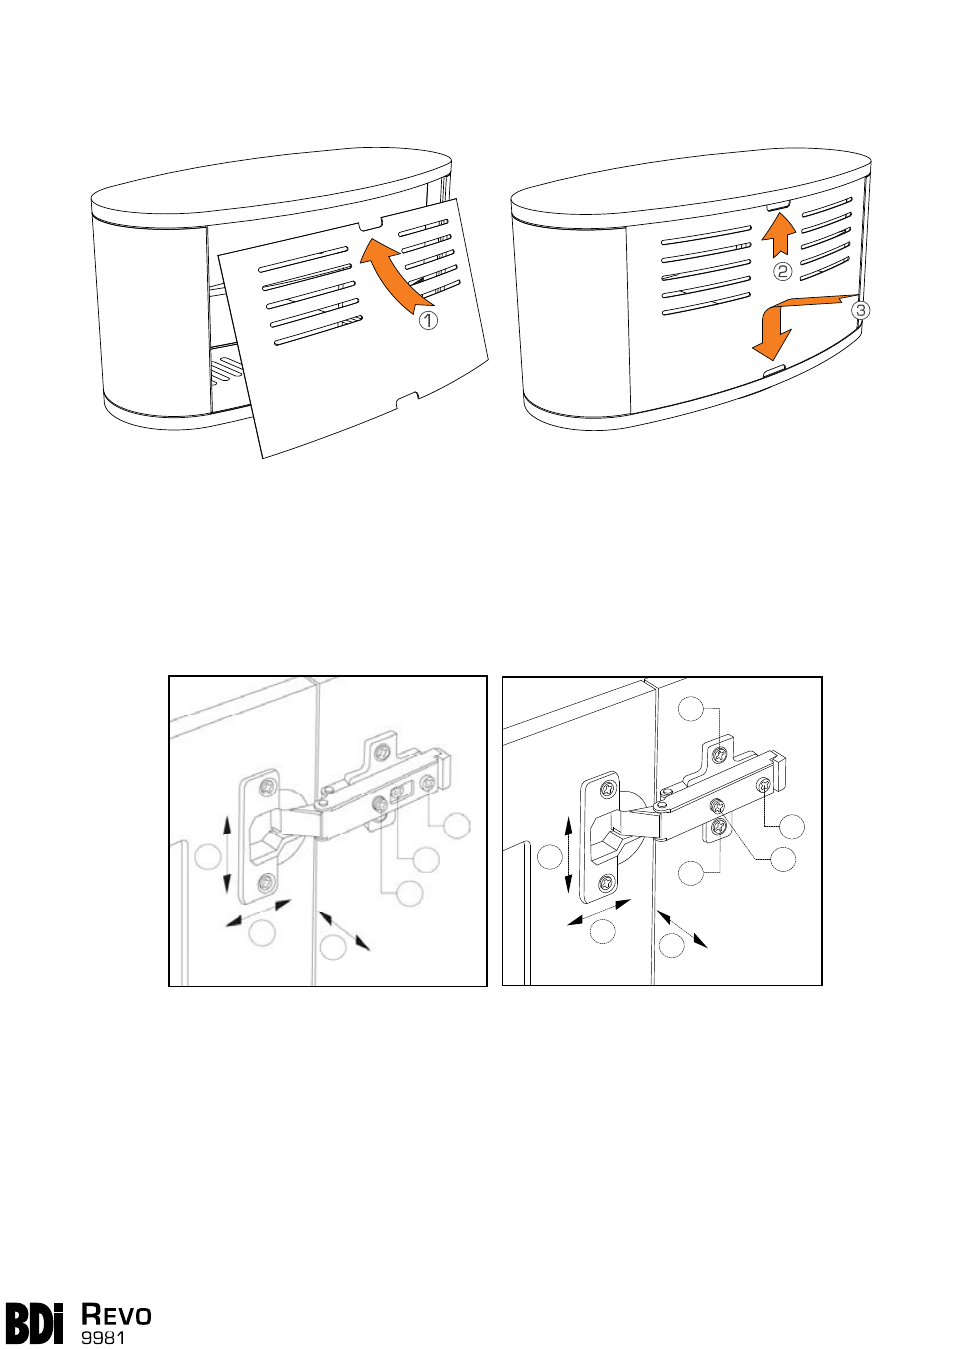
Step 4
Install Back Panel.
The back panel comes pre-installed. Follow illustrations below for
installation and removal.
Step 5
Adjust Door Hinges (if needed)
If the cabinet’s doors appear out of alignment, this condition can be corrected with minor adjustment
to the European hinges on each door.
Because these hinges are infinitely adjustable, adjusting one hinge element can sometimes cause the
need for adjustments to other elements. But with a few adjustments, you can modify the orientation of
the cabinet doors to make sure that they hang perfectly within your cabinet.
Use a Phillips screwdriver to adjust Revo’s door hinges:
By adjusting
•
Screw 1,
the door will move LEFT or RIGHT within the frame. Make minor
adjustments at both top and bottom hinges for best results.
By adjusting
•
Screw(s) 2,
the door will move UP or DOWN within the frame (the top and bottom
hinges must be adjusted the same degree).
NOTE:
I
f your hinges have a Slotted Mounting Plate (as shown in Figure 2): Loosen Screws 2
one complete turn, raise or lower door, then hold in position while tightening Screws 2 (on both
hinges).
By adjusting
•
Screw 3
the entire door will move IN or OUT, opening or closing the gap between the
door frame and cabinet. (This screw rarely needs adjustment.)
3.