Audio Enhancement WV-SF448 User Manual
Page 21
21
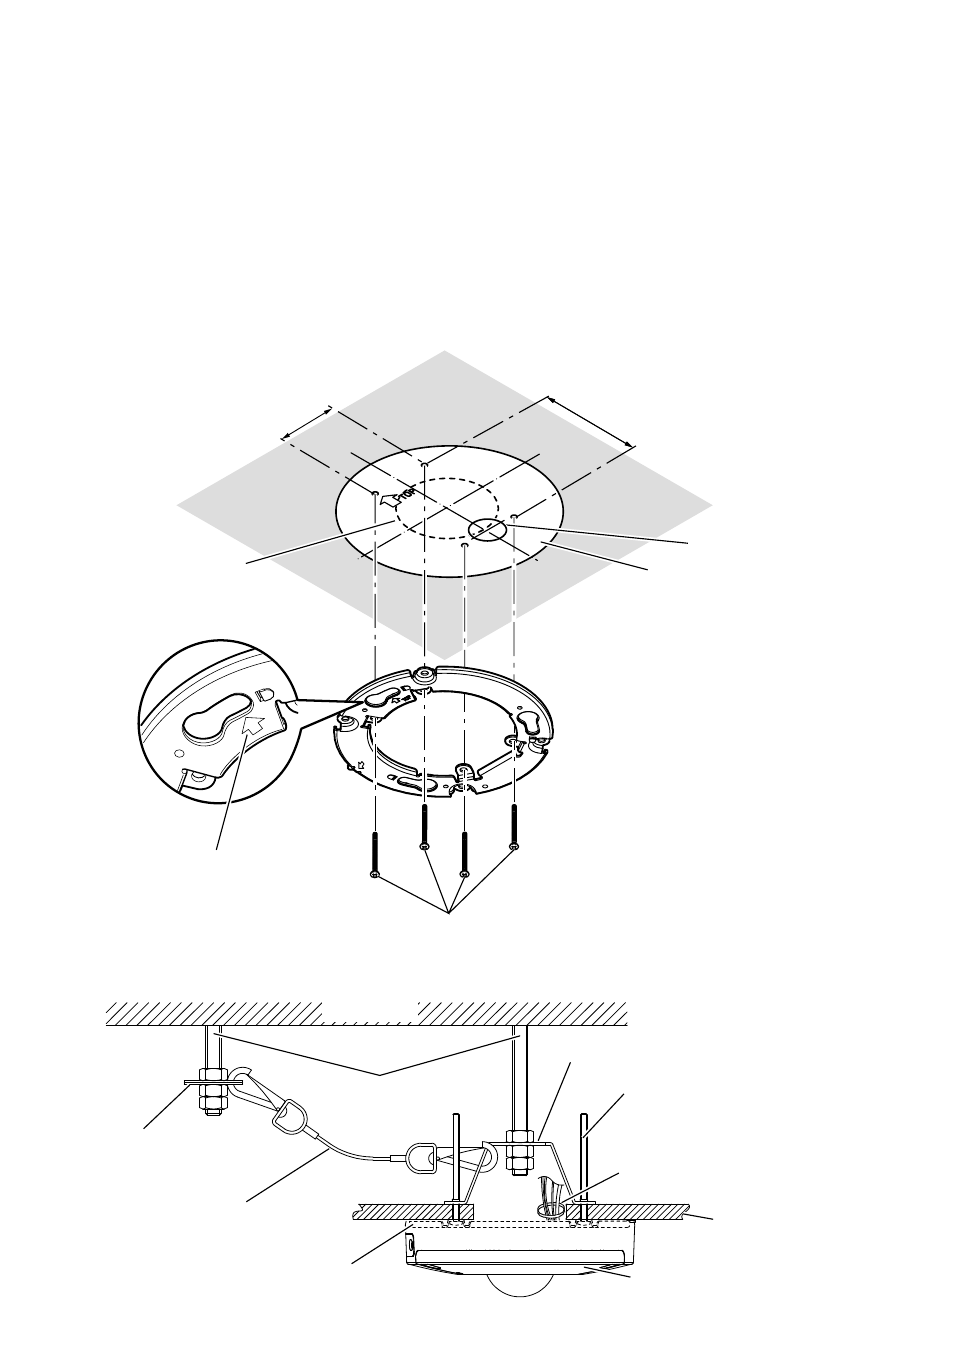
Using the optional ceiling mount bracket WV-Q105 (E model only)
When using the optional ceiling mount bracket to mount the camera, first place the installation tem-
plate (WV-Q105 accessory) on the ceiling, and then make a hole in ceiling and mount the
WV-Q105.
Next place the installation template label (accessory) on the ceiling, and make a hole to pass the
cables. After completing this, remove the template label, and mount the camera attachment (acces-
sory) by fixing 4 screws (WV-Q105 accessory).
Refer to WV-Q105 Operating Instructions for information on how to mount the camera when using
the optional mounting bracket.
The following illustration shows when the mounting for the optional mounting bracket and camera
attachment is completed.
TOP
83.5 mm {3-9/32 inches}
Cable access hole
(ø30 mm {ø1-3/16 inches})
Installation template label
(accessory)
WV-Q105 mounting hole
Fixing screws (4 pcs.(WV-Q105 supplied))
Camera attachment (accessory)
46 mm {1-13/16 inches}
Direction marker for installation
Roof space
Anchor bolt
Camera attachment (accessory)
Safety wire angle
(WV-Q105 supplied)
Safety wire
(WV-Q105 supplied)
WV-Q105 (option)
Fixing screw
(4 pcs.(WV-Q105 supplied))
Camera
Cable tie (accessory)
Ceiling board such
as plaster board