Audio Enhancement WV-SF448 User Manual
Page 20
20
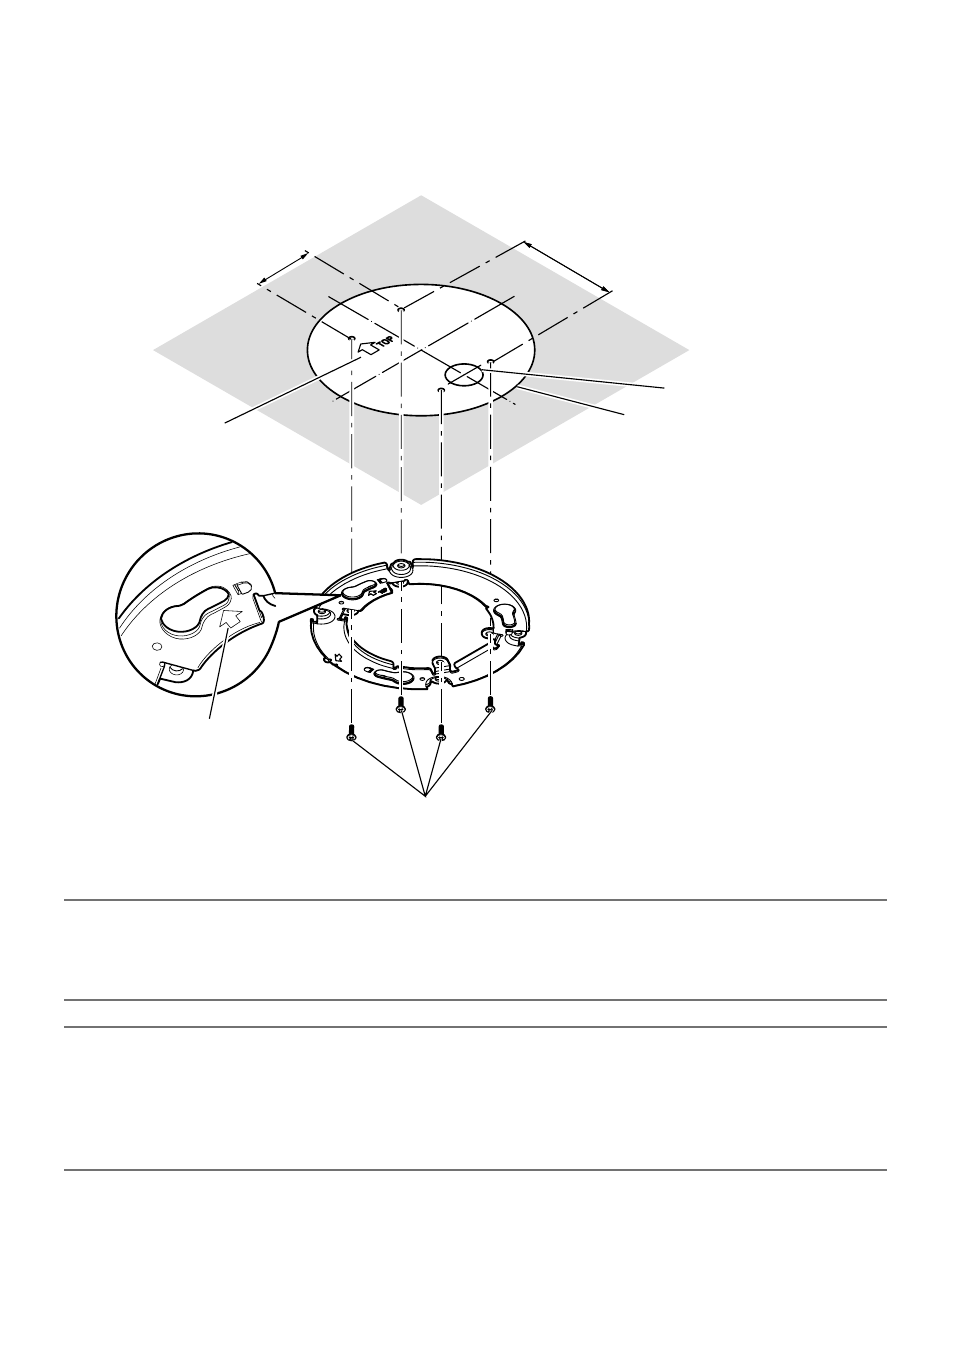
Installing the camera directly on the ceiling or wall
Place the installation template label (accessory) on the ceiling or wall, and make a hole to pass the
cable.
Remove the template label, and mount the camera attachment (accessory) by fixing 4 screws
(locally procured).
46 mm {1-13/16 inches}
Arrow
83.5 mm {3-9/32 inches}
Cable access hole
(ø30 mm {ø1-3/16 inches})
Installation template label
(accessory)
Fixing screws (4 pcs., locally procured)
Camera attachment (accessory)
Direction marker for installation
TOP
IMPORTANT:
• For mounting a camera on a concrete surface, use an anchor bolt (M4) or an AY plug bolt (M4)
for installing.
(Recommended tightening torque M4: 1.6 N·m {1.18 lbf·ft})
Note:
• The direction of “gTOP” on the camera attachment (accessory) determines the upwards direc-
tion of the image on the PC monitor.
Determine the direction that you want images to be displayed upwards on the PC monitor.
When installing, make sure that the direction of the arrow shown on the installation template
label matches that of the direction marker for installation.