Analog Way Axion - ARC100 User Manual
Page 20
Chapter 2 : STARTING (continued)
AXION
PAGE 20
2-6. PRESET SETUP
NOTE: Before beginning, open an existing show or create a new one. Wait for the initialization. The touchscreen displays
“Success: all devices connected are initialized”. Then…
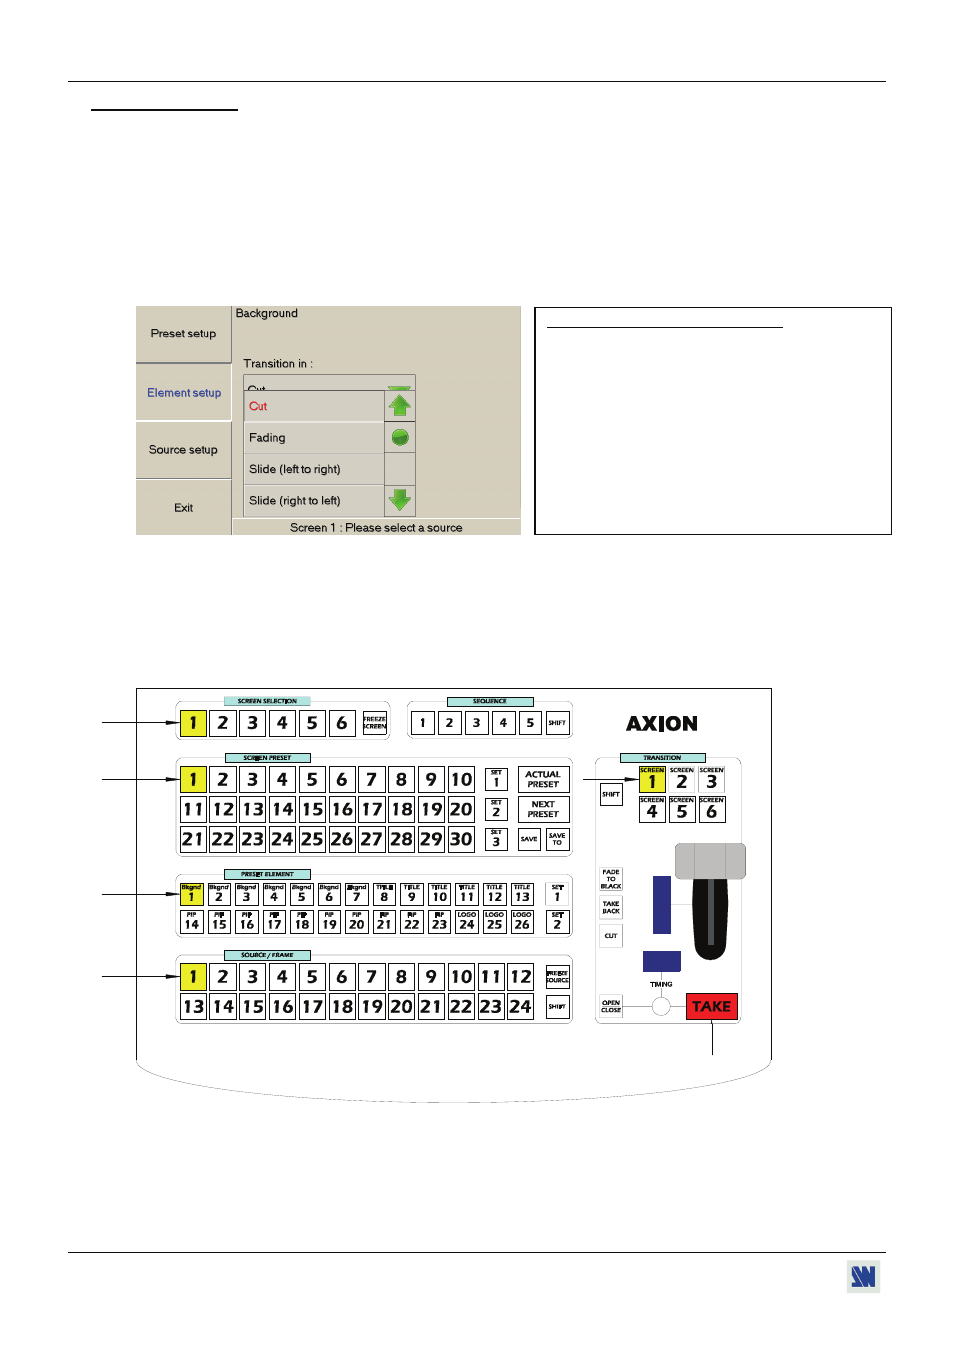
Select a SCREEN with the SCREEN SELECTION buttons.
Select a PRESET with the SCREEN PRESET buttons.
NOTE: With the touchscreen display you can give a convenient name to your preset.
Add an element on the selected PRESET: Select a Background button on the PRESET ELEMENT row. The
touchscreen display the transition window: select a transition type with the touchscreen and configure the needed
parameters.
Select a source with the SOURCE/FRAME buttons. The PRESET is now ready. The NEXT PREST button is turn
ON.
NOTE: You can add many elements on each preset. Renew the steps & for adding others elements like a PIP
or a TITLE or a LOGO.
In the transition section: select the corresponding SCREEN button.
Then press TAKE (or activate the T-BAR) to execute the PRESET.
1
2
3
4
5
6
NOTE: Renew the steps , , to create others presets. You can create up to 90 presets thanks to the SET 1,
SET 2 & SET 3 buttons. Wheeze: In multi-screens show, you can for example use the SET 1 of PRESET
for the SCREEN 1, the SET 2 of PRESET to the SCREEN 2, etc...
NOTE: Some transitions are not executable with the T-BAR, in this case, a cross is displayed on the blue screen
beside the T-BAR.
Information about the color of the buttons:
• Screen, Preset, Elements & Source/Frame buttons:
-Bright Yellow button = Selected button
-Dim Yellow button = Programmed button.
-Green button = Selectable button
• Titling bars:
The blue titling bar blinks when an action in this area is
required.
• Take button:
-Bright Red: A preset is ready to commute.
-Blinking: Transition in progress.
• Actual preset / Next preset button:
-Bright Red: Preset available (ready for a transition).