Figure 14. build completed message, Figure 15. connected successfully screen – Zilog ZUSBOPTS User Manual
Page 27
UM025503-0814
The Zilog Educational Platform as a Development Board
Zilog Educational Platform
User Manual
21
11. From the
File
menu in ZDS II, select
Open Project...
to open the Open Project dialog.
In this dialog, browse to the
C_Projects
folder on the USB Flash drive, and open the
LightMeUp.c
project file.
12. With the
LightMeUp.c
project displayed on your PC’s monitor, compile it by click-
ing
Build
in the ZDS II taskbar.
13. From the selection of commands listed in the
Build
drop-down menu, select
Rebuild
All
. The compile process that ensues will create several files that will be placed in the
Debug folder, which is located in the Project directory. One of these files will display
a
.hex
extension; this file will be used to burn the program into Flash memory in a
procedure that will follow later.
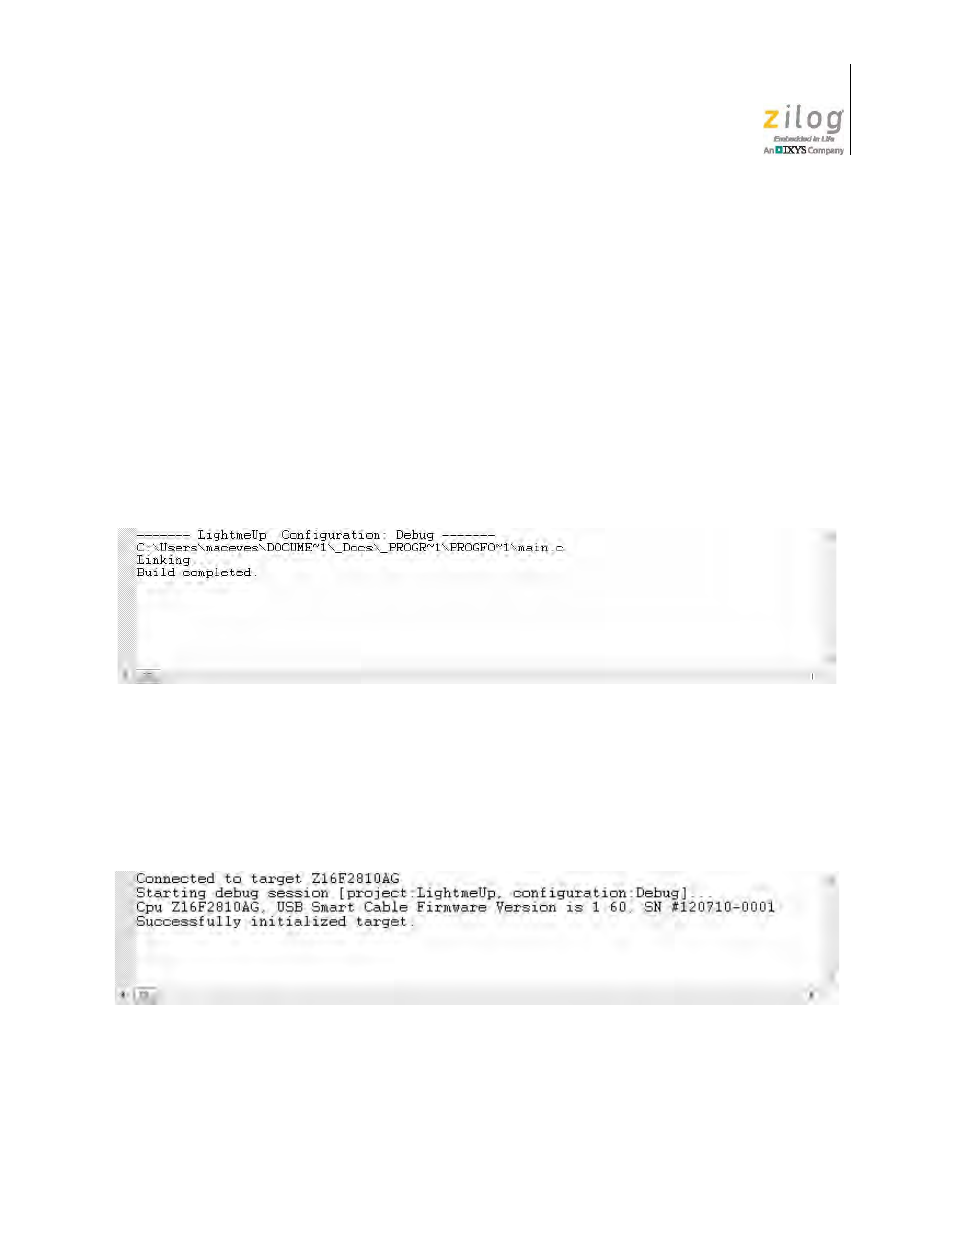
14. When the rebuild is complete, a
Build Complete
message will appear in the Mes-
sage Window at the bottom of the ZDS II screen; see Figure 14.
15. In the ZDS II taskbar, click
Debug
to open the Debug Command Window.
16. In the Debug Command Window, select
Connect to Target
, and observe the progress
of the debug operation in the progress window. When the debug is complete, a
Suc-
cessfully initialized target
message will appear, as shown in Figure 15.
Figure 14. Build Completed Message
Figure 15. Connected Successfully Screen