1 supercharger installat, 1 supercharger installation & assembly -1, Supercharger installation & assembly – Paxton Superchargers Mustang Novi 1000 User Manual
Page 11
2-1
P/N: 4809630
©2003 Paxton Automotive
All Rights Reserved, Intl. Copr. Secured
01APR03 v2.0 86-93Mus(4809630 v2.0)
Section 2
SUPERCHARGER INSTALLATION & ASSEMBLY
***IMPORTANT***
Before continuing drain the motor oil from the
vehicle.
2.1
SUPERCHARGER INSTALLATION & ASSEMBLY
***NOTE***
For the next few steps, refer to Appendix A-11 at the
back of this manual.
E.
Before you install the cast bracket to the
front of the engine, insert the 3/8" x 6-1/4"
bolt and washers through the back of the
cast bracket. At this point, install the smog
pump and smog pump spacer and alternator
to the cast bracket. Using the 3/8" x 1-3/4"
bolt and washer install the bracket with the
smog pump and the alternator attached.
Install the 7/16" x 1-1/2" bolt and washer in
its location noted in Appendix I on page A-
11 and Fig. 2-b but don’t tighten these bolts
yet as you may need to move the bracket to
install the rest of the bolts. Attach the front
supercharger mounting plate with the nuts,
bolts and washers supplied. (See Appendix I,
Page A-11 and Fig. 2-c.)
***NOTE***
The smog pump and alternator are not installed in
this picture to illustrate the location of the bolts,
washers and nuts.)
After all of the bolts are installed, tighten in
a uniform pattern.
***NOTE***
The hoses have been removed for clarity.
A
From underneath the vehicle you will need
to drill a pilot hole in the oil pan on the pas-
senger side by using a 1/8" drill bit approxi-
mately 1-1/2" from the top and 2” from the
front of the oil pan. (See Fig. 2-a.)
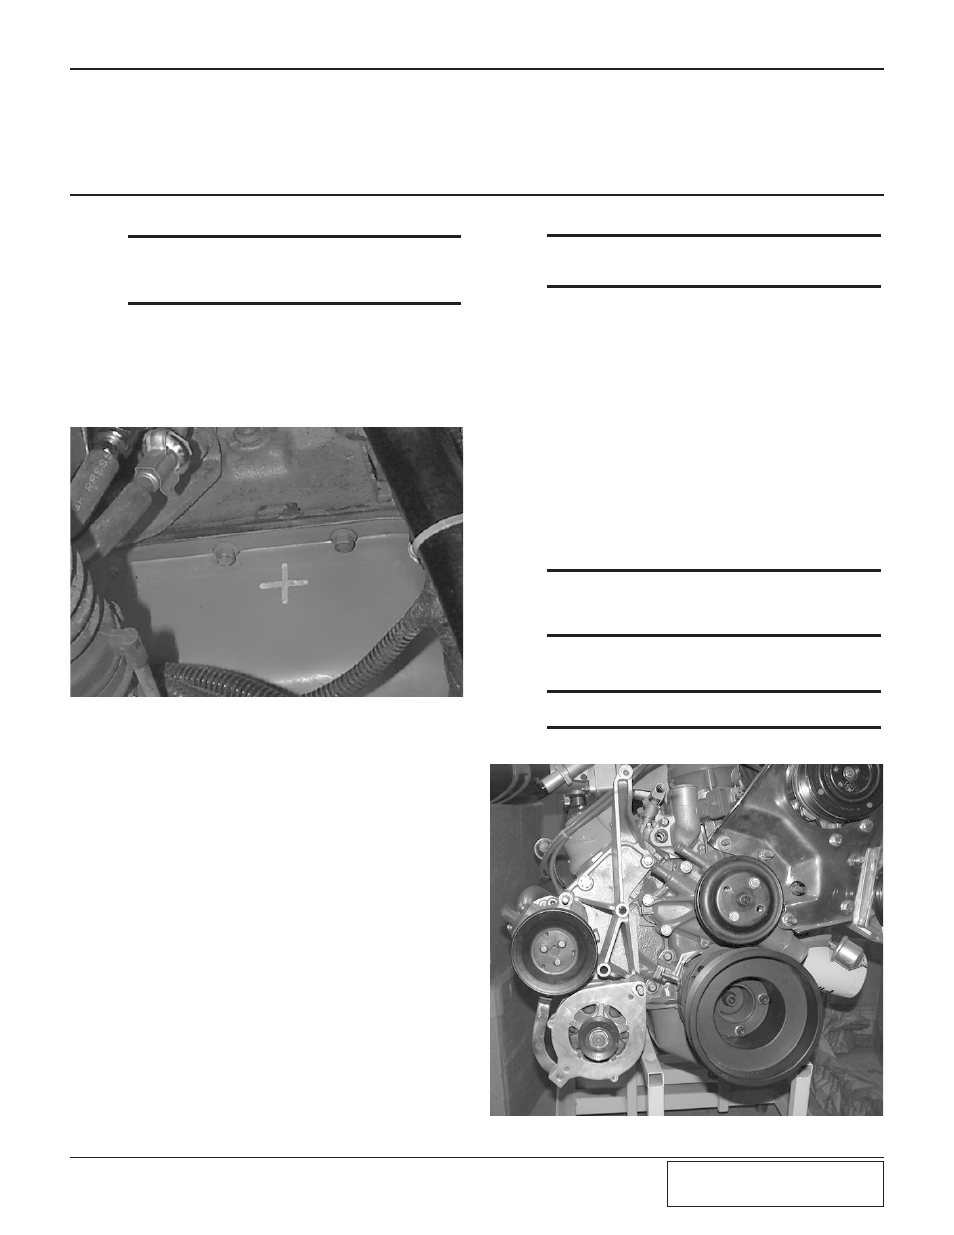
Fig. 2-a
B.
Upon completion of the drilled pilot hole,
insert a rigid thin piece of wire through the
drilled pilot hole to ensure that there is a
straight shot for the punch to go into. If
there is anything blocking the path, rotate
the engine by cycling the key on and off to
rotate the crankshaft. Insert the tap into the
pilot hole and punch it into the oil pan even-
ly, the punch must not go in completely into
the pan. Open the hole to approximately
9/16" of an inch. Go slow with this so you
don’t ruin the pan.
C.
Using a 3/8 NPT tap (not supplied) you will
now tap the punched hole to accommodate
the threaded brass fitting. Before tapping,
coat the tap with thick lithium grease to
retain the metal shavings while you tap the
oil pan.
D.
Upon completion of the tapped oil pan hole,
coat the threaded end of the brass fitting
with silicone and thread into the oil pan, be
cautious not to over tighten or to strip the oil
pan threads.
Fig. 2-b