Step 11, Step 12 – Oklahoma Sound #PRC 250 User Manual
Page 9
9
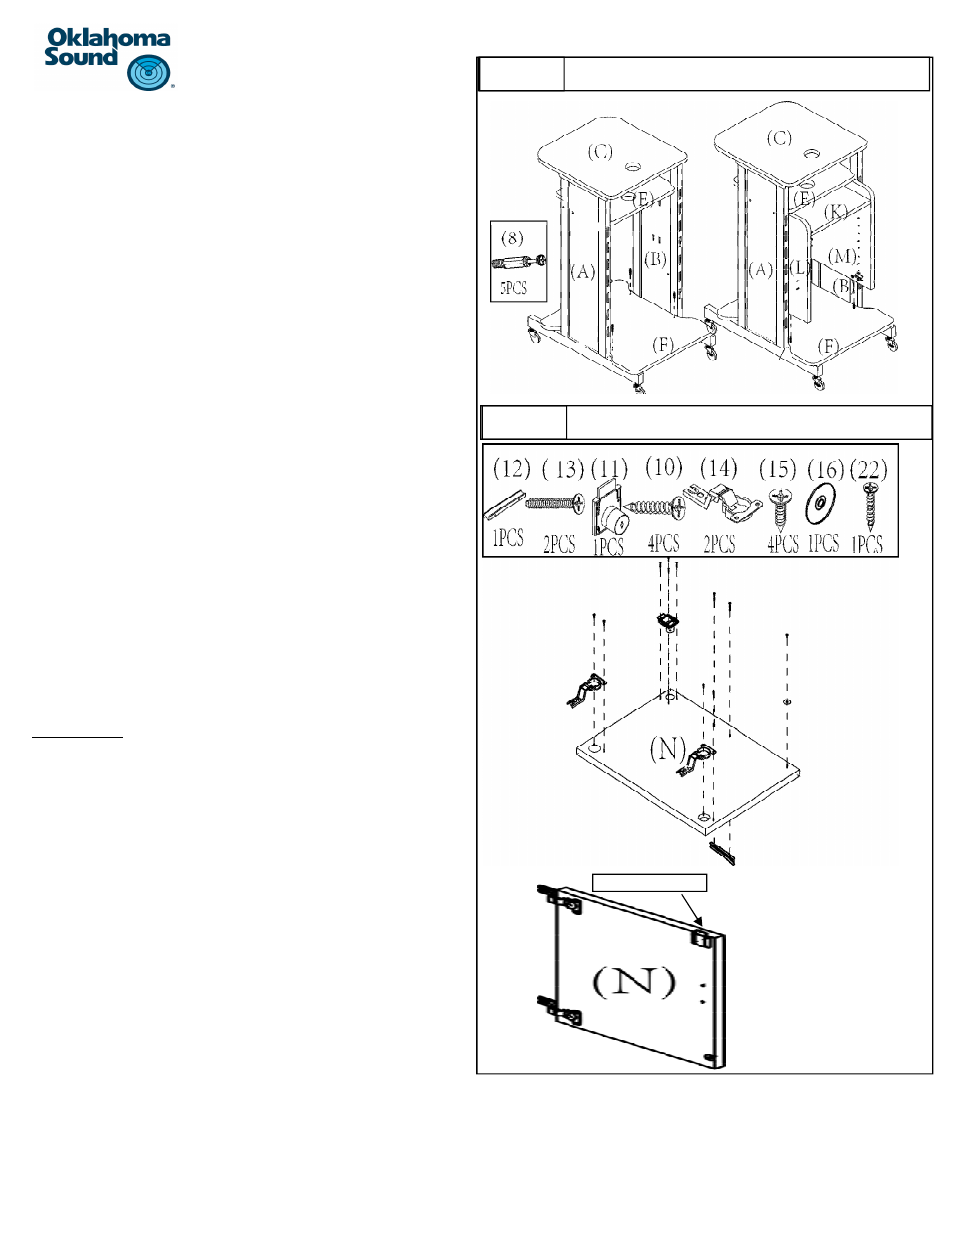
Step 11:
a) Use a Phillips screwdriver to Insert five cam bolts #8 to the plasƟc
inserts in the base panel #F as shown. (Two on each side and one
in the back)
b) Once the cam bolts are Ɵghtly screwed in, liŌ the cabinet (panels
#L,M,J,K) over the base panel to align the five cam bolts with the
five cam lock holes located on the boƩom of the cabinet walls;
Two on panel #L ,two on panel #M and one in the middle of panel
#J .
c)
Once the cam bolts and cam locks are aligned, lower the cabinet
so the bolts are inserted into the locks. Once the bolts are insert-
ed into the locks and the cabinet is flush with the base panel, use
a Phillips screwdriver to Ɵghten the cam locks, locking the cabinet
to the base panel.
Step 12:
a) IdenƟfy the door panel #N and lay it down on a clean, soŌ surface
with the white side facing up.
b) Begin by idenƟfying the two male hinges part #14. The base of the
hinges will fit into the two routed out holes on the edge of panel
#N as shown.
c)
On each side of the hinge there is a hole that will align with a pre-
drilled hole on the panel.
d) Make sure that the arm of the hinge is facing over the edge of the
panel as shown.
e) Use the four screws #15 to screw the hinges in place.
Lock Assembly
a) Locate the lock part #11 and insert the barrel of the lock through
the large hole on the top corner of the panel.
b) Make sure that the tongue of the lock is facing the edge of the
panel, poinƟng upwards as shown. The four holes on the lock as-
sembly will match four pre-drilled holes on the panel.
c)
Use a Phillips screwdriver to aƩach the lock assembly to the panel
with four screws #10.
d) Place the black ring around the barrel of the lock from the outside
of the panel with the spikes slipping between the barrel and the
panel.
e) Locate the round metal door catch plate part #16 and aƩach it to
the door at the corner of panel #N using a Phillips screw driver
and screw #22.
f)
Next, locate the door handle part #12 and place it on the outside
of the panel over the two small pre-drilled holes.
g)
Once the holes on the door aligned with the holes on the handle,
use two screws #13 and screw the handle to the door.
Lock tongue facing upwards
STEP 11
#(16)
#(22)
#(
12
) use #(13) to aƩach.
#(15)
#(10)
#(11)
STEP 12
h) The two screws should be threaded from the inside of the door using
a Phillips screwdriver to Ɵghten the screws with the handle in place.