Oklahoma Sound #PRC 250 User Manual
Page 5
5
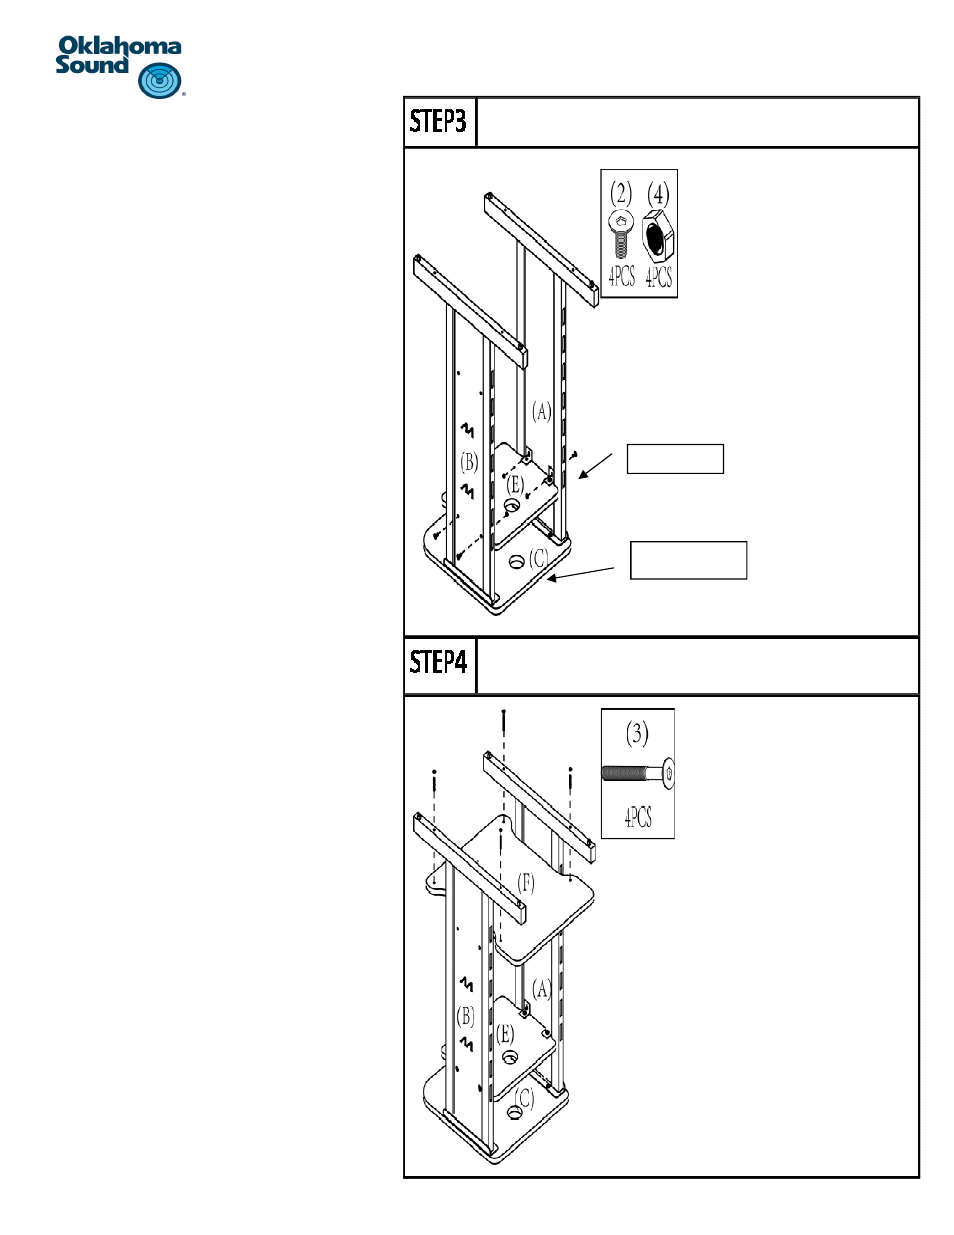
Step 3:
a) AƩach the projector shelf part #E to the
unit by aligning the holes on the two “L”
brackets on both sides of the shelf with
the holes on both side panels #A and #B
as shown.
b) Make sure that the flush end of the
projector shelf is aligned with the straight
end of panel #C as shown.
c) Once the holes on the brackets are
aligned with the holes on the side panels,
take four bolts #2 and thread them
through the hole from the outside of the
side panels and through the “L” bracket.
Once the bolts are threaded all the way
through, use four nuts part #4 to secure
the bolt in place.
d) Use the provided hex key, part #20 to
Ɵghten the bolt in place.
Step 4:
a) Locate the base panel #F and slide it
between the two side panels as shown.
LiŌ the panel upwards unƟl the boƩom of
the panel reaches the base of the side
panels as shown. The ends of panel #F
should not protrude over the ends of the
side panel.
b) The two holes on each of the side panels
will line up with the embedded T-nuts on
panel #F.
c) Use four bolts #3 to aƩach the base panel
#F by threading the bolts through the
holes on the boƩom of each side panel
and into the embedded T-nuts in panel #F
as shown
d) Tighten the bolts well so the panel is se-
cured to the two side panels.
e) Use the provided hex key to Ɵghten the
bolt in place.
Flush End
Straight edge